Seamwork Elmira Wrap Sweater

Wednesday January 8, 2020

As part of my Fall/Winter sewing plans, I wanted to make a layer that wasn’t a standard button up cardigan. I have the Seamwork Elmira ballet wrap top pattern and decided to give it a try. The Elmira is a cropped, fitted ballet wrap with 3/4 sleeves and long ties. Two examples that got me interested in trying the pattern are Meg at Cookin’ & Craftin’ and Sewrendipity’s on instagram. You can see lots more examples on Instagram here.

I haven’t had much luck with Seamwork patterns in the past. Both woven pieces I attempted required a lot of fitting changes and I gave up on them. But this is a knit, so I thought it might be more forgiving. Most blog posts I read about the pattern didn’t mention fit issues, but before I cut into my expensive wool jersey, I tried out the pattern with some left-over ITY in my stash.

I made a few changes before I cut my fabric:
1) Lengthened it 2″ as it seemed awfully short
2) Lengthened the sleeves 2″
3) Shortened the ties.
4) The front of the wrap is 2 layers but the back is only one. The back neckline is just folded and stitched. Lots of other bloggers complained about this, so I made the back 2 layers as well.

Once I had the pieces cut out, I used some lightweight fusible interfacing on the shoulders and neckline so they wouldn’t stretch out.

The instructions were good and the construction straight-forward. I did most of the sewing on my serger.

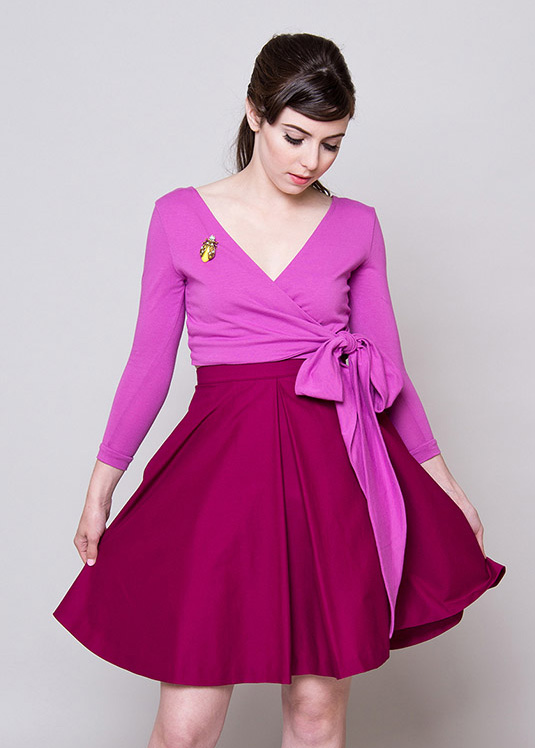
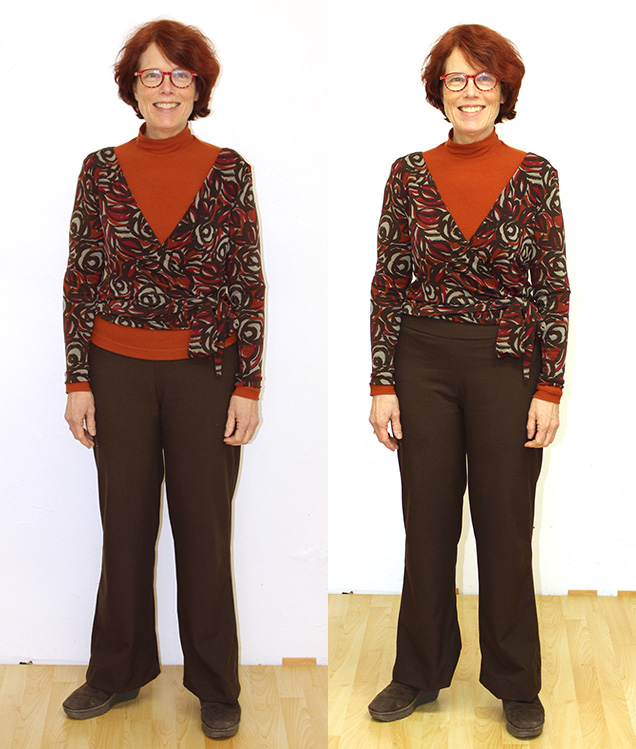
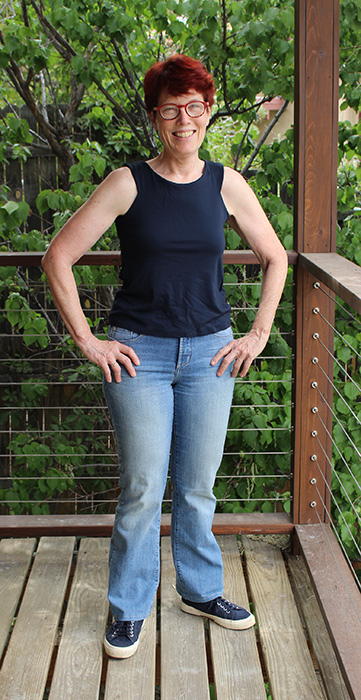
Here’s the picture Seamwork uses to show off the Elmira. Mine looks very similar (except for the long ties), but if I was to make this again, I would go up a size, to to get more front coverage, like Meg does here.

Looking at all the Instagram examples, I think the wrap looks best over a dress. I’ve tried it with my turtleneck tucked and out, and I prefer the shirt out.


Seamwork Elmira wrap top, True Bias Nikko turtleneck, self-drafted pants

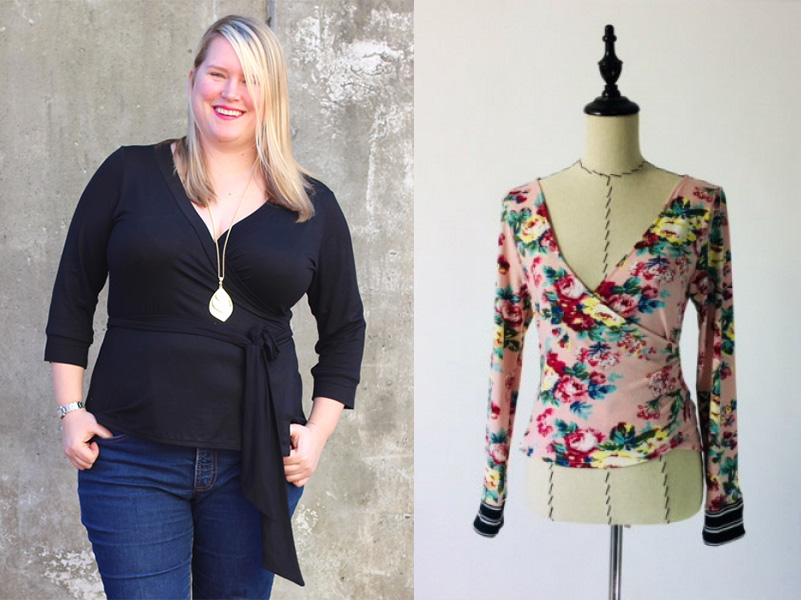
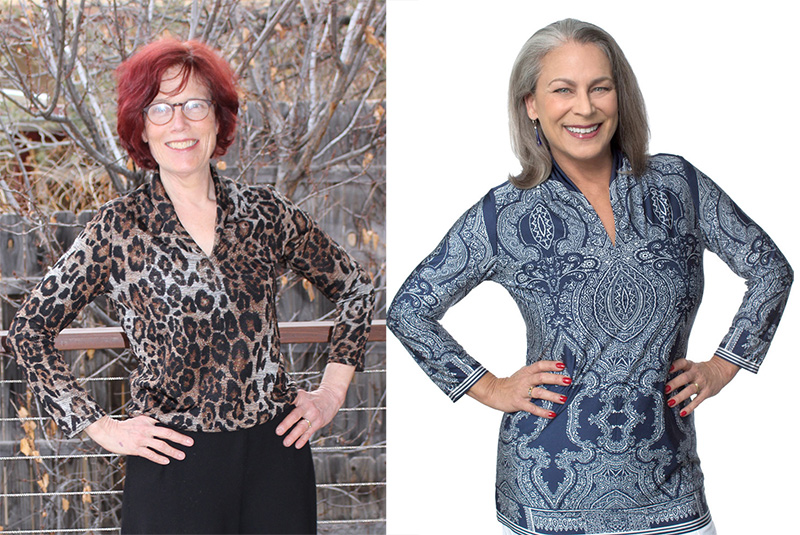
I’m glad I made this up in the ITY before committing to my plan of making it in my merino jersey. I’d rather have something a bit longer. Here are 2 other patterns I’m considering: the Cashmerette Appletop wrap top hack (below left) or the Trish Newbery wrap cardigan (below right).

Jalie Charlie Bomber Jacket

Wednesday January 1, 2020

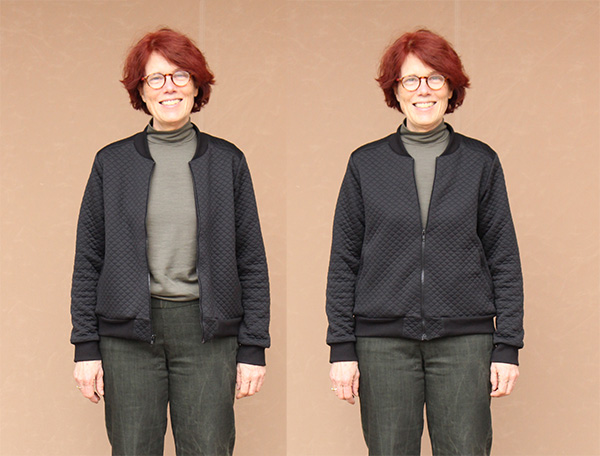
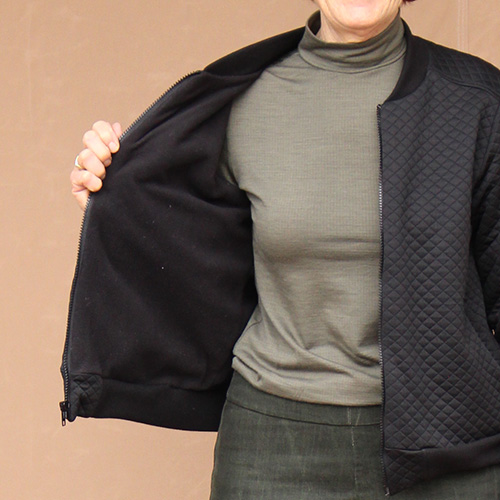
Last spring I realized I needed a light-weight jacket to wear on my daily walk. I quickly decided to make Jalie’s Charlie Bomber Jacket, an unlined jacket with a zipper front, welt pockets and ribbing at the collar, cuff and waistband. The first one I made is a bit oversized and the sleeves are too long, but it’s perfect for its intended purpose. This fall, I made another one out of a quilted knit (above), as part of my fall/winter sewing plans. This one is meant for colder weather — it’s lined with micro-fleece. There’s a close-up below.

The Charlie Bomber is one of those patterns that looks more complicated that it is — I’m an “adventurous beginner” when it comes to garment sewing, and this was easy to construct, especially with their video tutorial. I’m glad I made the unlined version first — although the collar-to-zipper connection is pretty dodgy — it made the lined (& bagged) version easier to understand. There’s a Jalie blog post on lining the jacket here.

My only complaint about the pattern isn’t about the pattern itself or the instructions — it’s about the ribbing requirement. The pattern says you need 1/3 of a yard — but ribbing (especially the striped / multicolored ones) doesn’t come that way. It’s sold in strips. And I discovered the strips really aren’t long enough and need to be pieced (for an adult jacket). I guessed on my first ribbing order and bought 2 strips — not quite enough for the waistband, collar and cuffs — and I should have ordered 3. And you might ask, as I did, what width strip should be… you have to read the pattern to figure out it’s 6 inches.

Botani seems to sell the widest variety ribbing in the US (online, anyway). But as I looked at their offerings, I was baffled about what weight and fabric composition I should get for the solid black ribbing I was after. I own a ready-to-wear jacket with ribbing that is thick, soft and seems like a natural fiber — could I find something like that? Ah the problem of living in a city that has only a JoAnn! In the end I ordered several different kinds of ribbing from Botani, and when they arrived, used this cotton one.

Some notes about the pockets. First, the welt is formed from the pocket pouch fabric. So while I would have liked the inside of the pocket to be my fleece lining, it’s the not-so-cozy outer fabric. Second, while my iphone fits in the pocket, it doesn’t feel very secure as the pocket isn’t very deep. If I make another one, I would include an interior pocket in the lining.

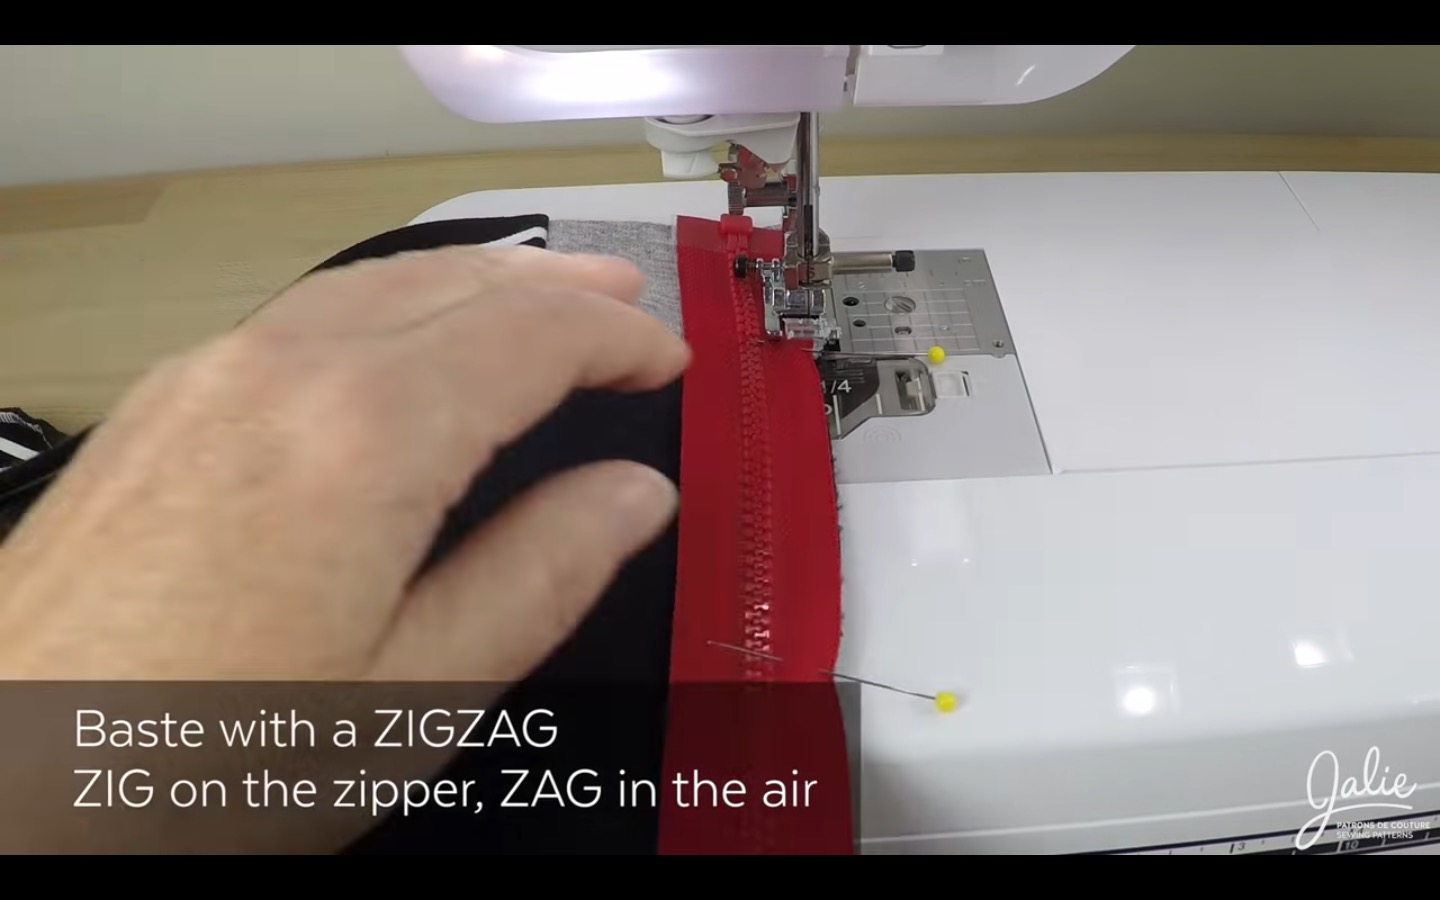
I also got a very useful tip from the video tutorial. She has you baste the zipper to the jacket using a wide zig zag stitch at the edge, with part of the stitch on the fabric and a little off. I’ve since used this method to baste together the folded collar for a turtleneck before attaching it to the neckline. It effectively makes the collar one layer. Here’s a snap from the video showing what I mean:

My review:

Pattern Description: Bomber jacket for stable knits or stretch woven. Zippered front. Ribbing collar, cuffs and waistband. Welt pockets with the welt forming from the pocket pouch fabric. Forward shoulder seam.

Pattern Sizing: Jalie sizing, 27 sizes included, from 2 yr toddlers to women size 22.

Did it look like the photo/drawing on the pattern envelope once you were done sewing with it? Yes.

Were the instructions easy to follow? Yes, especially with the video tutorial. This was my first welt pocket and separating zipper installation, and I didn’t have any problems. I liked the new-to-me basting method for knit fabrics from the video.

What did you particularly like or dislike about the pattern? Mostly likes. I would like deeper pockets, and I thought the info about ribbing was lacking (see above).

Fabric Used: Pre-quilted black stable knit for the body, micro-fleece for the body lining, and a rayon lining with a bit of stretch for the arms. (I thought it would be hard to get my arms into the sleeves with fleece.)

Pattern alterations or any design changes you made: I added a hang loop on inside back. I took 2 inches off the body and 1-1/2″ off the sleeves.

Would you sew it again? Would you recommend it to others? Yes and yes. If I make another one I would add an inside pocket for my phone. Also, I’d change the collar from ribbing to a standing collar for added warmth. This Pattern Review review talks about how she changed the collar to do just that.

Fall-Winter Sewing Plans

Thursday November 21, 2019

Since I started garment sewing in the fall of 2017, I’ve tried unsuccessfully to put together a seasonal sewing plan. I tried the Seamwork “Design your wardrobe” online course. I tried the yearly Make Nine challenge. I drew sketches and made lists. But in the end I couldn’t decide on a list or plan, much less stick to it. Ultimately I suspect I wasn’t ready to commit to a plan, as I wasn’t confident of my sewing abilities. But this fall I realized I actually had a plan, I just hadn’t articulated it. I looked at the fabric I bought recently and saw lots of olive green. I’ve been trying to make coordinating pieces that mix and match, and I noticed that the sketches I drew were of complete outfits — bottom, top, top layer and jacket/coat.

I wondered if I could combine those outfits into a plan or a mini capsule wardrobe. As someone who loves puzzles, I returned to something I’d tried before but abandoned — a wardrobe sudoku. The idea is to create a “sudoku” board of 4 rows and 4 columns with each row containing one top, bottom, accessory, and shoes to create an outfit. You end up with 10 outfits using 16 pieces (reading the rows, columns and 2 diagonals). Pattern Review had a sudoku contest and you can see what people made here. And here’s an explanation of how the sudoku wardrobe works.

In fall, winter and spring, I wear a top, a cardigan, a bottom, and, on errands and my afternoon walk, a jacket or coat. I don’t wear many accessories — jewelry or scarves, and my shoes are boring — sneakers when there is no snow and boots when there is. Since I’m interested in making/sewing, I decided on 4 categories I could make: top, bottom, top layer and jacket.

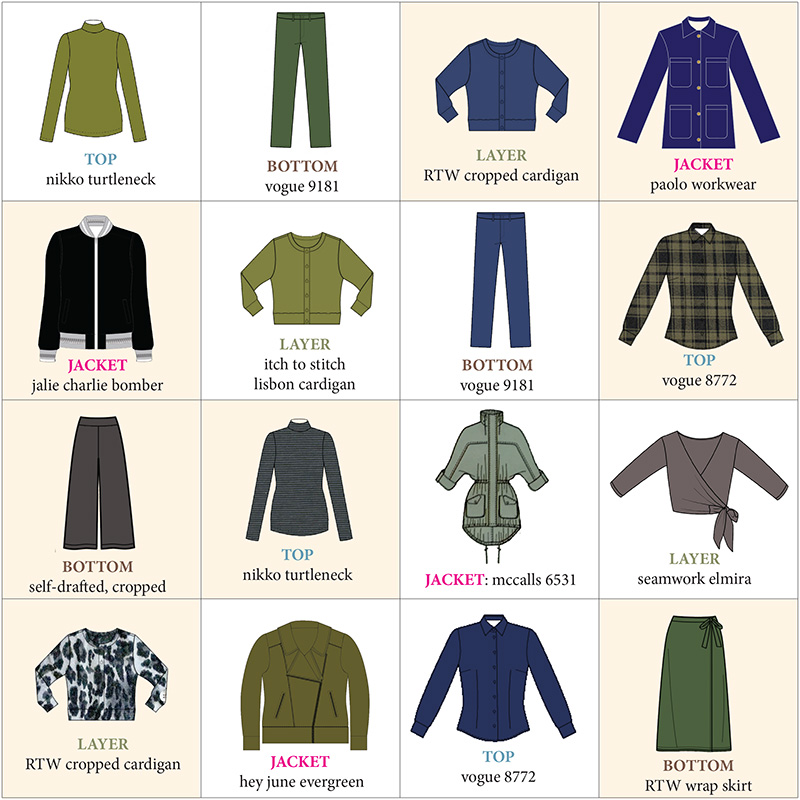
I knew that sewing 16 items wasn’t realistic for me, plus I wanted to make the outfits work with things that are already in my closet. So I picked 8 things to make, and 8 things I had already made or bought. I also wanted to pick both patterns I’ve made before as well as a few I haven’t, and to vary the complexity — easy knit tops and more time consuming button ups and coats. Here’s the grid, and below a list of the items. The cells in the grid with the yellow-ish background are things I’ve already made or bought.

Tops:

  1. True Bias Nikko Turtleneck in olive wool jersey. I’ve made this top several times, so no fitting necessary. And a quick sew!
  2. Vogue 8772 button up in green/black plaid flannel. I made this shirt last year and wear it often with black jeans, but would like to have it work with other things in my closet
  3. True Bias Nikko Turtleneck in black/grey stripe wool jersey. I made this one earlier this fall.
  4. Vogue 8772 button up in navy. Since I’ve already made this pattern multiple times, there’s no fitting. But it is time consuming with collar and button & sleeve plackets (not to mention getting the sleeve head to fit nicely!)

Bottoms:

  1. Vogue 9181 pants in olive green stretch twill: I haven’t had a lot of luck fitting pants — the back on the patterns I’ve attempted are a mass of wrinkles. But this pattern has 3 backs — so I’m hoping the curvy one will be more successful.
  2. Vogue 9181 pants in a stretch denim: see above.
  3. Self-drafted cropped black culottes. I took a pants fitting class last year, and these are the results — they are comfortable and since they are cropped they stay out of the snow when I run errands!
  4. Ready to wear midi wrap skirt in loden (dullish grey green). I really like this skirt but don’t wear it enough.

Layers:

  1. Ready to wear cropped navy cardigan.
  2. Itch to Stitch Lisbon Cardigan in olive wool jersey. I’ve made this sweater before, so no fitting required, and mostly sewn on my serger (well, there are button holes!)
  3. Seamwork Elmira wrap cardigan in black jersey. I’d like to have a few layers that aren’t standard button up cardigans. This is a new pattern for me.
  4. Ready to wear cropped animal print grey/black cardigan. I’m not sure this goes with the other things in my grid, but I don’t wear this enough so thought I would give it a boost.

Jackets:

  1. Paola workwear jacket in navy denim. Made this fall — blog post here.
  2. Jalie Charlie Bomber Jacket in quilted black ponte, made earlier this year. Blog post coming.
  3. Mccall’s 6531 anorak in olive green twill with red zipper: This anorak is the most involved make on my list. It’s unlined, but realized after getting all the materials together that I really need a warmer jacket. So I’ll be lining this one.
  4. Hey June Evergreen Moto Jacket in olive green sweater knit. This is a new pattern for me.

First up is the Seamwork Elmira wrap top. Do you have sewing plans for this fall/winter?

Paola workwear jacket pattern review

Tuesday October 29, 2019

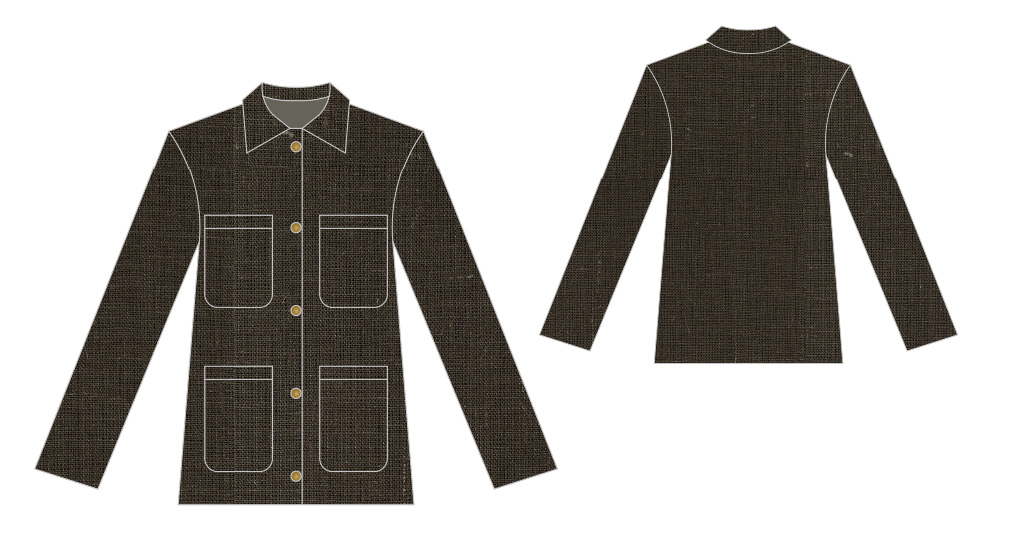
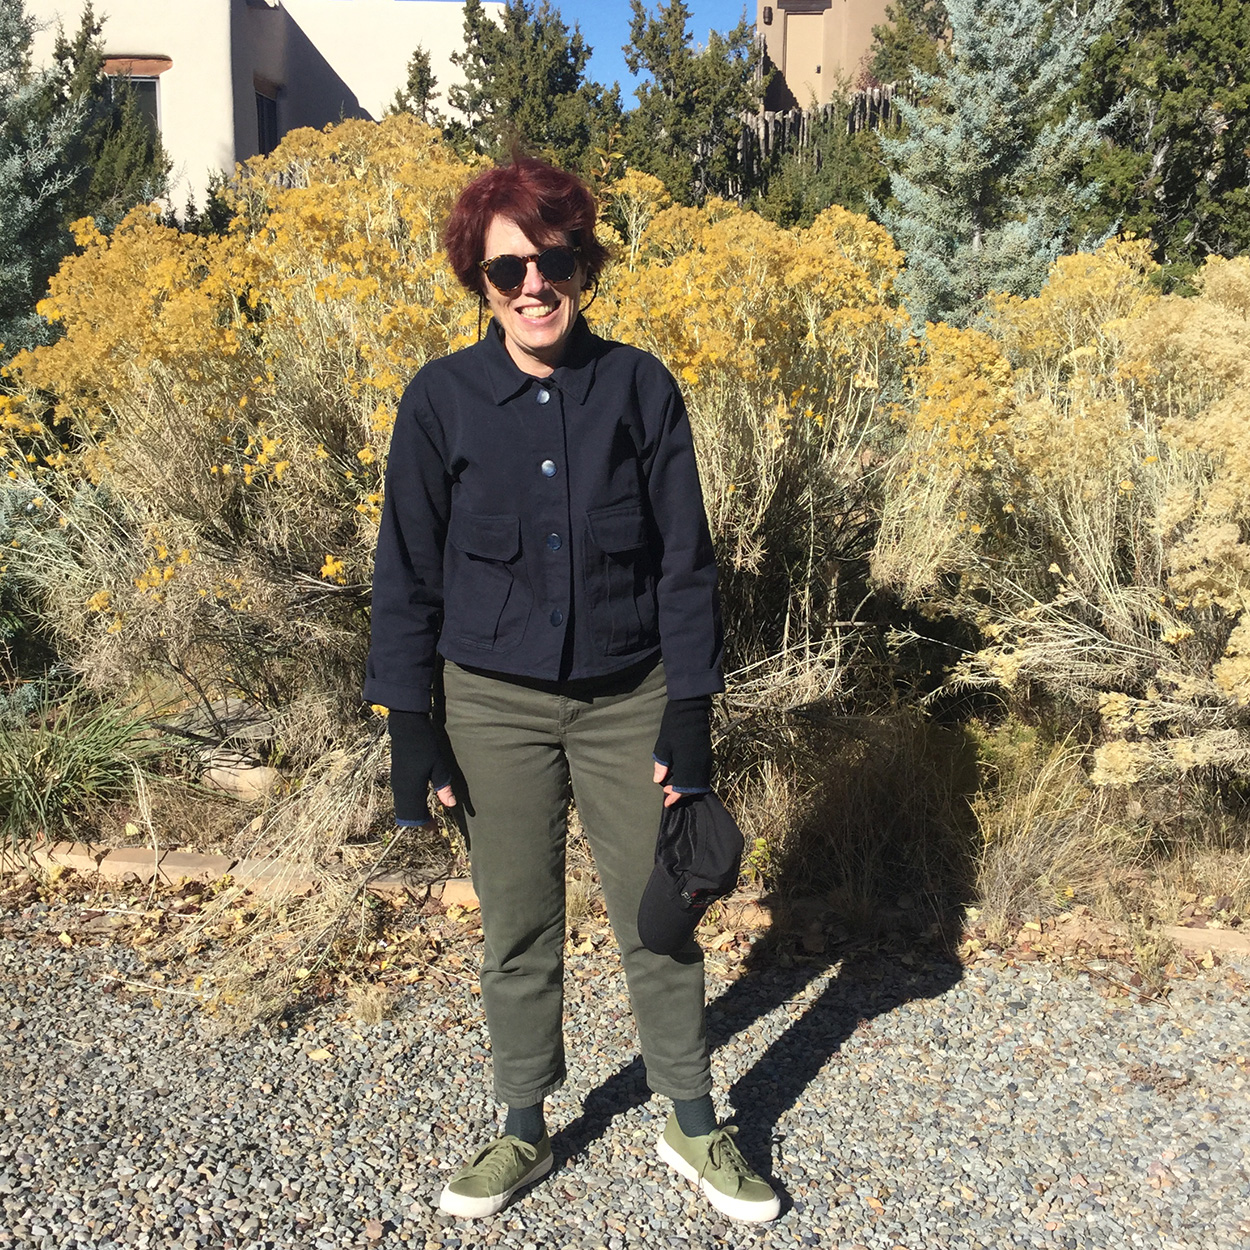
On my sewing list this fall is a navy jacket that I can use for layering. I wanted a utility-type jacket and decided to use a free pattern from the Fabrics Store, the Paola Workwear Jacket. It’s described as “featuring a straight boxy fit, four large patch pockets and flat-felled seams for sturdiness.” Here’s the technical drawing

Paola Workwear Jacket Tech Drawing

You can see other sewists’ makes of the jacket on instagram

I knew I was going to crop the jacket, so I made a muslin to check the length and the pocket placement. I made up a small based on the finished measurements (I’m 35 bust, 29 waist). After taking 5 inches off the bottom of my muslin, the 2 vertical pockets weren’t going to work — not enough space. So I drafted a larger pocket that would hold my phone. The other alteration I made was to add a seam down the back for a bit more interest.

I bought a dark navy brushed denim from Blackbird Fabrics, as well as an edge stitch foot for my sewing machine, to help with the double stitching on the pockets. I’ve not made jeans or done much top stitching, so I did some experiments before getting started. Coincidentally I read a post from Claire about making a denim jacket and she recommended hammering down the flat-felled seams before top stitching. This tip made my job much easier! On Instagram, someone mentioned she top stitches with a triple stitch and regular thread. I liked my experiments with that method — it made the top stitching, which matched the color of the jacket, stand out more than using top stitching thread. If I was using a contrasting color, my experiments told me to use a thread that matches the jacket in the bobbin and the contrast for the top color. This made the stitches stand out a lot more than using the contrast in the bobbin.

The instructions are spare but good, although the pattern pieces don’t mention cutting interfacing for the facings and collar, but the instructions assume you’ve cut & applied them.

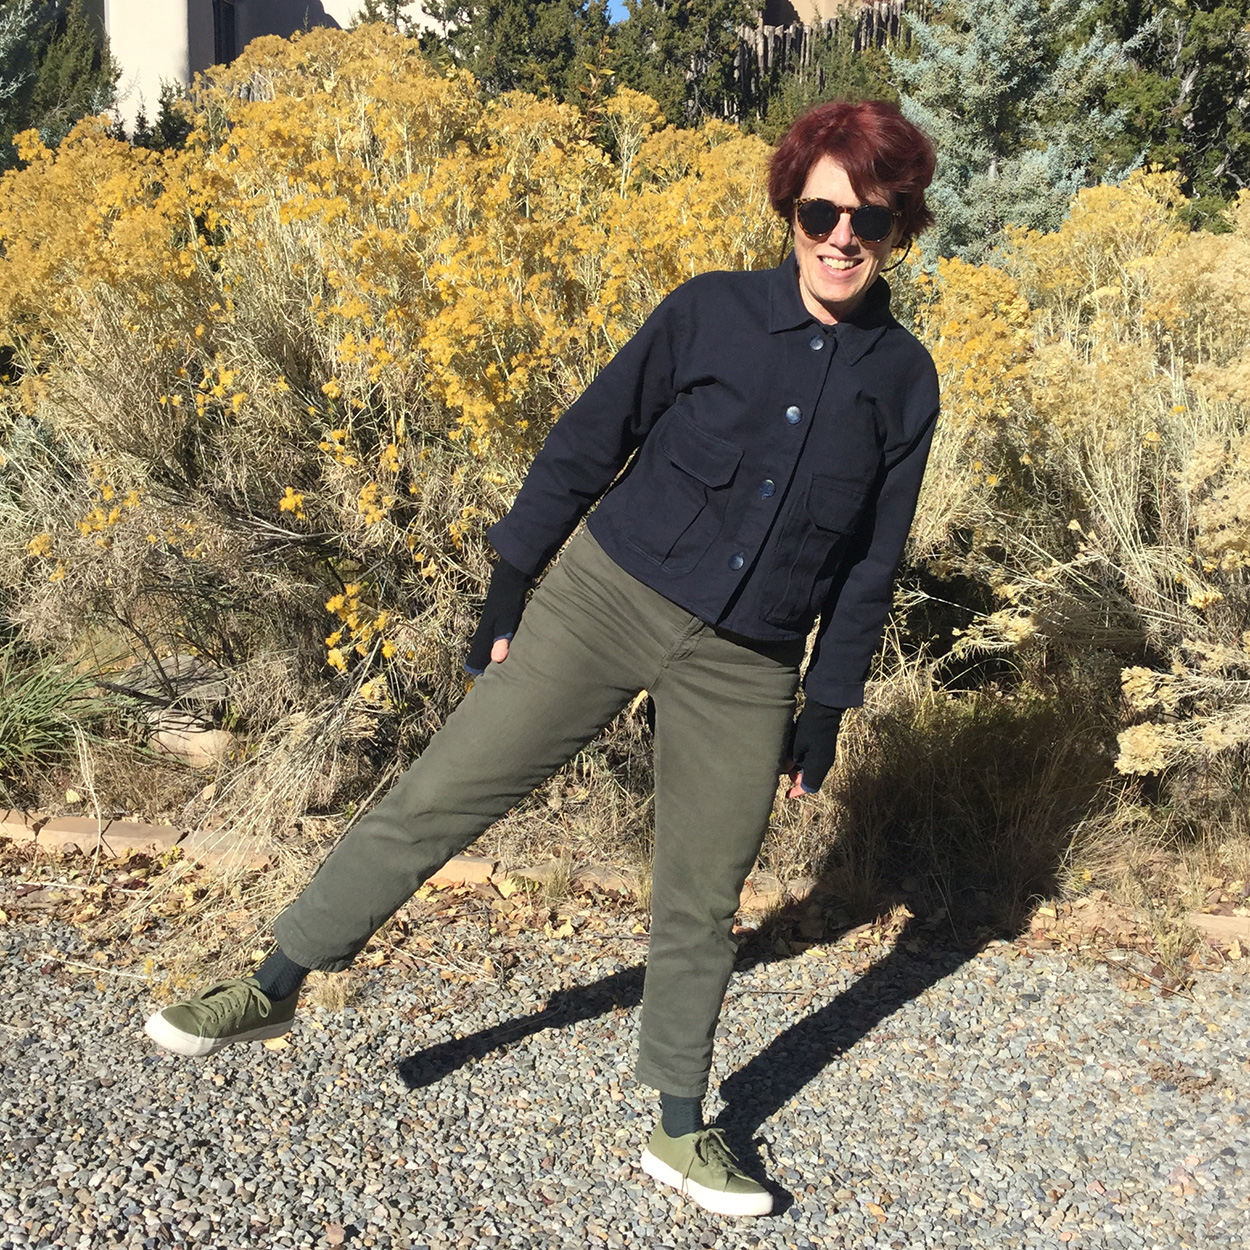
Here’s my jacket in action:

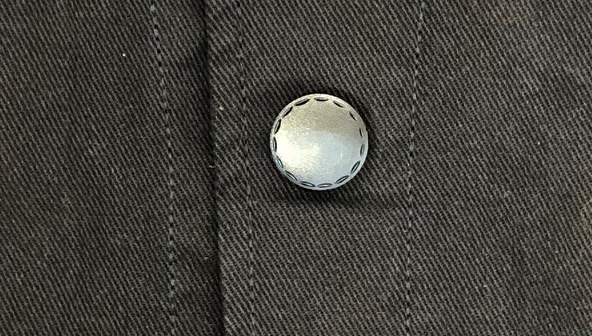
I’m pleased with the buttons I found on ebay — they are navy with a what looks like top stitching around the edge.

One more picture:

New Look 6459 Cropped Top, woven and knit

Sunday June 30, 2019

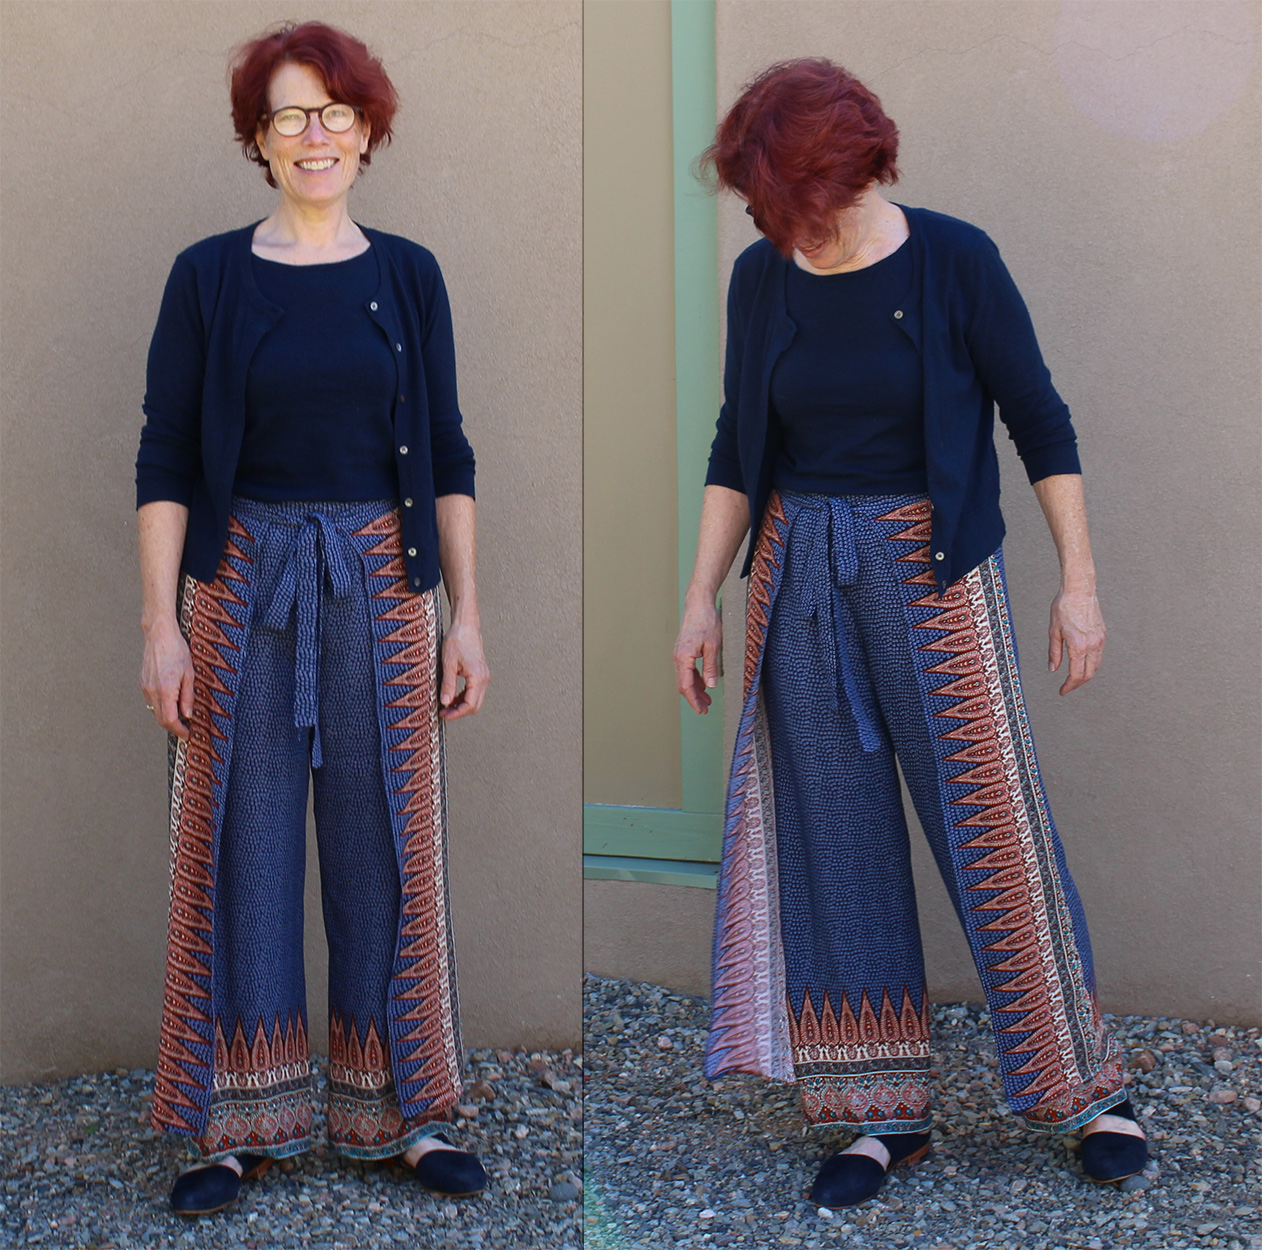
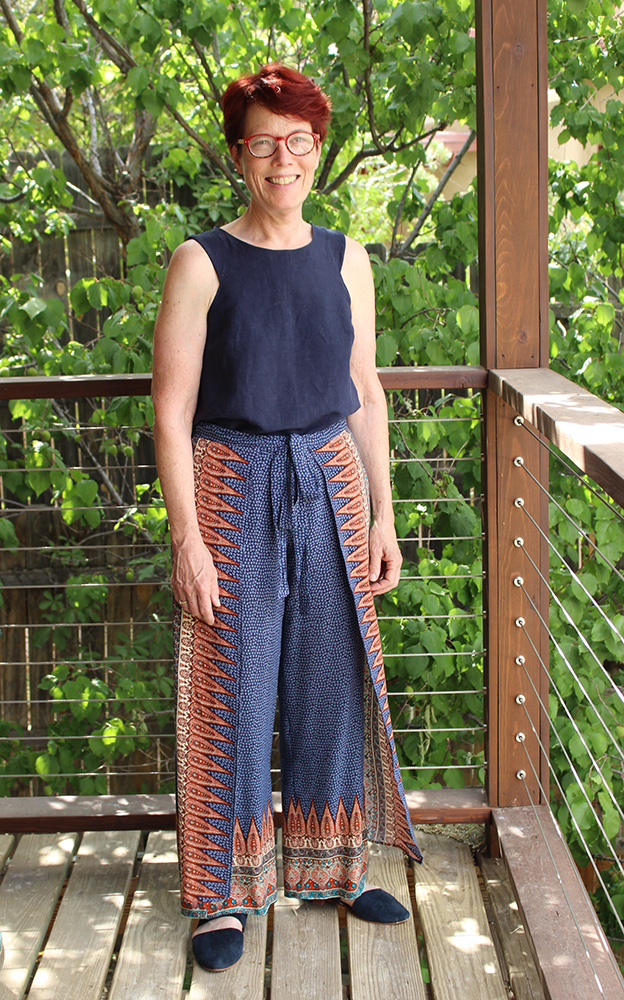
When I made the wrap pants shown below last fall, the only top I had to wear with them was a navy wool shell & cardigan. Much too itchy for summer, so this spring I looked for a more appropriate top. I wanted something sleeveless, and to use a piece of navy linen/rayon blend fabric in my stash.

New Look 8134 Wrap Pants

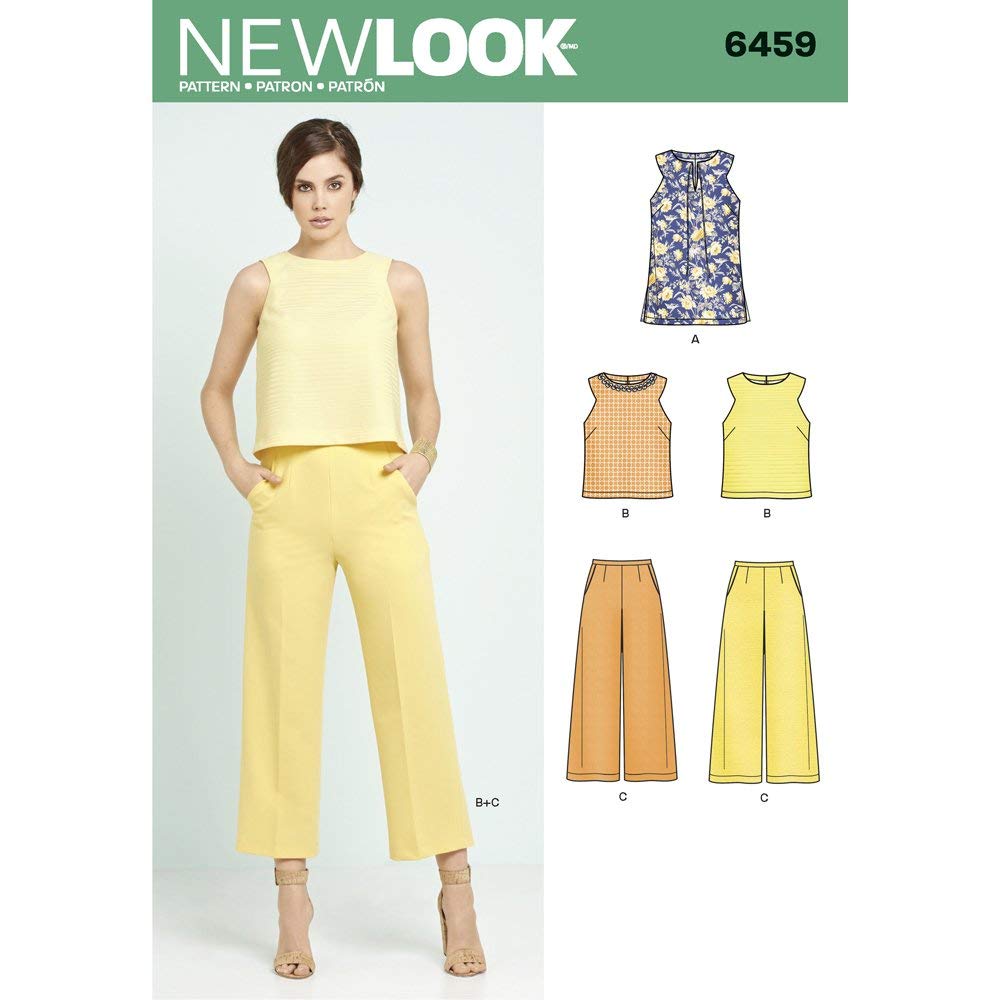
I looked through the patterns I already own first and was immediately drawn to the neckline on New Look 6459, view B. I had bought the pattern for the pants, but now the top looked like a good candidate.

New Look 6459 pattern envelope cover

The reviews on Pattern Review mostly said the top was really cropped and that the neck and armhole facings didn’t stay down. No biggie, I thought, I’ll just lengthen the pattern and draft an all-in-one facing.

My alterations

  • Made a straight 12
  • Lengthened the pattern by 2″
  • Made an all-in-one facing using this tutorial. I attached it using this youtube video.
  • I have pointy shoulder blades, so I usually have to make a prominent shoulder blade adjustment to the back of woven tops (the result is a neckline dart). I use this video for the alteration.

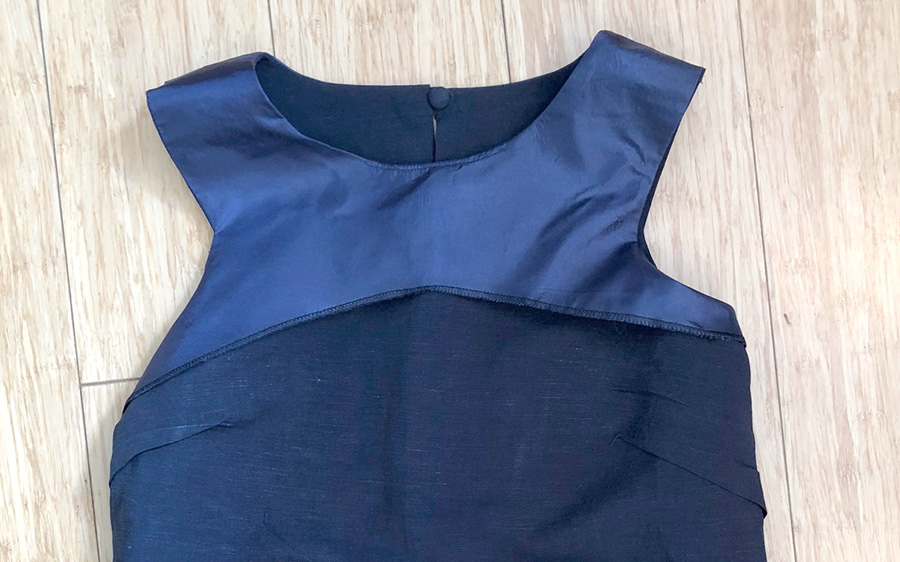
Here’s a photo of the shirt inside out so you see the facing, as well as the button/loop closure on the back. The facing is made from some left over lining.

shirt inside out so you see the facing, as well as the button/loop closure on the back

And the finished top….

Finished top, NL6459 in linen-rayon blend

The problem that no one on Pattern Review mentioned is that the top isn’t particularly bra friendly, even when I added lingerie holders, so I’m wearing a strapless bra.

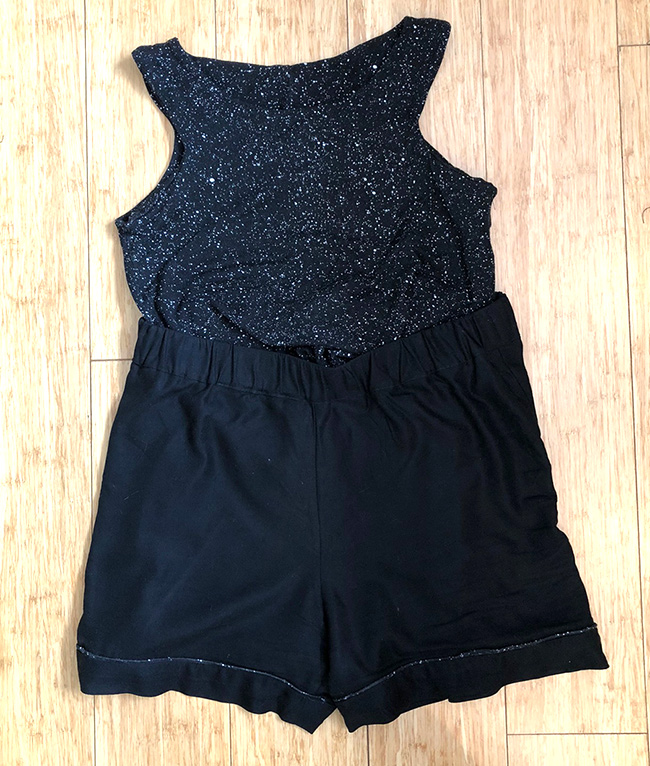
But I like the neckline, and thought if I made it up in a knit rather than woven fabric it would make a good alternative to a tank top. I compared the pattern to a t-shirt pattern I’ve made before, and decided to size down 1 size, to account for the stretch in the knit fabric. I also made the strap a little wider and the cut-in a little less, to alleviate the bra-showing problem.

I kept almost everything else the same — the added length, the shoulder blade dart and the all-in-one facing. The woven version has a center back seam with a loop & button closure. I kept the back seam, in case I had problems with gapping at my neckline, but sewed up the entire back, removing the closure. I could get the woven version over my head without undoing the button, so figured I definitely wouldn’t need it for the knit version.

Using a small piece of cotton jersey left from another project, I made up a test version. It turned out so well I made a pair of Closet Case Carolyn Pajama shorts to go with it. I made the piping at the top of the cuff on the shorts from the knit used in the top.

And here it is in a lighter-weight ponte (navy Ponte Leggero from Stone Mountain)

Naughty Bobbin Patterns Presto Popover Top

Sunday March 3, 2019

I’ve wanted to take part in one of the many many Instagram sewing challenges that keep popping up, but don’t seem to be able to find one that works with my current sewing plans. Then when the #sewOver50 organizers announced the #so50Visible challenge, I decided to make more of an effort to participate. The challenge is aimed at raising awareness and calling for pattern makers to include older models on pattern covers and in other marketing for their patterns. To participate, you post a make of a pattern that features an older model in the marketing.

I started watching the #so50Visible tag on Instgram and browsing the list that Sue Young put together of pattern companies that use older models. My criteria was to find something that was cold weather appropriate so I could wear it now, not require too much fitting, and use fabric I already had.

Eventually I found the Presto Popover Top by Naughty Bobbin Patterns. It’s a knit top — so easy to fit. It’s got a collar to keep my neck warm, which I like, and long sleeves. And there are quite a few positive reviews on Pattern Review. But I didn’t have any appropriate fabric. Fortunately I was about to place an order at Gorgeous Fabrics and she had a knit pattern that I thought would work.

And here I am, on the left, modelling my new shirt and attempting to pose like Coco Savage, the pattern designer, on the right.

Naughty Bobbin Patterns Presto Popover Top

About the pattern: It’s got a clever construction where you cut 2 fronts, sew them together vertically along center front, then connect this to the back using the “burrito method” to get a completely enclosed neckline. The instructions are quite minimal and there are no diagrams or pictures — so I did what I do with Burda patterns and made a doll-sized version of the pattern using scrap fabric to work out the construction. To make the doll-sized pattern, I enlarge the pattern drawings in the layout page of the PDF, cut out the fabric, and use a 1/4″ seam allowance when I sew it together.

I made a size medium, after comparing the pattern pieces to pattern pieces of a t-shirt I’d made previously. And I made 2 alterations: lengthened the sleeves by 4″ to get bracelet length, and shortened the body by 4″ as I wear shirts untucked and most of my pants and skirts are high-waisted (I’m 5’3″).

For next time, I would raise the v-neck a bit (there are 2 options for the v on the pattern, and I made the higher one).

Because the top requires 2 fronts, it uses more fabric then a conventional t-shirt. And I had to do a bit of pattern matching along center front where the 2 fronts meet.

I’ve worn the top 3 or 4 times already, so it’s definitely a keeper. And I’ve been keeping my eye out for fabric to make a second one.

Skirt-a-palooza: New Look 6106

Sunday January 27, 2019

As fall approached in my first full year of garment sewing, I began to feel as if the things I was making weren’t working well together, and a bit more planning was called for. Then I read Sew Altered Style‘s blog post about her Seasonal Sew 3 challenge. The challenge: “Each season, choose 3 patterns that you want to make that season and then commit to making them over a 3-month period.” The example she gives is a small capsule set — pants, shirt, topper. I had just finished making a pajama set — top, pants, kimono/robe — and was really jazzed about how they coordinated, so I decided to try another set. This time it would be a skirt, cardigan and collared blouse.

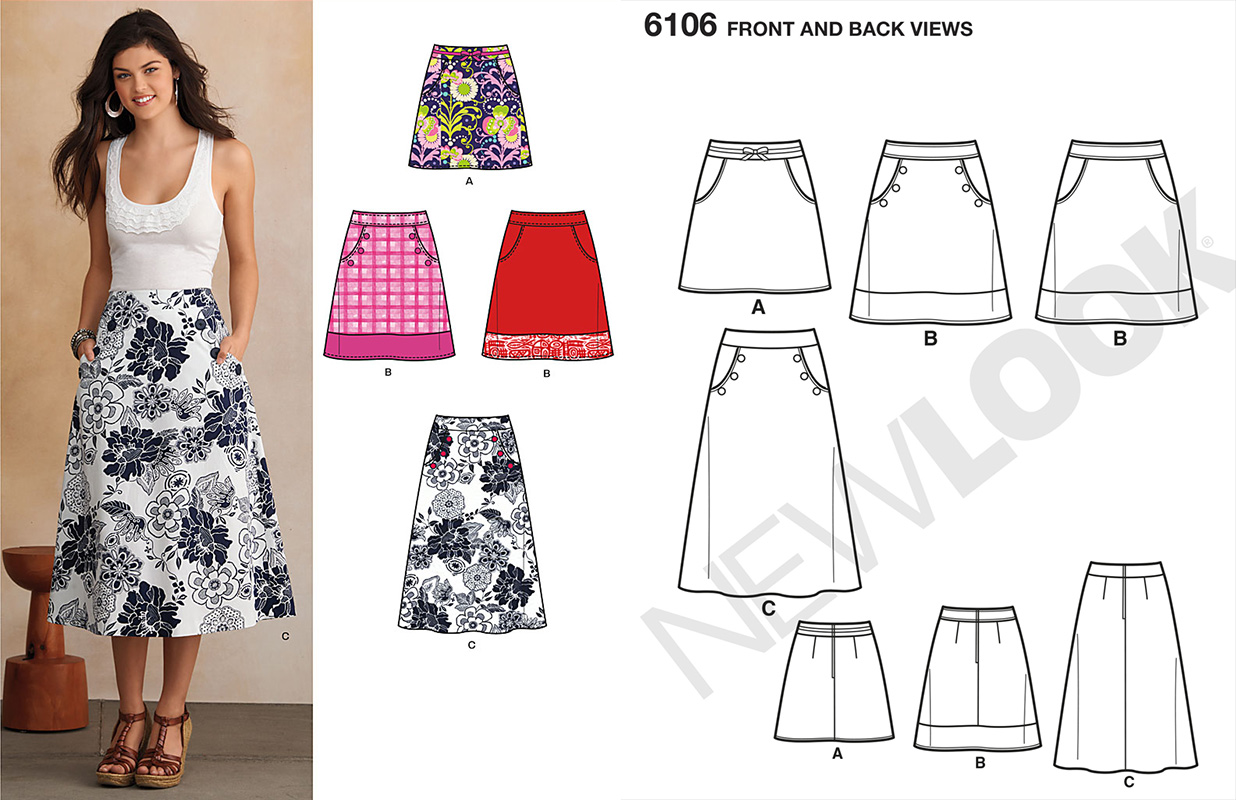
I started with New Look 6106, a simple a-line skirt with a curved waist-band, that I bought when I first started sewing, but hadn’t made yet. I started with View A, without the ribbon at the waist.

New Look 6106

I made a trial version from Eco Twill in Sweet Potato from the Confident Stitch. Eco Twill is “a midweight (7 oz.) fabric made from 65% recycled polyester and 35% organic cotton. The polyester comes from Polyethylene Terephthalate (PET) bottles used for drinking and soda packaging.”

It fit pretty much out of the package, with the following changes

  • Cut a 12 at the waist, grading to a 14 at the hips
  • Used an invisible zipper instead of a lapped zipper, using this tutorial by Kenneth King
  • After sewing it up, the ease in the hips and width at the bottom was way too much, so I took 6 inches off the circumference at the bottom, tapering to nothing at the bottom of the pocket opening.

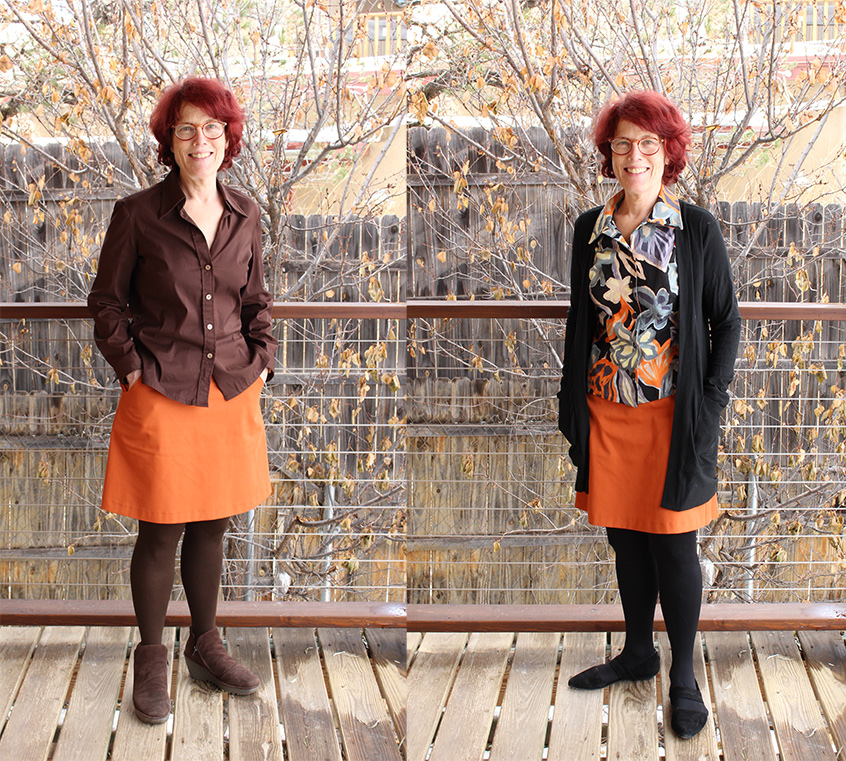
And I was pleasantly surprised that it went with several things I already had in my closet. And with 52″ fabric, it only uses a yard if you make the facing and pocket lining out of scraps.

On the left, with a ready-to-wear shirt. On the right, with 2 me-mades: blackwood cardigan and sleeveless button up s2215

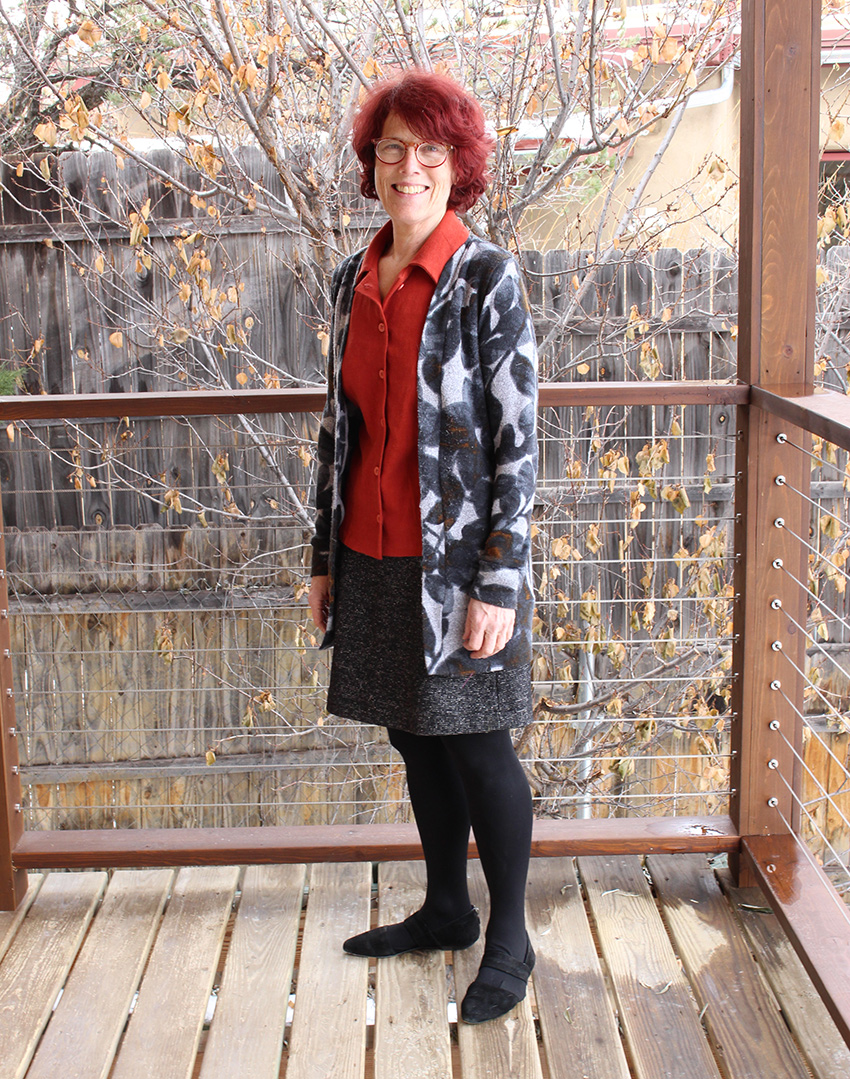
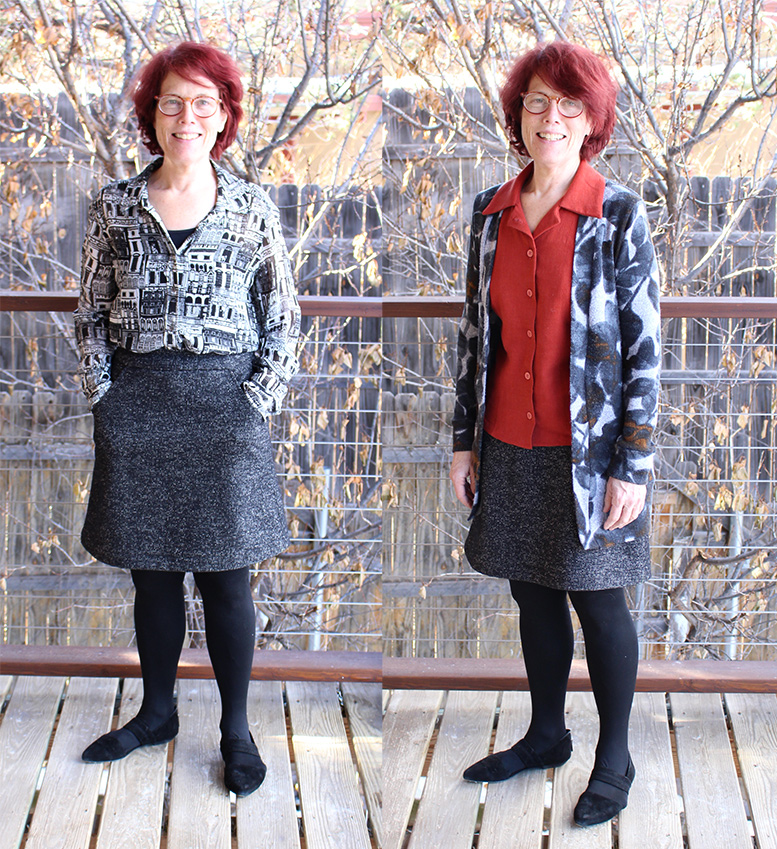
Next up I made the skirt for my seasonal sew 3 — from a wool blend from Style Maker Fabric. This time I drafted a lining, so it wouldn’t, like the sweet potato version, stick to my tights. The lining is a static-free one I got at Joann. Below on the right is my seasonal sew 3 outfit — skirt, blackwood cardigan in a sweater knit from Marcy Tilton and another s2215 made from mora slub linen from Stone Mountain Fabric.

Fall 2018 Seasonal Sew 3Left: with my favorite ready-to-wear silk shirt, Right: seasonal sew 3 capsule

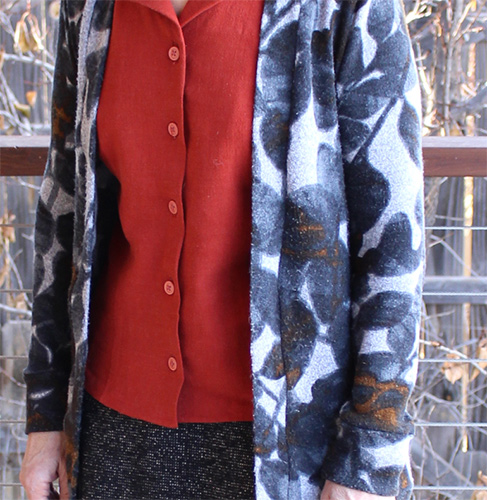
I was really happy with the rust color match between the blouse and sweater for my seasonal sew 3. Unfortunately, the sweater knit catches on everything and has gotten quite pilly. I’ve de-pilled it a few times since I made it in November, and I’m not sure it will last very long.

good match but pilly sweater knit

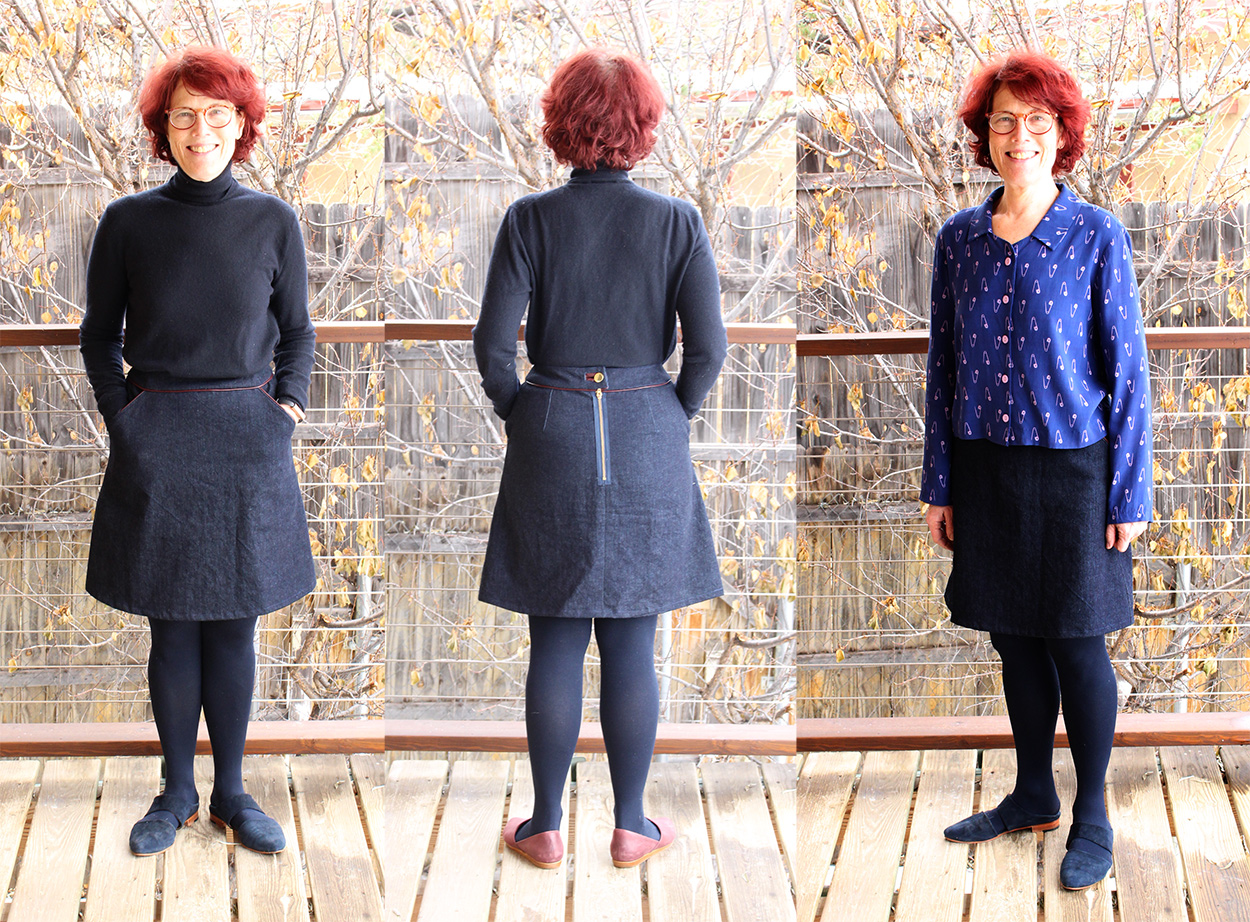
But I wasn’t done with the skirt pattern quite yet. I had just-large-enough piece of cone mills denim to make a 3rd version. This time I made it a little extra by

  • cuting the pocket opening straight across rather than curved
  • adding piping, made from a piece of leatherette from my stash, to the bottom of the waist band and top of the pockets
  • installing my first ever exposed zipper
  • making a welt buttonhole on the back waist band using the leatherette.

New Look 6106 in cone mills denimLeft: dressed like a crayon, Middle: back with exposed zipper and welt button hole, Right: the top is a hacked Carolyn Pajamas top made from the nicest behaving rayon challis from Workroom Social.

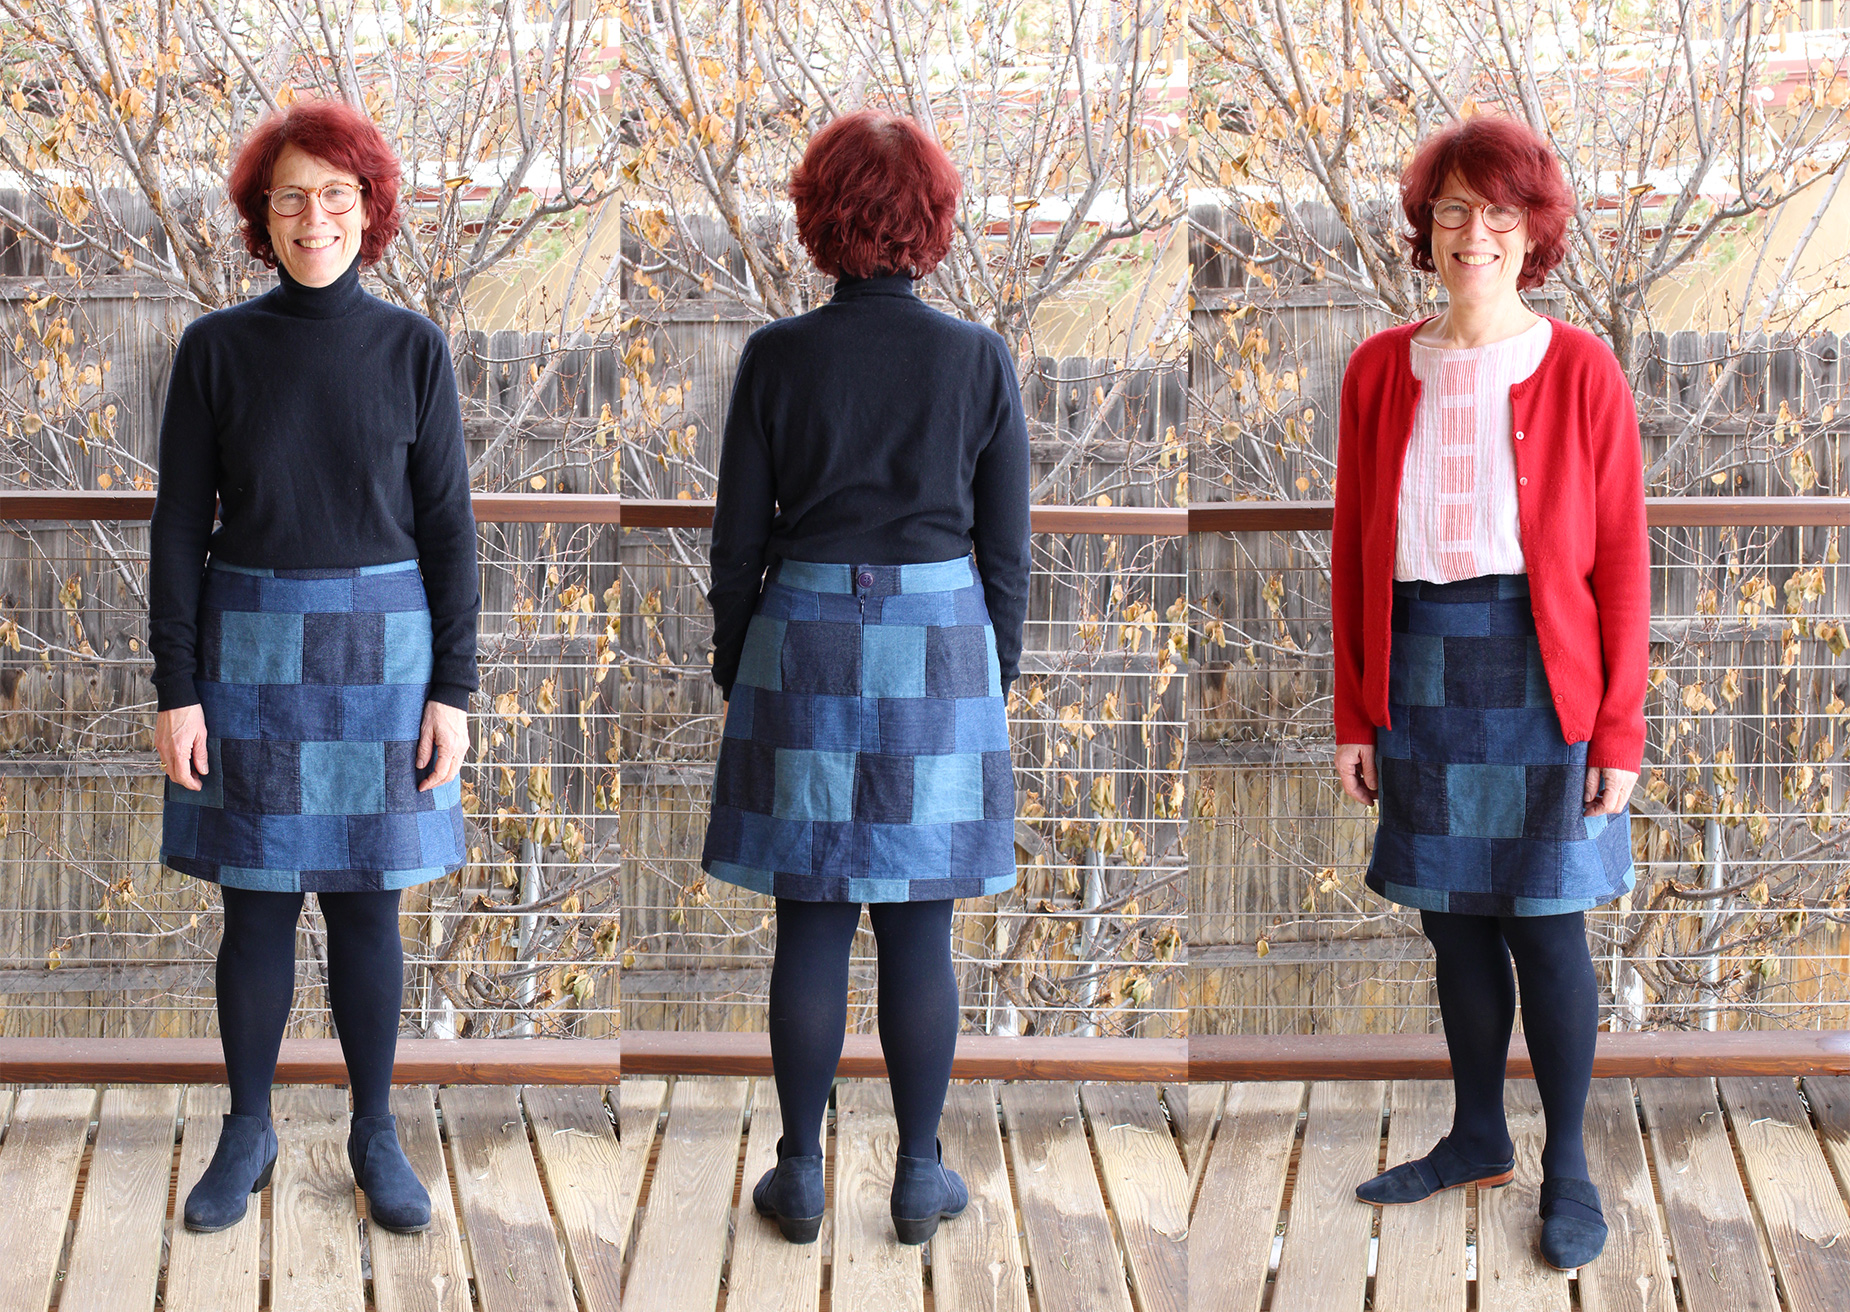
And last, the one I’ve worn the most, a couple of times a week. I saw this patchwork denim at Joann and couldn’t resist (plus I had a coupon). I see Style Maker Fabric has it too. This one doesn’t have pockets.

Left, dressed like a crayon again, Middle: I had fun planning the pattern-matching on the stripes created by the patchwork, Right: the top is a Maya top made from a dress that fell apart, and with a ready-to-wear cardi.

My #SewingTop5 for 2018

Sunday January 20, 2019

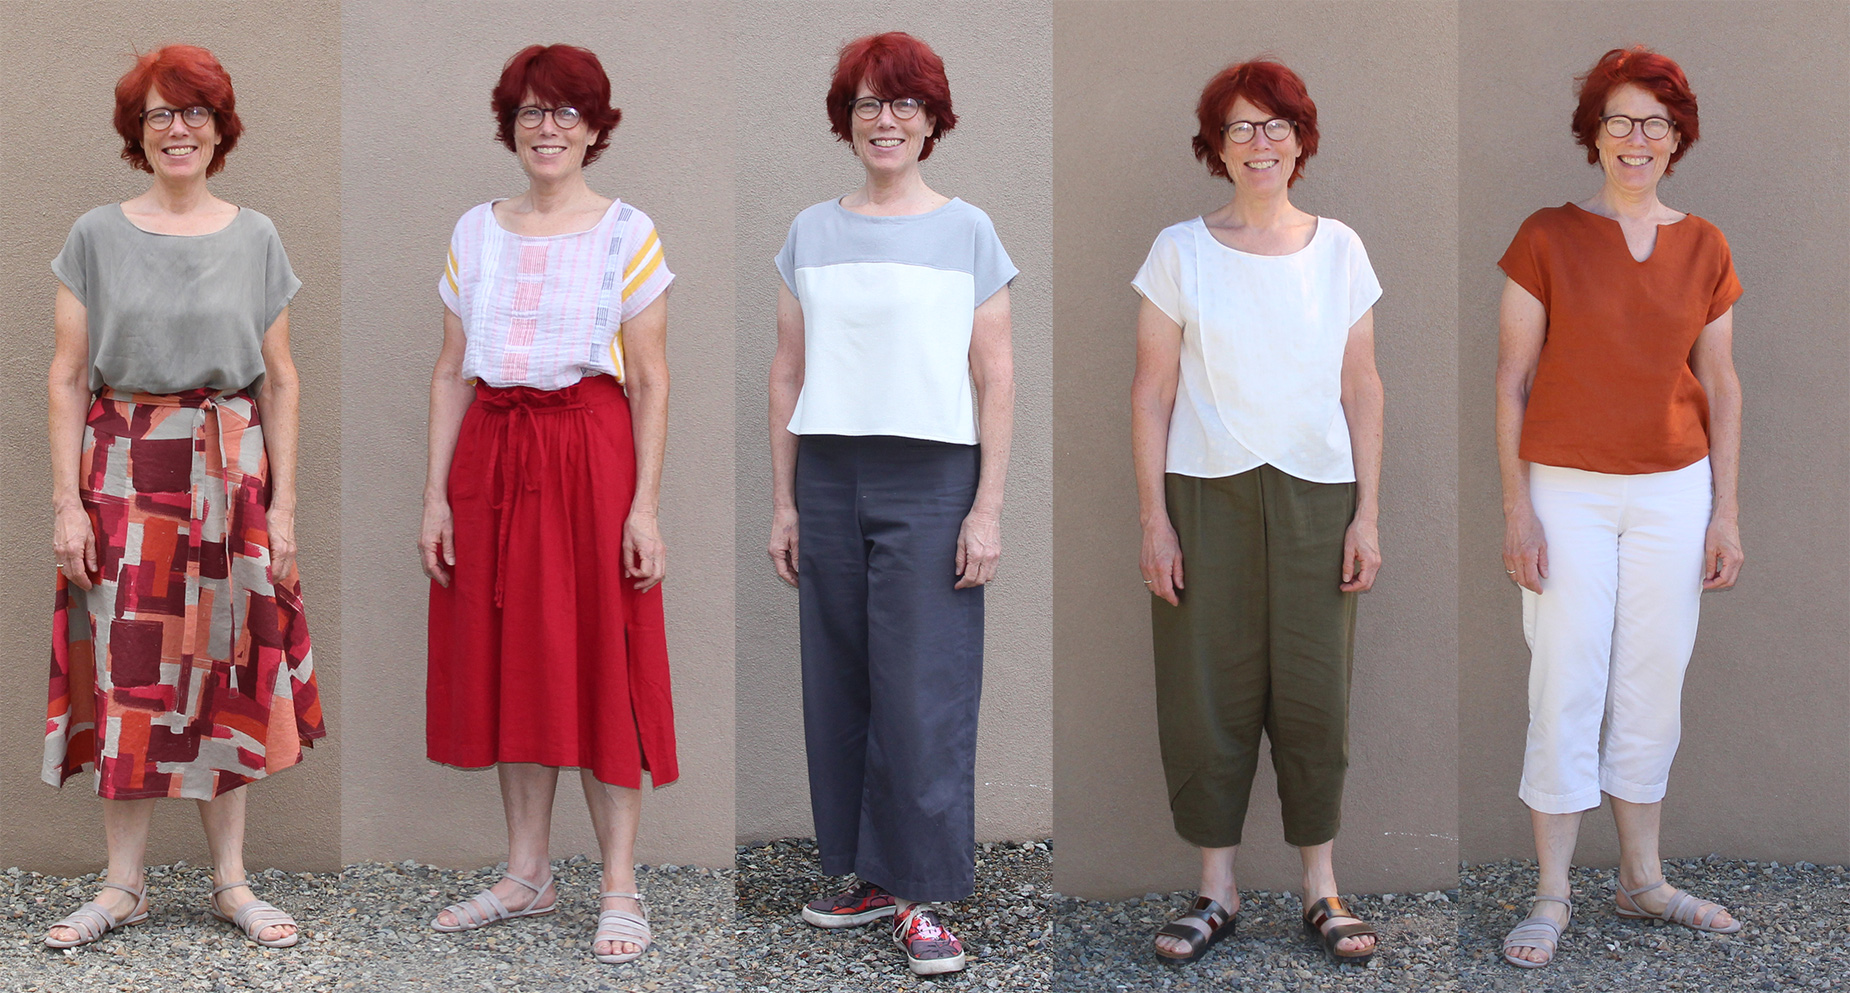
2018 was my first full year of garment sewing (I started in the fall of 2017). Like many beginners, I started with quilting cotton and patterns for boxy woven tops. With encouragement from Craftsy classes and reading lots of blogs, I progressed to knits, bought a serger, made a coat. So I thought it would be fun to join in the #SewingTop5 blog series hosted by Gillian from Crafting a Rainbow where she encourages sewing bloggers to post about their highlights (and lowlights) for 2018. Here’s my top 5.

1) Pattern Hacking

I like to cook. I like finding new recipes and new techniques. But I don’t alter them — even ones I’ve made for years. If I want to recreate a dish I’ve eaten at a restaurant, I look for a recipe that’s close, and if nothing turns up, I go on to the next thing. So when I started sewing and immediately started pattern hacking, I was pretty surprised to see this new side of myself. For instance Marilla Walker’s Maya top — I’ve color blocked it, made it in different fabrics, altered the neckline, altered the front into a tulip shape… I’ve done the same thing with a skirt pattern.

Maya top pattern hacking
My mayas: (left to right) original in rayon (no alterations), made from a cotton dress that fell apart, color-blocked with silk noil, tulip hem in a double gauze, “madewell” neckline in linen (from a Grainline Studio pattern hack).

2) A Halloween surprise

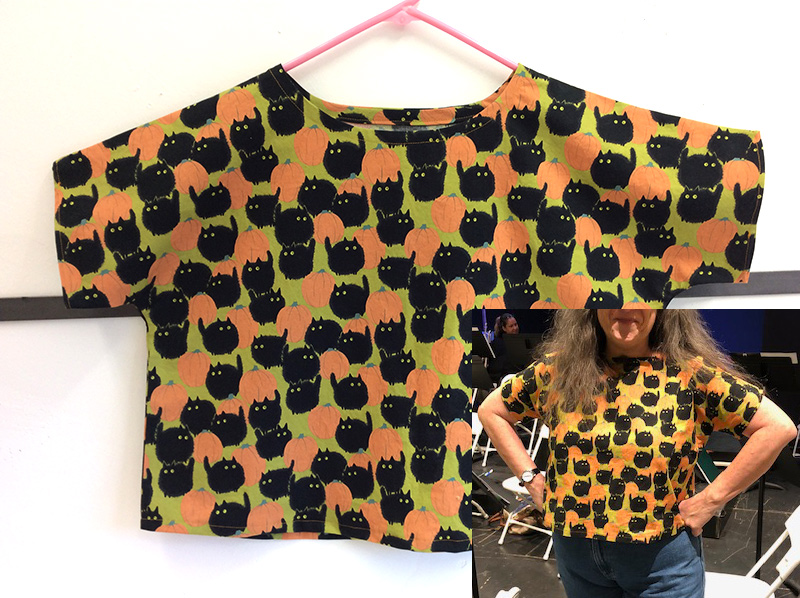
One of my first makes in 2017 was a Shirt No 1 for my Mom. It was October, and she loved cats and holidays, so I choose a fall/Halloween themed quilting cotton. I made another one for Christmas. When my Mom passed away last February, my sister was tasked with sorting through all her clothes. Imagine my surprise and pleasure this past October when my sis sent me a photo of her in the Halloween shirt — she’d saved both my makes to wear for herself.

3) Me-Made-May

I was also surprised that within 6 months of starting to sew I had enough tops (and a few other things) to wear a me-made garment every day of May without too many repeats. And even more proud of myself for getting a photo every day (although I should thank my husband, who took the photos and reminded me on the days I forgot!) You can see the recap here.

4) Where’s the black?

My husband has teased me for years that I wear only solids in black, navy and dark brown. Sewing has changed that. I never would have predicted in January that I’d make these pants and wear them outside the house (and more than once at that)!

S8134 wrap pants

5) And the lowlights?

I’ve had wadders and patterns I couldn’t figure out how to fit, I made a lovely blouse only to spill cooking oil down the front the first time I wore it, I tried unsuccessfully to make slim fitted flat front pants (3 times, actually), but I had to think hard to remember the failures. Mostly I’m left with the pleasure of dreaming up a garment, finding the pattern, sewing it up and wearing it.

Adventures in coat making: M7481

Sunday January 13, 2019

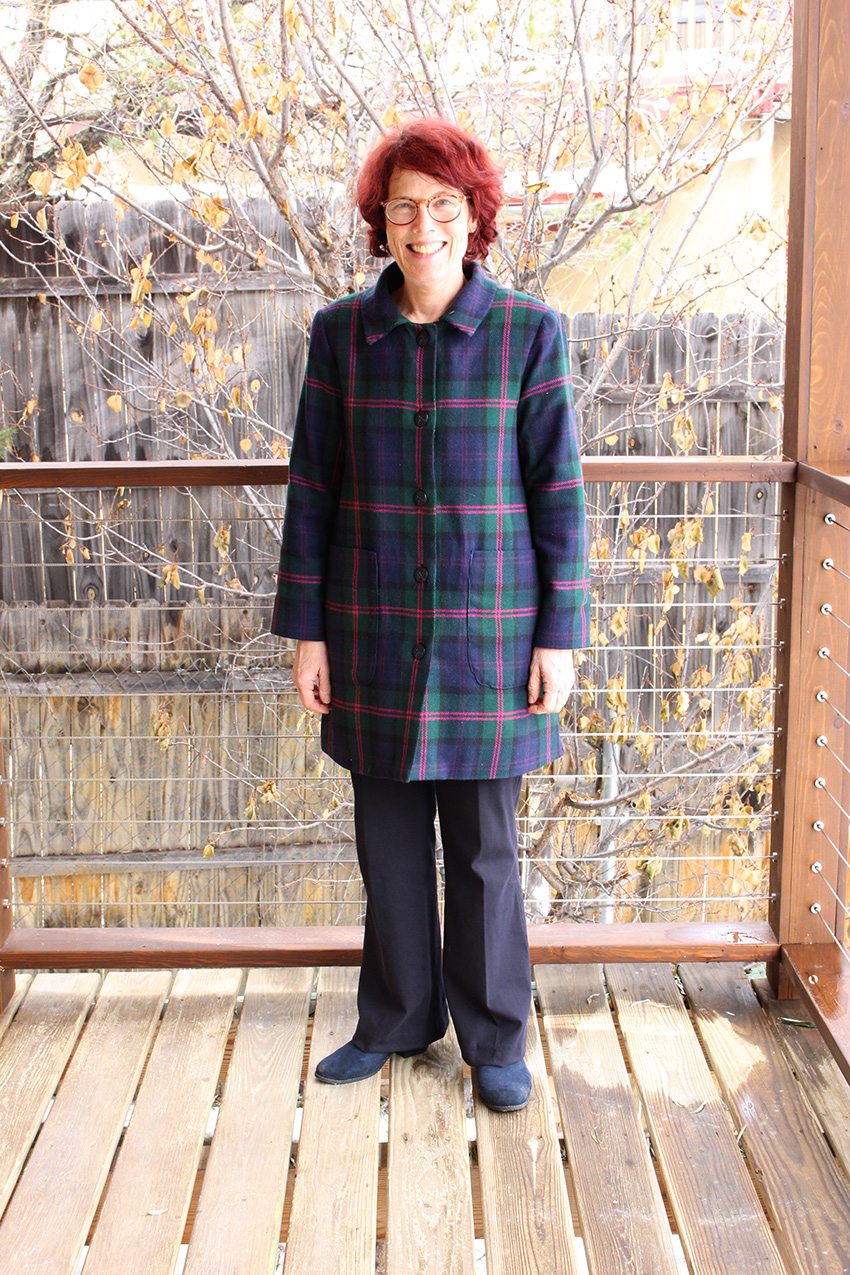
Front of the coat

One of my friends selects a word at the beginning of every year, rather than a resolution. The idea is to apply that word to the things she does throughout the year — words like “play” or “ease.” At the beginning of 2018 I hadn’t been sewing very long, and picked “coat” as my word, hoping that in the coming months I would pick sewing projects that gave me the skills and confidence to make a winter coat.

I knew from the start I wanted to make a plaid wool coat. And something like this Lisette Pattern
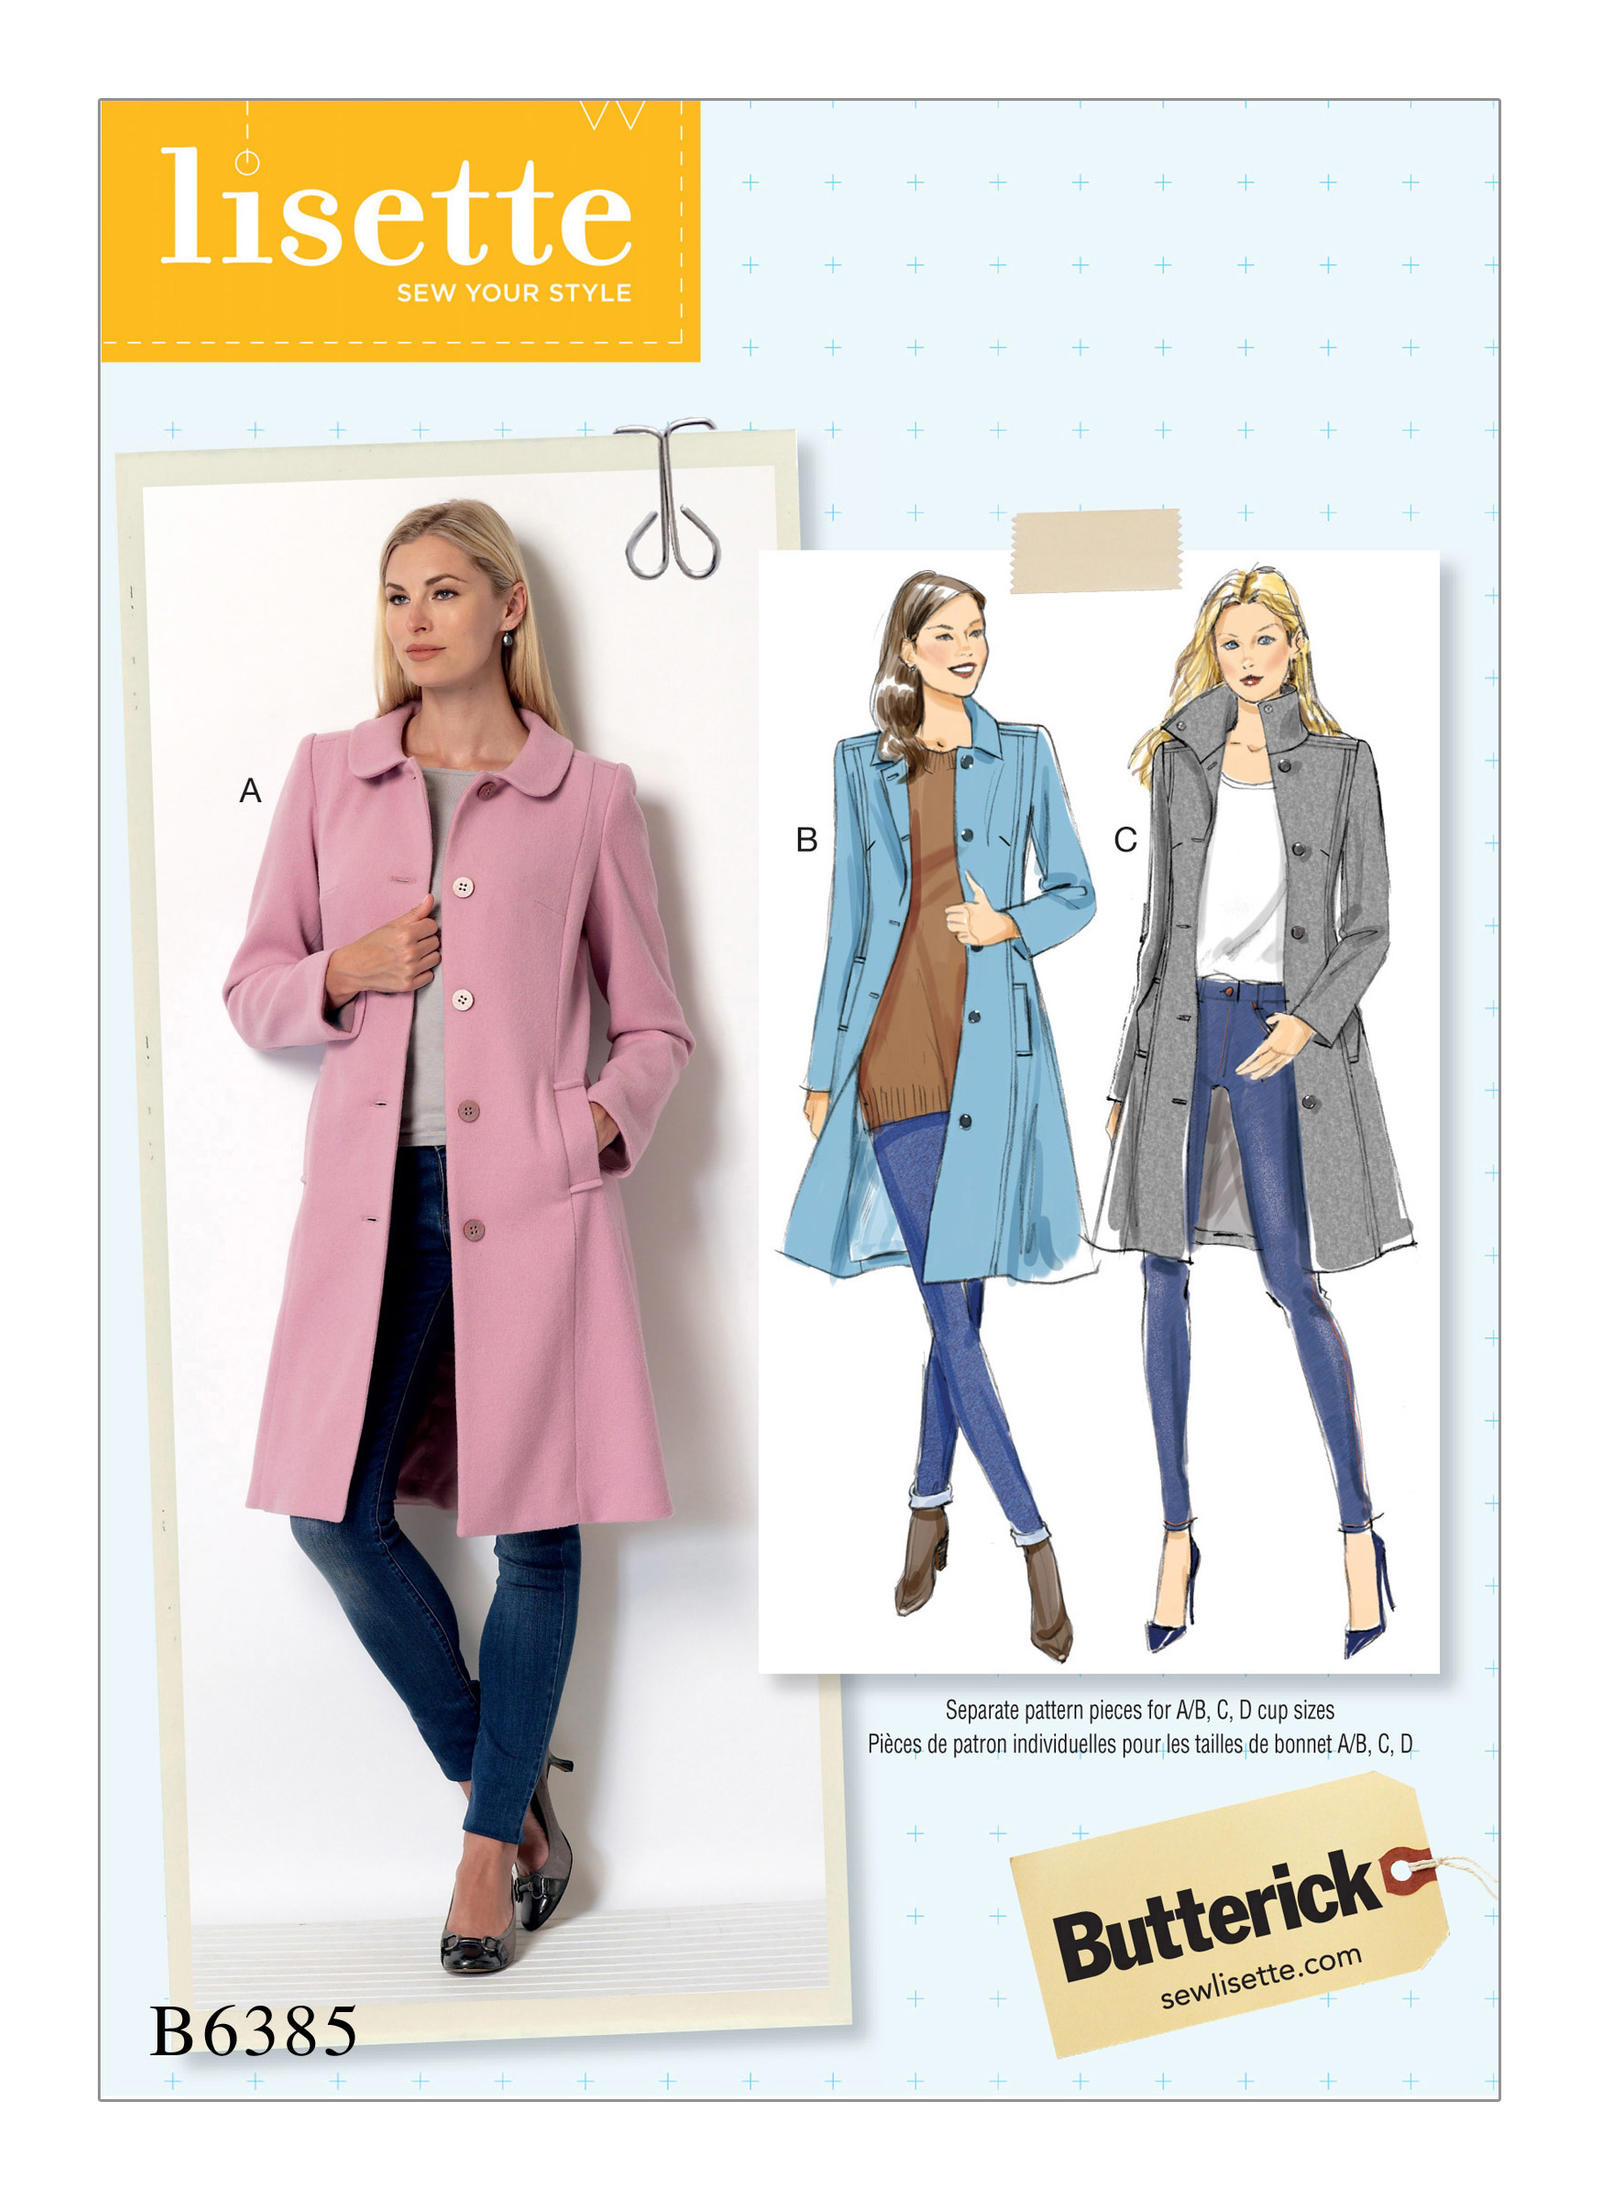
Butterick 6385

And I found the fabric (a wool coating) this fall, from Stone Mountain and Daughter.
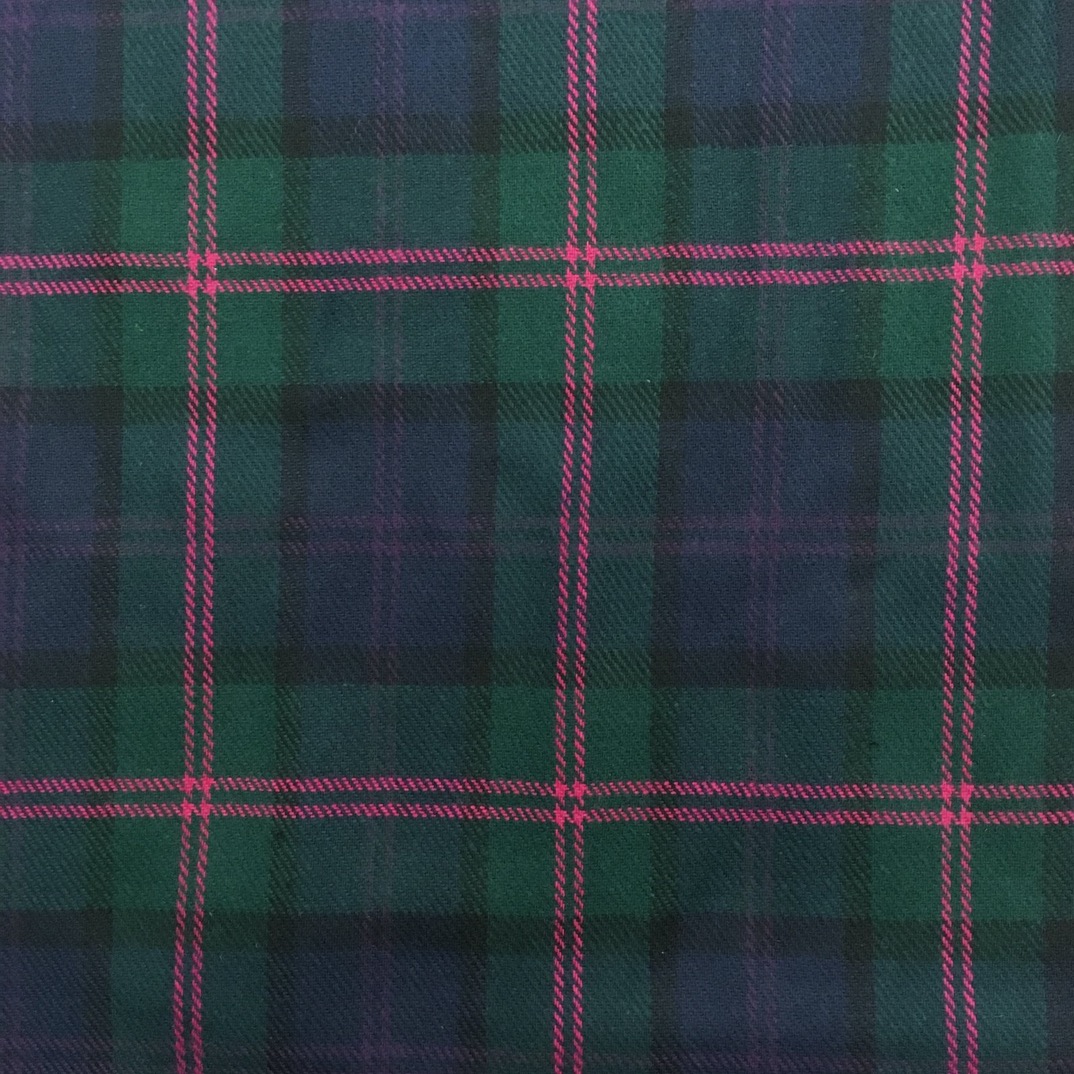
The Lisette coat has princess seams, and while there are lots of examples and blog posts about making the coat, I only found one sewist that made it in other than a solid color. That made me nervous — plaid matching princess seams was maybe beyond my current skills. So I looked for another pattern. I found a couple of candidates, and bought the most promising. But I didn’t like the look after I made a muslin (the sleeves fit very oddly and I had no idea how to fix them). Same went for the second coat pattern (raglan sleeves, not what I wanted). But whoa did I learn a lot from making those muslins and what I was in for. They left me with a lot of questions too. Should I bag the lining? How wide should the hem be? When exactly during the coat construction do I make bound button holes — maybe before attaching the facing? So to boost my confidence a bit, I also watched several Craftsy classes about linings and tailoring.

The third pattern I bought was McCalls 7481, to make view C. It’s described as “Lined vest and coat have front snap closing with sleeve and/or pocket variations. C: Collar and patch pockets.” My plan was to use buttons instead of snaps.
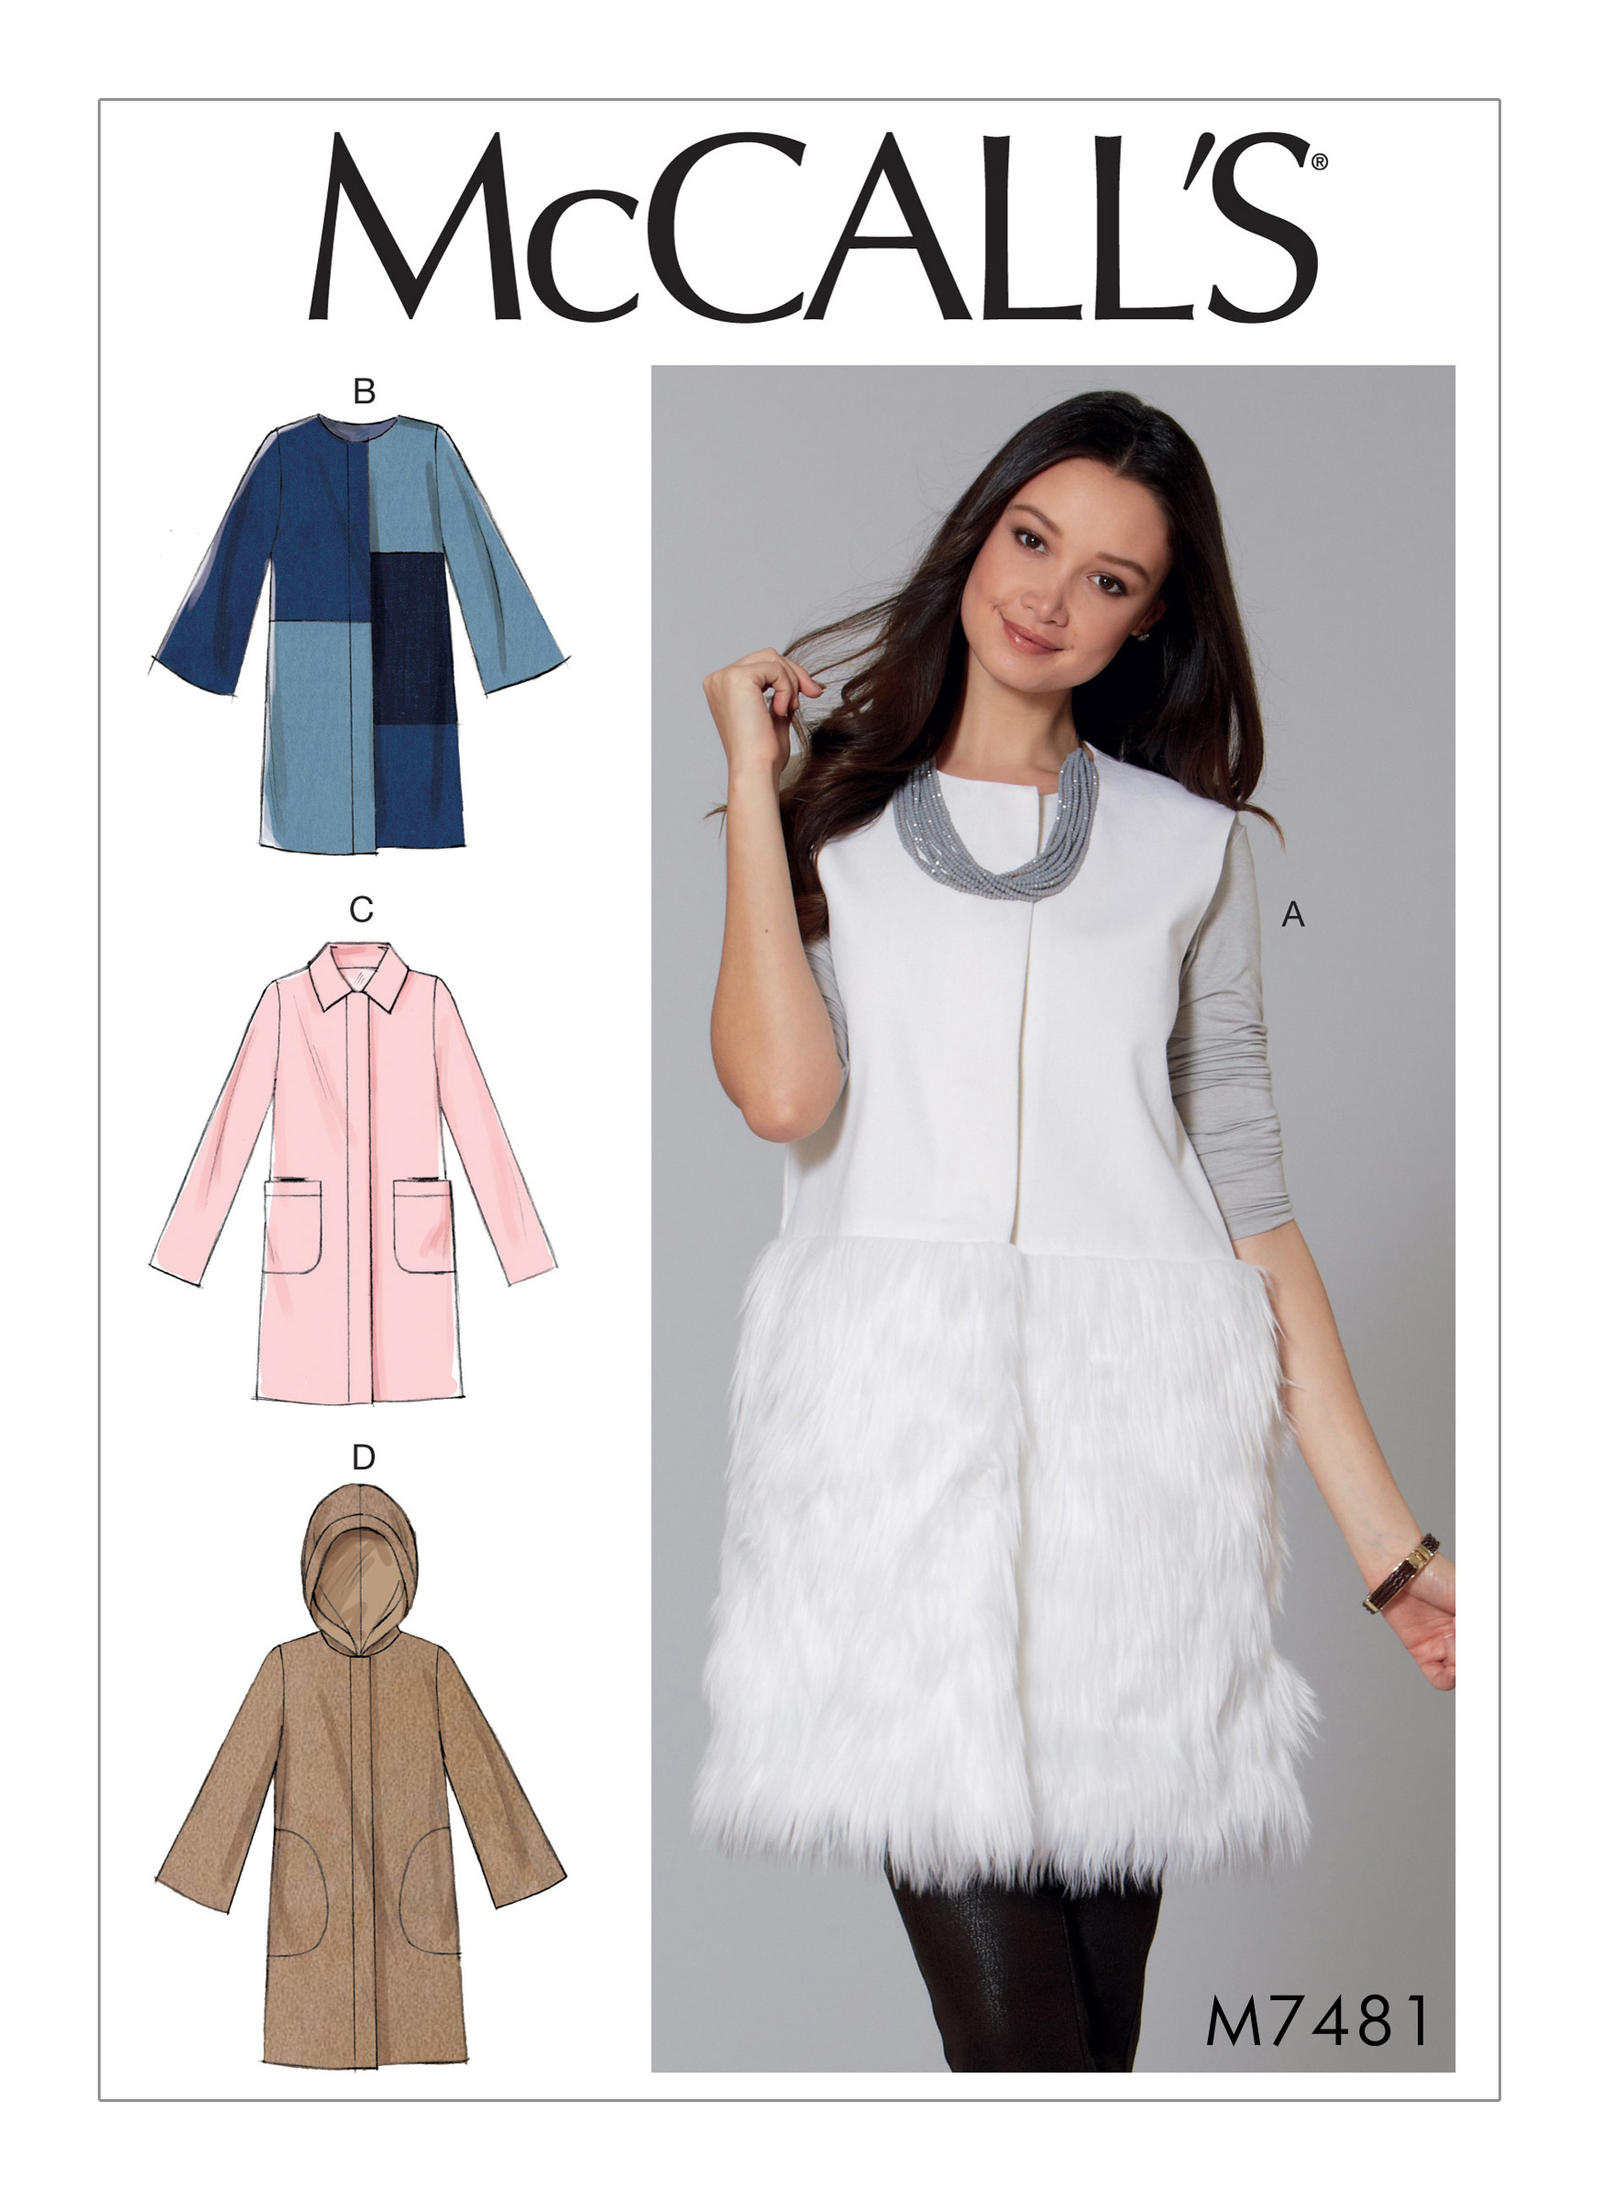
M7481 Misses' Hooded, Collared or Collarless Coats and Vest

I made up a muslin out of a sheet, and liked the way it looked. Then I made these changes

  • Made a size 12, grading to 14 at the hips. I widened the bottom even more, as it didn’t seem to close properly
  • Raised the arm hole using this Threads video
  • 1″ full bicep adjustment using this tutorial from Helen’s Closet
  • Added length to make a 3″ hem, rather than a 5/8″ hem.
  • Drafted a separate lining after watching Linda Lee’s Craftsy class Underneath it All
  • It looked like the lining would show at the top when the coat was open, so I also drafted a back facing.
  • And finally I merged the front facing with the coat front, so it was cut-on and a fold line rather than seam, to eliminate the bulk (Abby Mats shows how to do that on Instagram here)
  • The pattern had you just interface the collar and front facing. But after reading Lucinda Hamilton’s post here, I also used weft fusible for the bottom and sleeve hems, upper back and front, as well as the place where the pockets were to be placed. I got the interfacing from Vogue Fabrics.

Okay, at this point I knew the pattern did me no favors, and I probably should have kept looking for something else. But it was mid-December by this point, and I blundered along, reasoning that this is my first me-made coat, and I had procrastinated enough.

After I’d sewn the shell and tried it on, I realized I needed something at the shoulder. First I added a sleeve head using this Threads tutorial, but that didn’t make it look much better. Threads has a pattern for shoulder pads here and I had some quilt batting at home, so I tried making a set. I got to use the 3 step zigzag on my sewing machine — something I hadn’t used before! — but the resulting pads were pretty wimpy, so I ended up getting a pair at Joann.

About my lining. I decided on Sunback lining (satin on one side, flannel on the other) because the wool I’d bought wasn’t really that thick. I got it at B&J Fabric. I’m glad I got a thicker lining, because the finished coat isn’t as warm as I’d hoped.

One of the coat patterns I’d considered, but hadn’t muslined, was Vogue 1479, an Isaac Mizrahi design with something like 9 pockets (patch, welt, inside, outside…). It seemed more complicated than I was up for as a first coat-making project. But I read all the directions, and was intrigued by the patch pockets — they have 2 separate openings, from the top and from the side. They also had a facing for the top, which the patch pockets on my pattern didn’t. The construction seemed straight-forward, and the top facing seemed like a good idea, so I swapped in the Vogue pockets.

After a lot of head-scratching, I made the welt button holes before folding the facing and attaching the lining. I made 3 practice button holes before attacking the actual coat. Sadly the practice ones are very nice and the ones on the coat are pretty iffy. But they work, and I like the buttons I found.

Bagging the lining. I read several blog posts about bagging (here and here), and in Linda Lee’s Craftsy class Underneath it All she shows how to bag a coat, with the opening at the hem. I decided to use Lee’s method — rather than the bagging opening in the sleeve. I found hand sewing the hem once the coat was right-side-out to be very awkward (Lee’s lining drafting directions has the lining fold over the hem for extra ease), so next time I make a coat I’ll try the opening in the sleeve method.

Here’s the final coat. As I said, it’s not as warm as I hoped, but I’m really pleased with how it turned out. I’ve worn it every day since finishing it at on January 4th. The sleeves are too short — maybe because I added shoulder pads? There’s something wonky happening at the hem where the coat closes… but YEAH, I finished!

Front of the coat Front of the coat
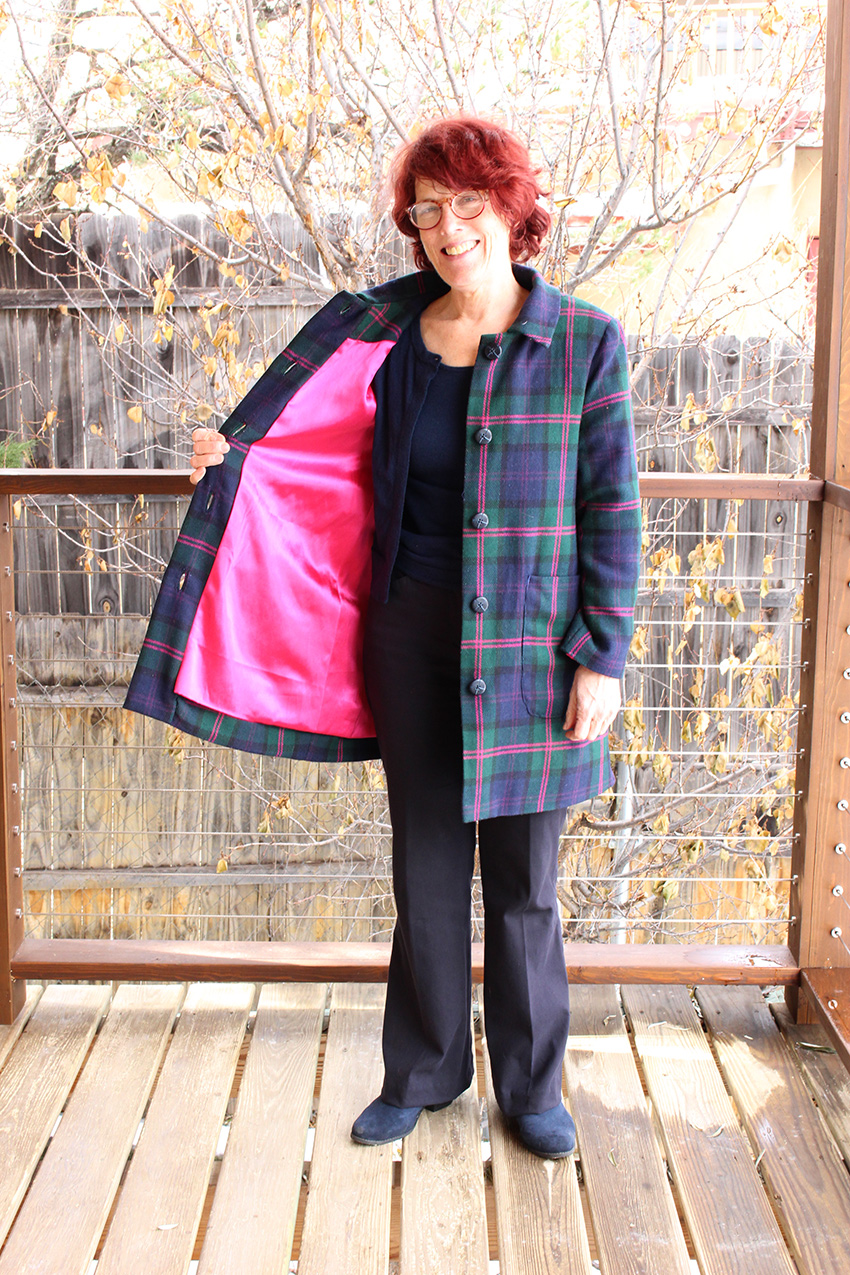
Sunback lining in very bright fuchsia Sunback lining in very bright fuchsia
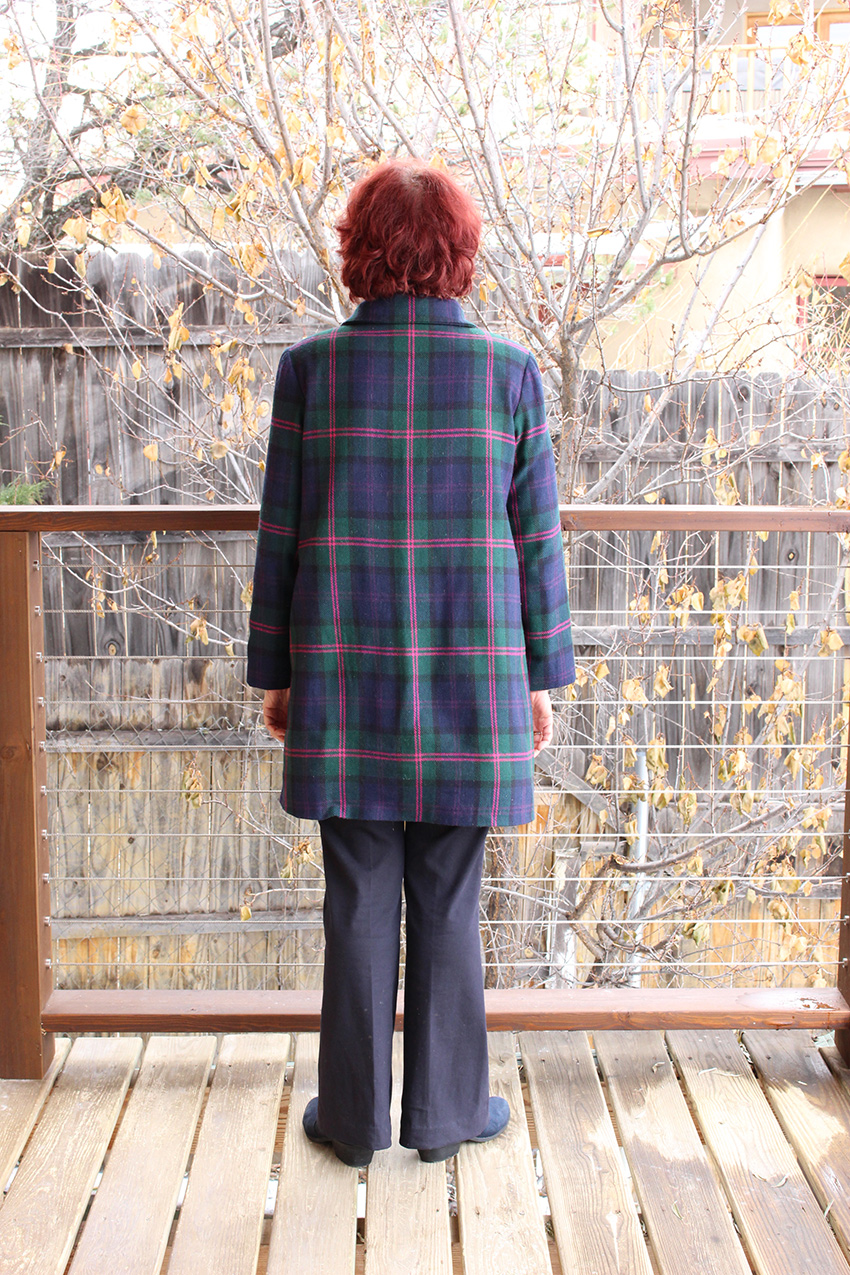
Back of the coat Back of the coat
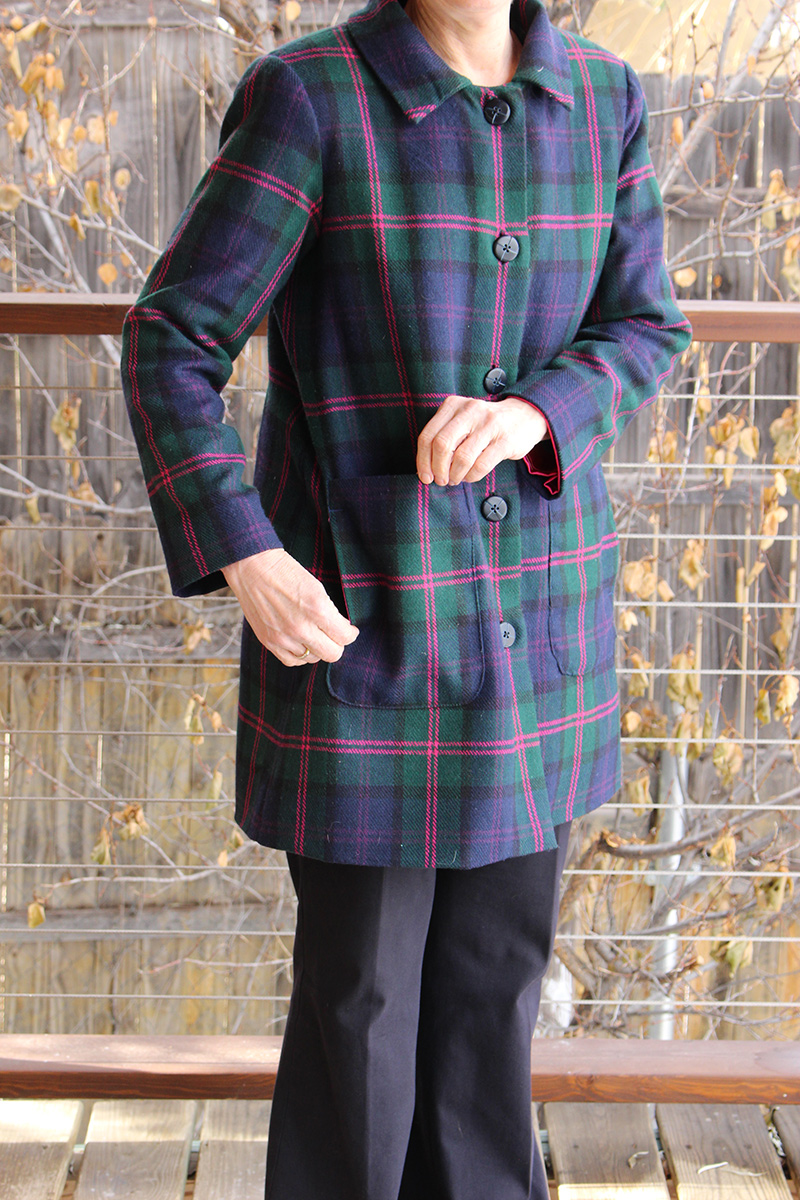
Pocket detail -- opens from either the top or side Pocket detail — opens from either the top or side

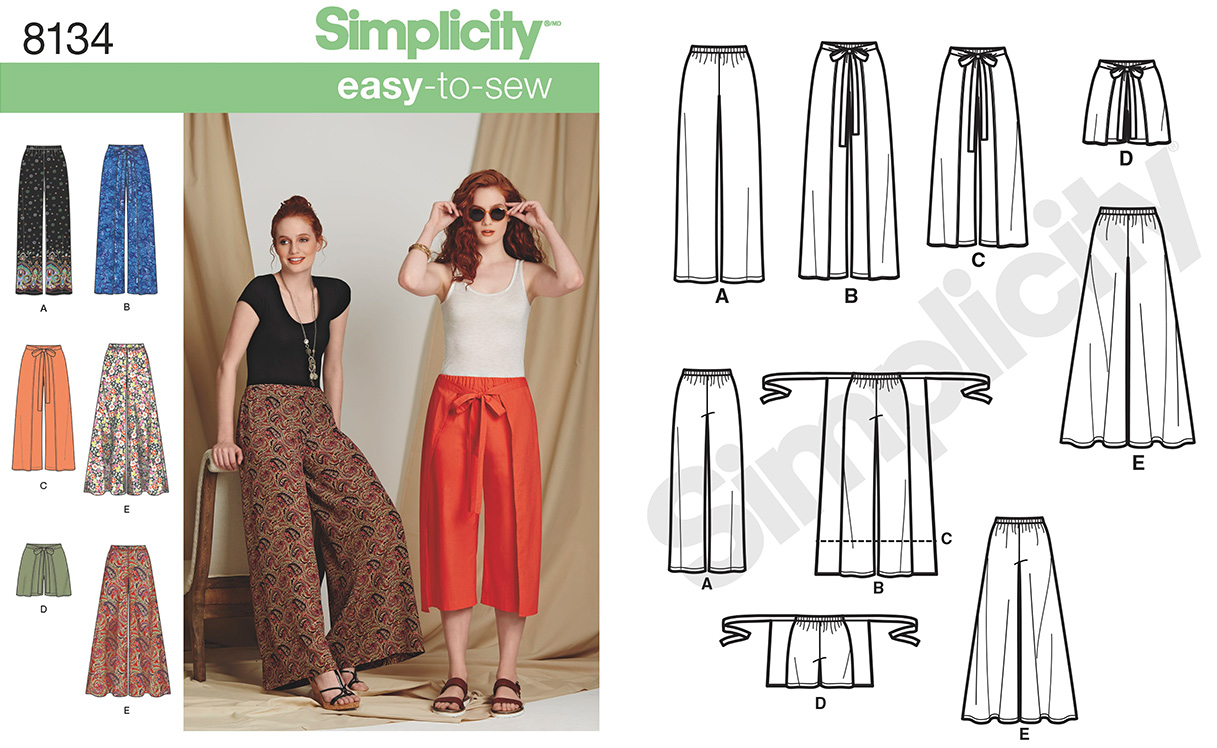
Simplicity 8134 wrap pants

Thursday October 4, 2018

Since May I’ve been working on and off to find a fitted pants pattern that actually fits me. I think I’ve finally got the crotch curve and other adjustments figured out, and I wanted to see how my basic pattern could be applied to other patterns. After seeing Manju and Lori’s version of Simplicity 8134, I bought it as my first test. The wide legs would cover up some of my fitting issues — heavy thighs and extended calves — and I could practice transferring my fitting block to the Simplicity pattern.

Simplicity 8134 envelope

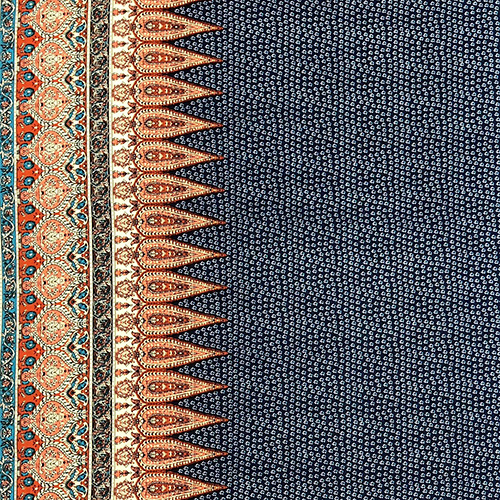
When I looked at the reviews on Pattern Review, I saw these in a border print, so I decided to give that a try. I found the perfect rayon challis from Sly Fox.

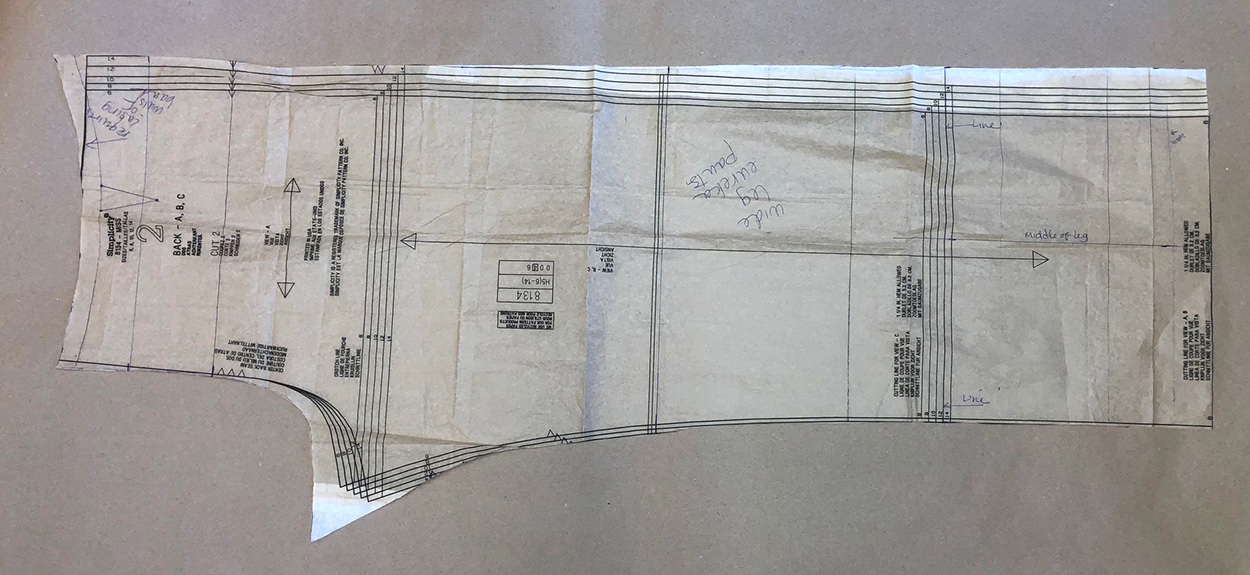
Happily transferring my pattern to the Simplicity one was really straight-forward. I used the top of my pattern (from the crotch up) and the Simplicity pattern legs. My pattern has a flat waist band with a zipper and the Simplicity one has an elastic waist. The wraps on these pants are sewn into the side seams, so I also had to modify the top of the wrap pattern.

Keeping in mind that this was all an experiment for me, here a bit of detail about how I merged the 2 patterns. I started by laying the Simplicity on top of my pants pattern, lining up the waistline. The rise on the Simplicity pattern was higher than my pattern, so the crotch lines didn’t match. I adjusted the rise on the Simplicity pattern so now a line horizontal across the crotch was the same for both. From there I figured out the leg width. My pants pattern is based on Sarah Veblen’s Eureka pants, and the directions for that pattern emphasize keeping the width of the pants symmetrical around the middle of the leg — so same amount of fabric on both sides of a line running perpendicular to the middle of the bottom of the pants. Keeping that in mind, I drew the middle line from my pants pattern to the hem of the Simplicity, and used that line to figure out the new width. I tried to make the pants straight from about the knee down. Here’s a photo of the finished back pattern:

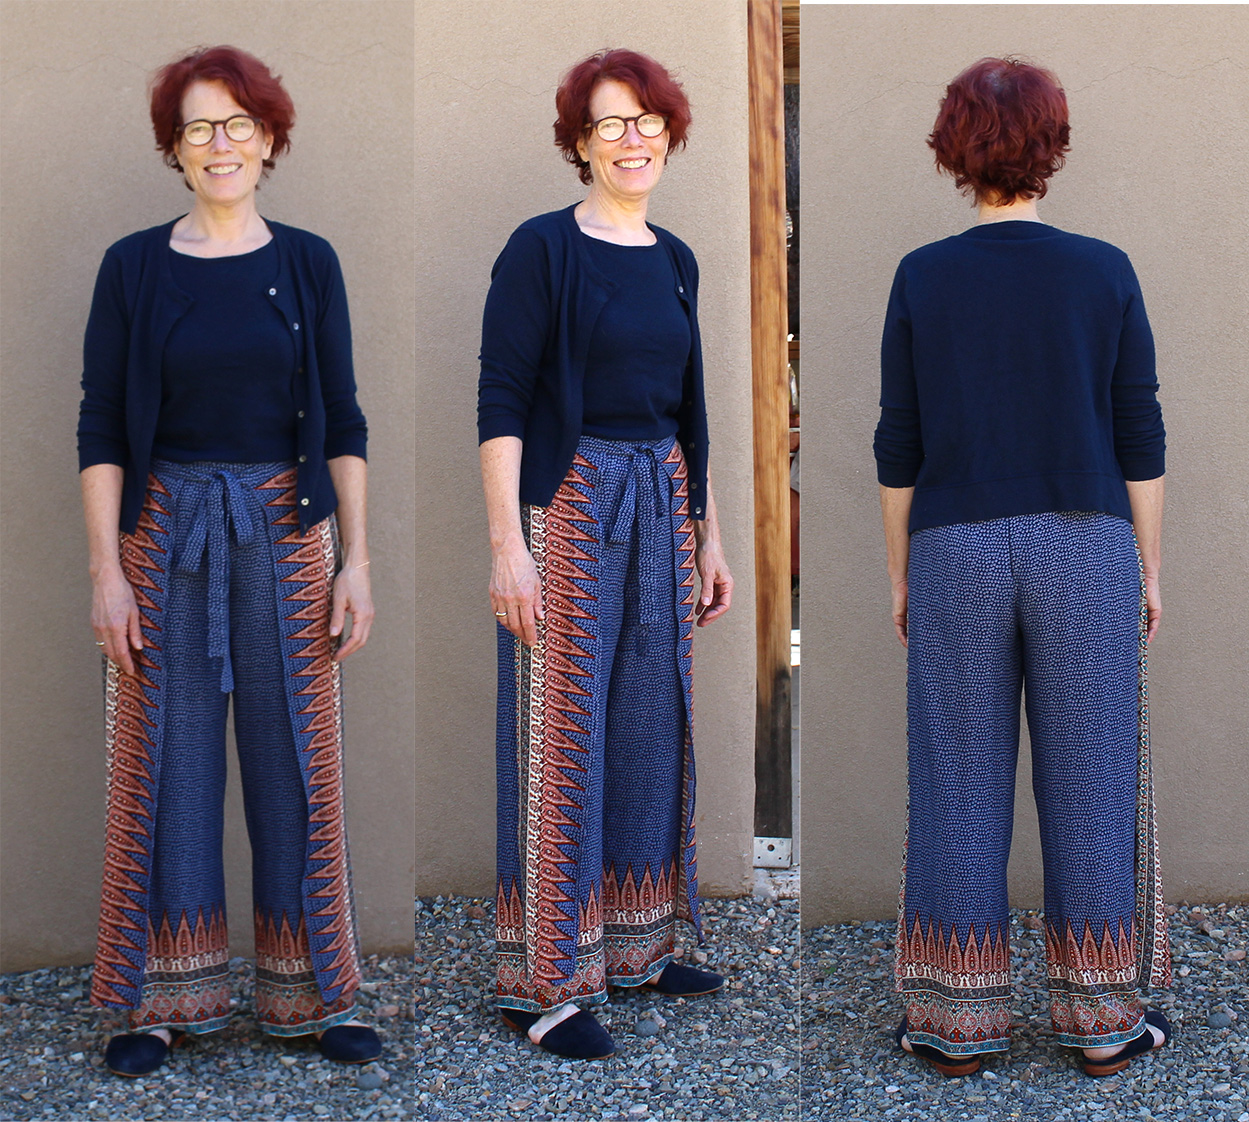
They were easy to sew up, the fit is really nice, and the fabric is soft and comfy. But as you can tell from the first picture in this post, I didn’t take into account that when I walk, the wrap flutters open and you see the wrong side of the fabric. I’m still debating whether that’s a big problem. I’ve worn the pants several times now, so maybe it really doesn’t bother me!

Here it is from all sides:

Thanks for reading!