One of my friends selects a word at the beginning of every year, rather than a resolution. The idea is to apply that word to the things she does throughout the year — words like “play” or “ease.” At the beginning of 2018 I hadn’t been sewing very long, and picked “coat” as my word, hoping that in the coming months I would pick sewing projects that gave me the skills and confidence to make a winter coat.
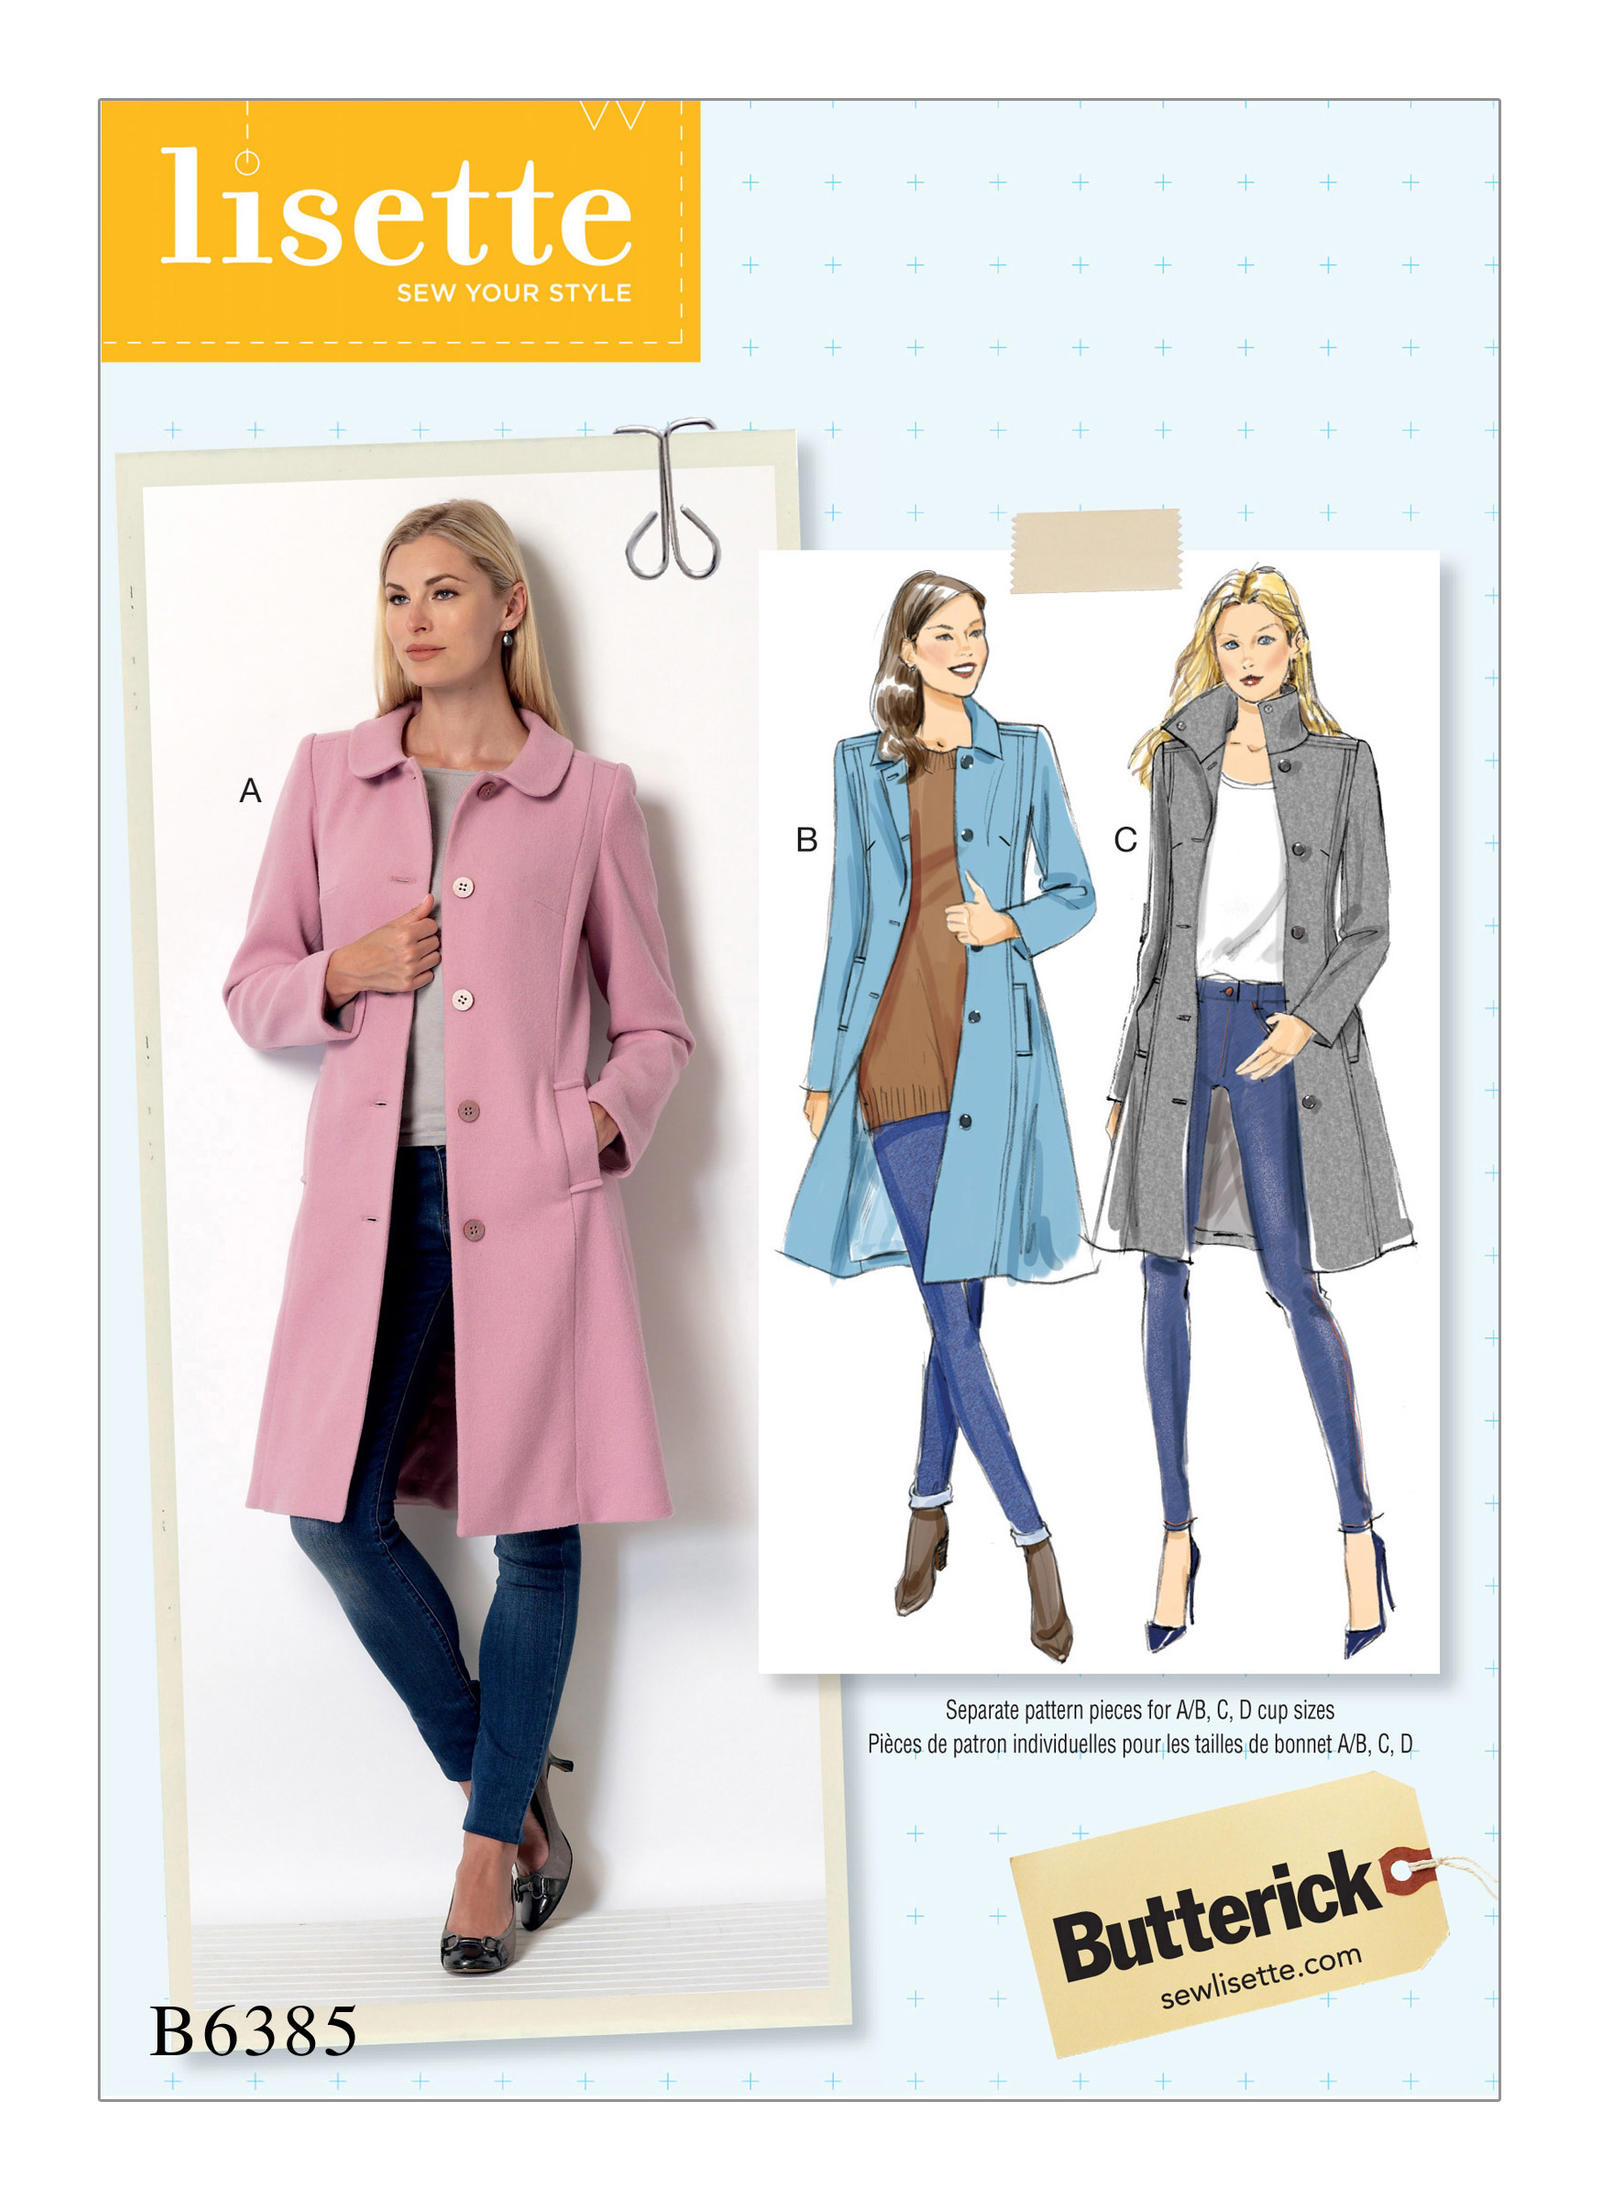
I knew from the start I wanted to make a plaid wool coat. And something like this Lisette Pattern
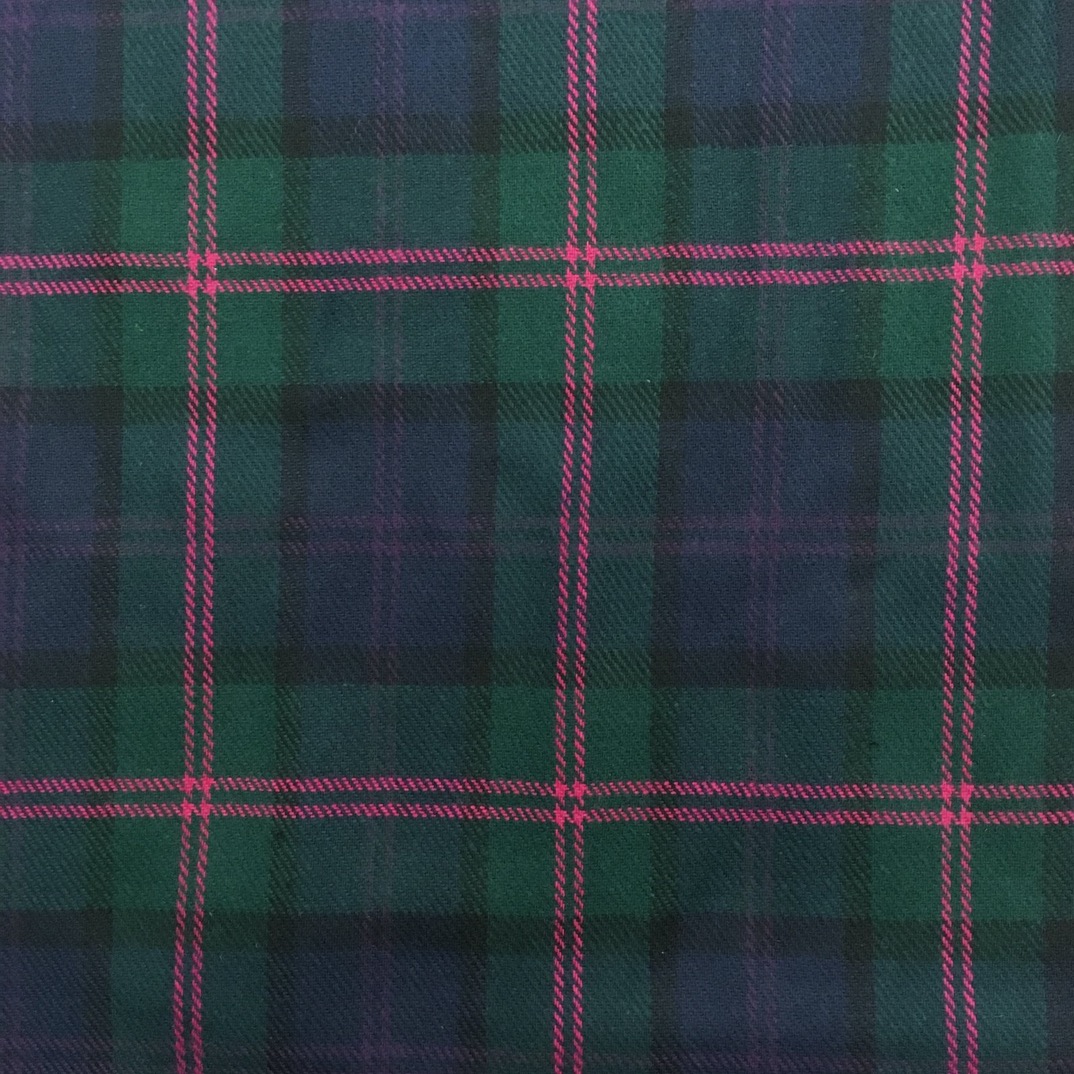
And I found the fabric (a wool coating) this fall, from Stone Mountain and Daughter.
The Lisette coat has princess seams, and while there are lots of examples and blog posts about making the coat, I only found one sewist that made it in other than a solid color. That made me nervous — plaid matching princess seams was maybe beyond my current skills. So I looked for another pattern. I found a couple of candidates, and bought the most promising. But I didn’t like the look after I made a muslin (the sleeves fit very oddly and I had no idea how to fix them). Same went for the second coat pattern (raglan sleeves, not what I wanted). But whoa did I learn a lot from making those muslins and what I was in for. They left me with a lot of questions too. Should I bag the lining? How wide should the hem be? When exactly during the coat construction do I make bound button holes — maybe before attaching the facing? So to boost my confidence a bit, I also watched several Craftsy classes about linings and tailoring.
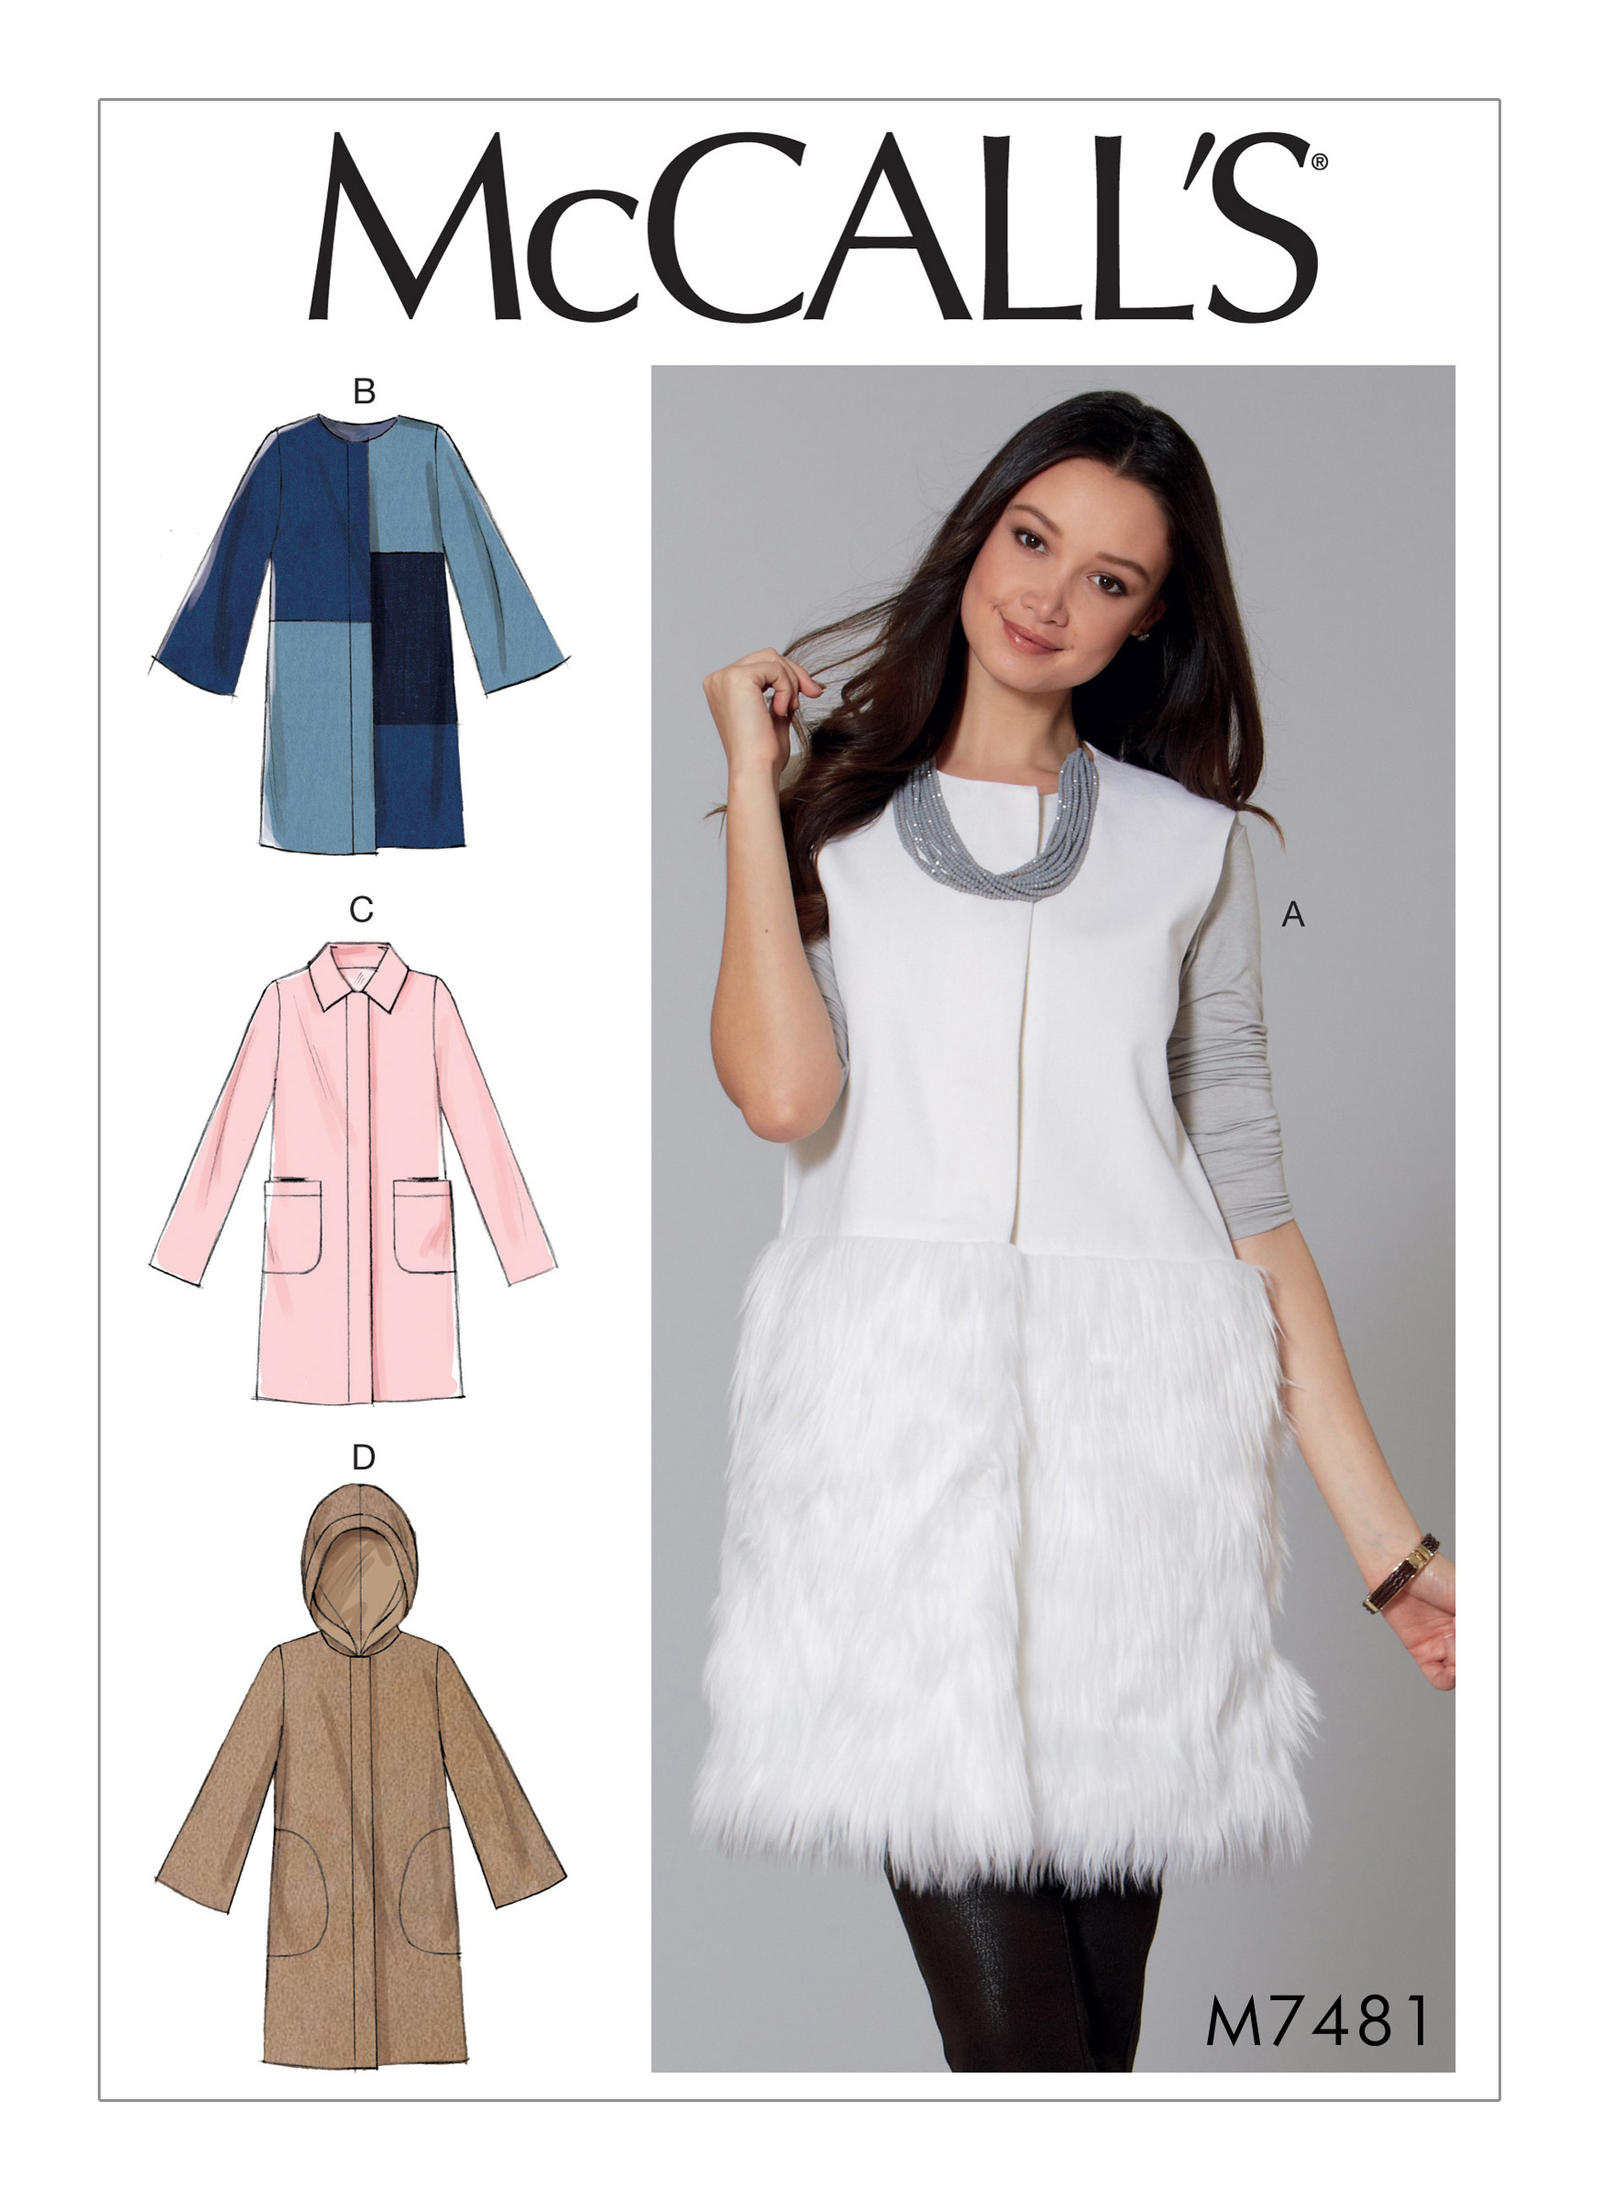
The third pattern I bought was McCalls 7481, to make view C. It’s described as “Lined vest and coat have front snap closing with sleeve and/or pocket variations. C: Collar and patch pockets.” My plan was to use buttons instead of snaps.
I made up a muslin out of a sheet, and liked the way it looked. Then I made these changes
- Made a size 12, grading to 14 at the hips. I widened the bottom even more, as it didn’t seem to close properly
- Raised the arm hole using this Threads video
- 1″ full bicep adjustment using this tutorial from Helen’s Closet
- Added length to make a 3″ hem, rather than a 5/8″ hem.
- Drafted a separate lining after watching Linda Lee’s Craftsy class Underneath it All
- It looked like the lining would show at the top when the coat was open, so I also drafted a back facing.
- And finally I merged the front facing with the coat front, so it was cut-on and a fold line rather than seam, to eliminate the bulk (Abby Mats shows how to do that on Instagram here)
- The pattern had you just interface the collar and front facing. But after reading Lucinda Hamilton’s post here, I also used weft fusible for the bottom and sleeve hems, upper back and front, as well as the place where the pockets were to be placed. I got the interfacing from Vogue Fabrics.
Okay, at this point I knew the pattern did me no favors, and I probably should have kept looking for something else. But it was mid-December by this point, and I blundered along, reasoning that this is my first me-made coat, and I had procrastinated enough.
After I’d sewn the shell and tried it on, I realized I needed something at the shoulder. First I added a sleeve head using this Threads tutorial, but that didn’t make it look much better. Threads has a pattern for shoulder pads here and I had some quilt batting at home, so I tried making a set. I got to use the 3 step zigzag on my sewing machine — something I hadn’t used before! — but the resulting pads were pretty wimpy, so I ended up getting a pair at Joann.
About my lining. I decided on Sunback lining (satin on one side, flannel on the other) because the wool I’d bought wasn’t really that thick. I got it at B&J Fabric. I’m glad I got a thicker lining, because the finished coat isn’t as warm as I’d hoped.
One of the coat patterns I’d considered, but hadn’t muslined, was Vogue 1479, an Isaac Mizrahi design with something like 9 pockets (patch, welt, inside, outside…). It seemed more complicated than I was up for as a first coat-making project. But I read all the directions, and was intrigued by the patch pockets — they have 2 separate openings, from the top and from the side. They also had a facing for the top, which the patch pockets on my pattern didn’t. The construction seemed straight-forward, and the top facing seemed like a good idea, so I swapped in the Vogue pockets.
After a lot of head-scratching, I made the welt button holes before folding the facing and attaching the lining. I made 3 practice button holes before attacking the actual coat. Sadly the practice ones are very nice and the ones on the coat are pretty iffy. But they work, and I like the buttons I found.
Bagging the lining. I read several blog posts about bagging (here and here), and in Linda Lee’s Craftsy class Underneath it All she shows how to bag a coat, with the opening at the hem. I decided to use Lee’s method — rather than the bagging opening in the sleeve. I found hand sewing the hem once the coat was right-side-out to be very awkward (Lee’s lining drafting directions has the lining fold over the hem for extra ease), so next time I make a coat I’ll try the opening in the sleeve method.
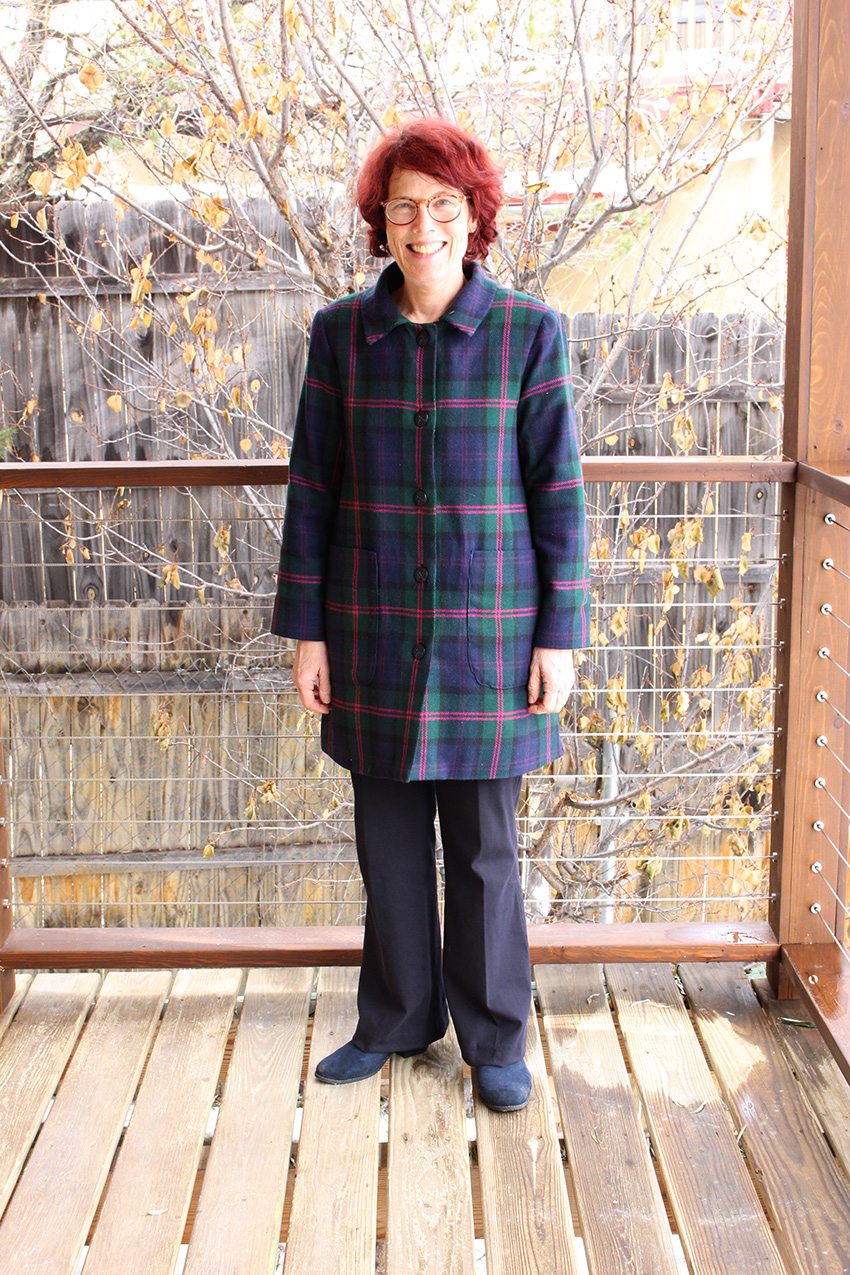
Here’s the final coat. As I said, it’s not as warm as I hoped, but I’m really pleased with how it turned out. I’ve worn it every day since finishing it at on January 4th. The sleeves are too short — maybe because I added shoulder pads? There’s something wonky happening at the hem where the coat closes… but YEAH, I finished!
Front of the coat
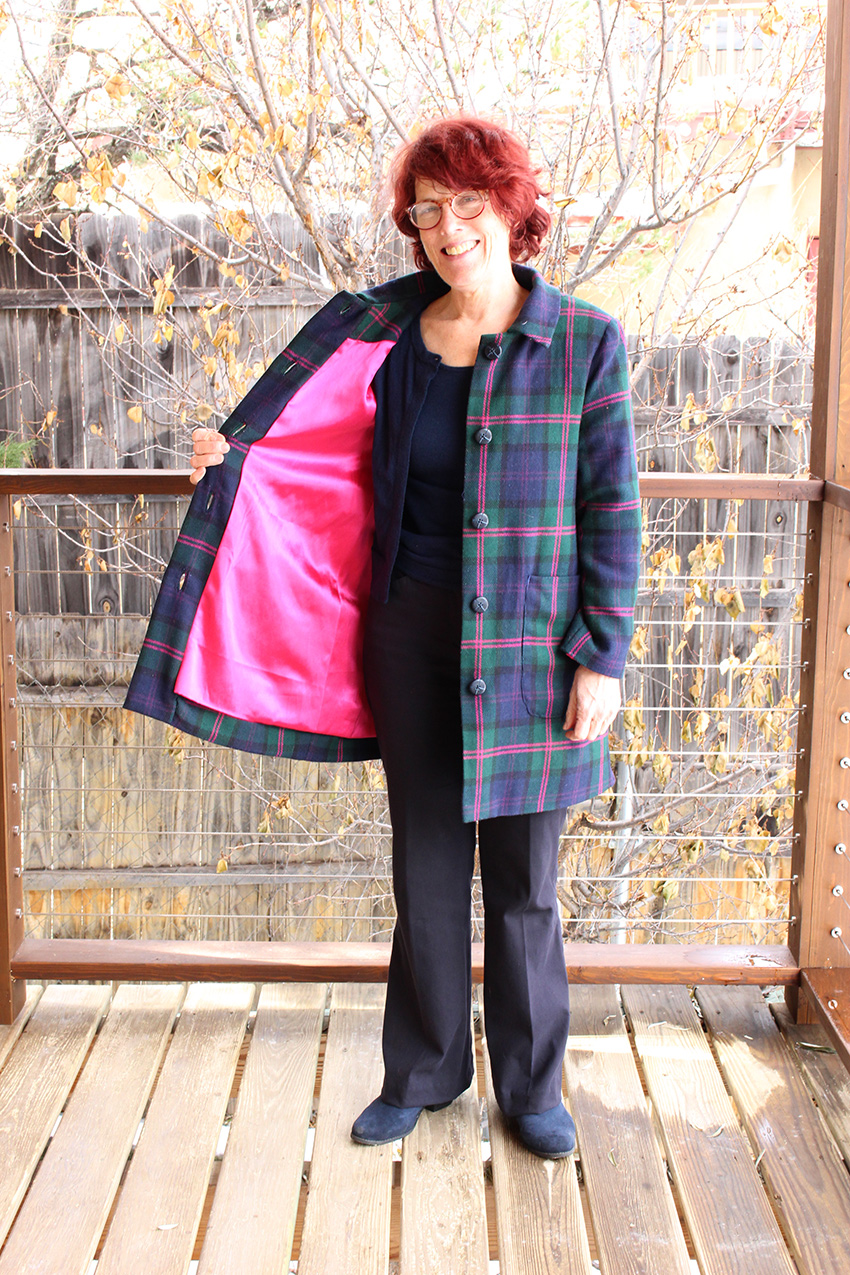 Sunback lining in very bright fuchsia
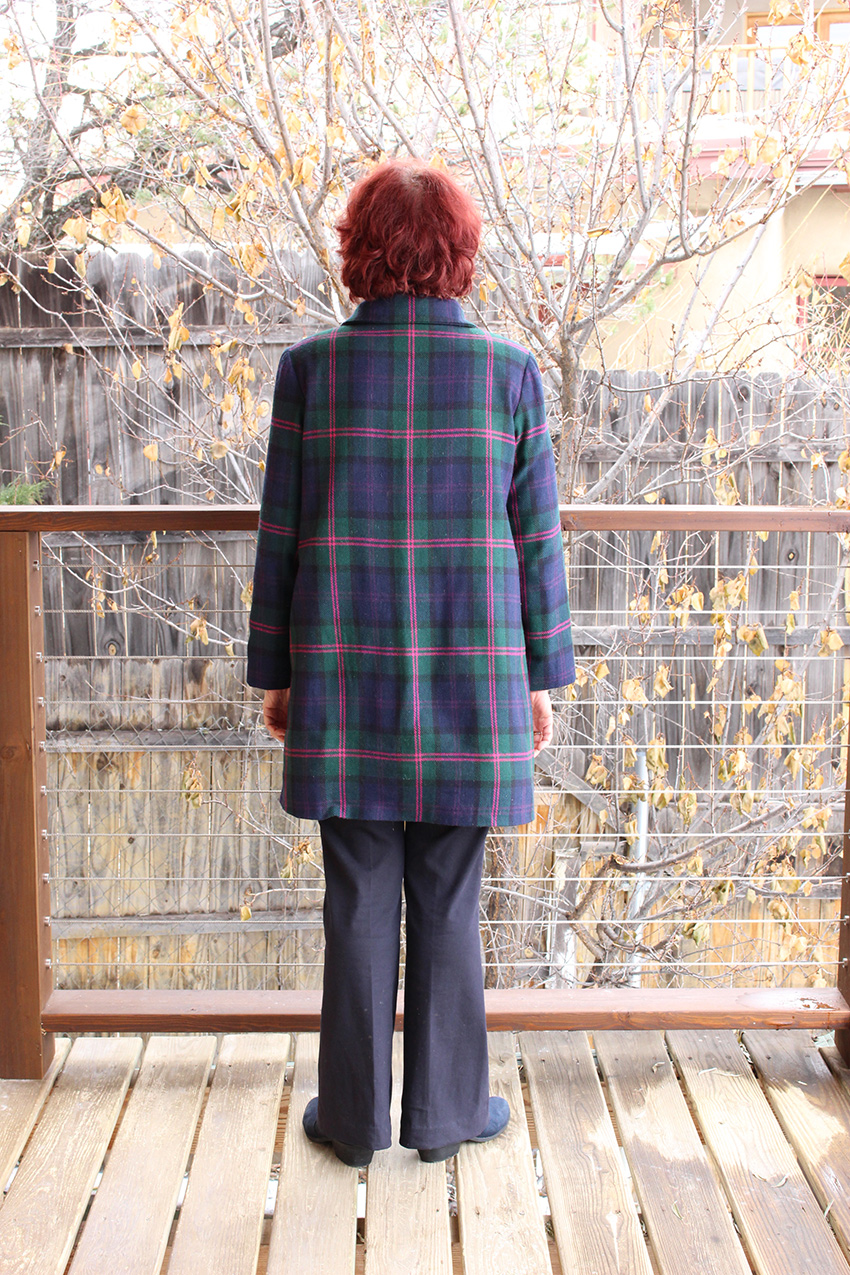 Back of the coat
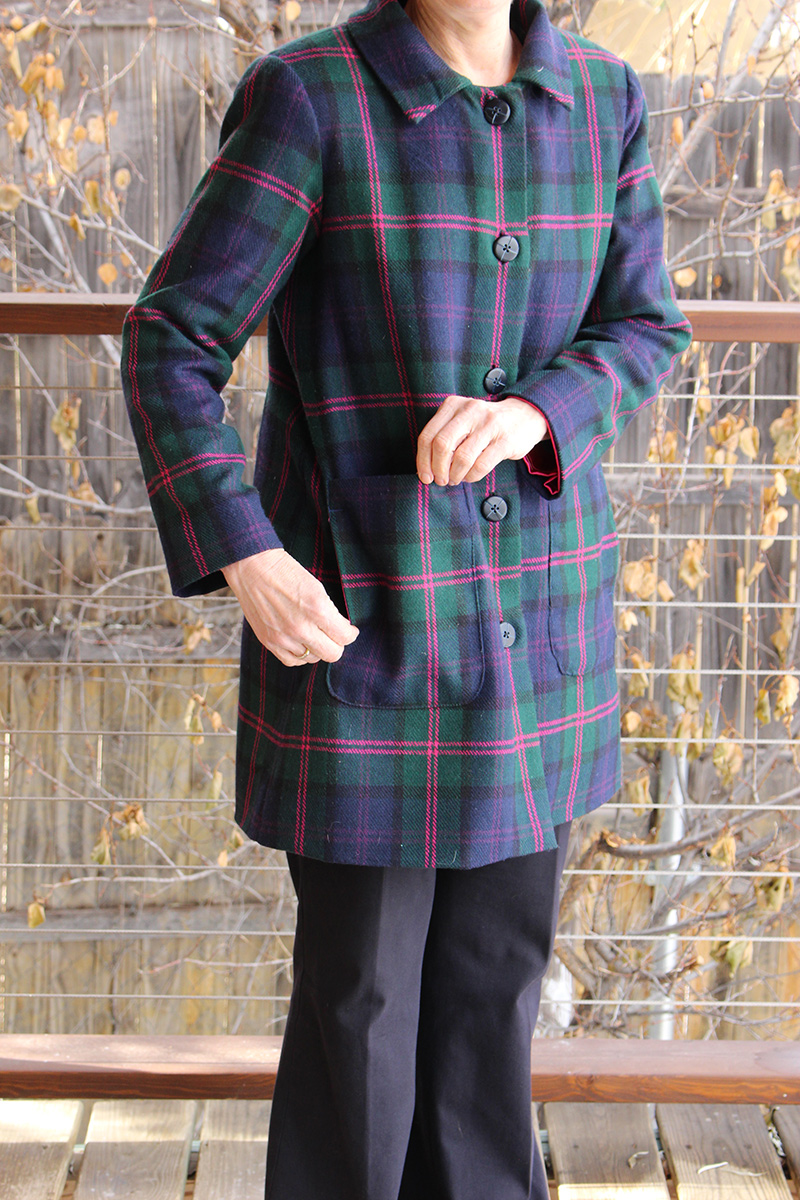 Pocket detail — opens from either the top or side
The work and research you put into that is amazing! No wonder it turned out to be great. Your next one will be twice as terrific!
Thanks for all the links. I’m planning my first coat and that info will be a great help.
Oh my goodness ! What an amazing first coat. Your research is impressive and so is choosing a plaid for your first. Great job!