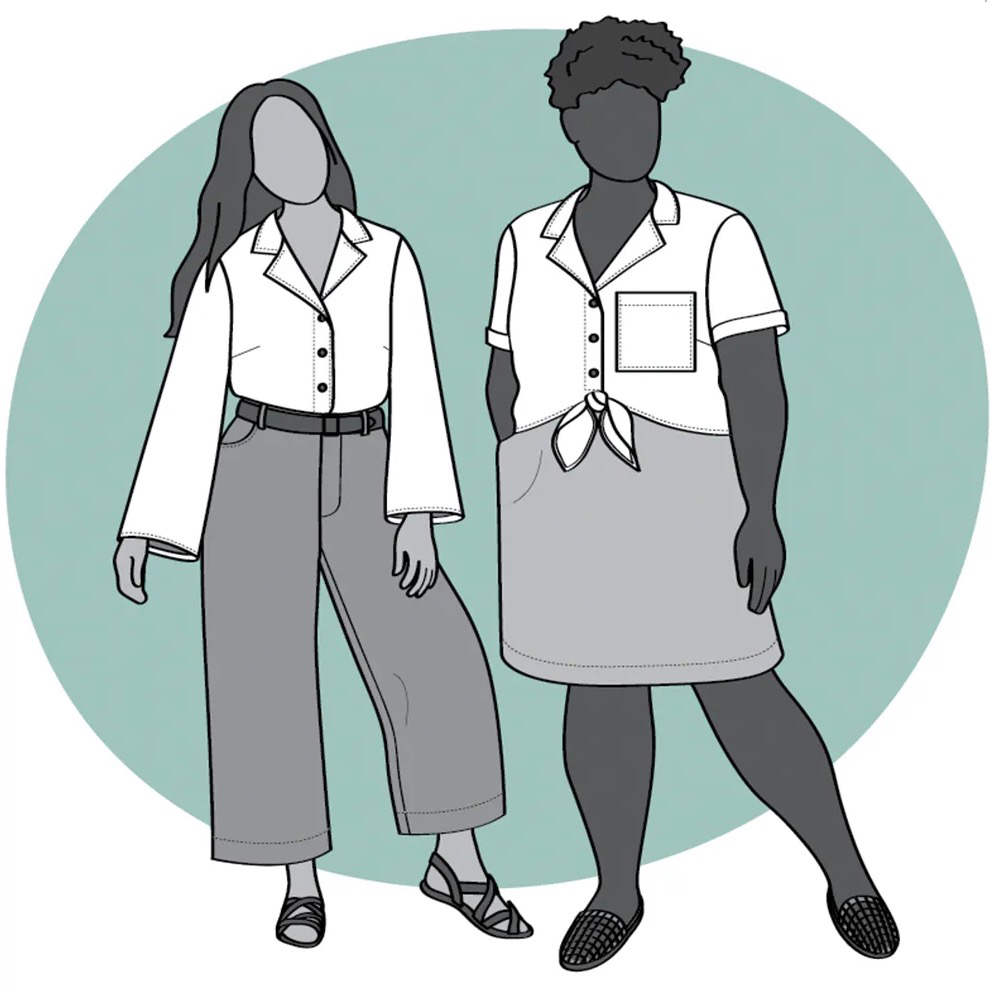
I’ve been wanting to add a tie front button up top to my wardrobe, and when Helen’s Closet Patterns announced their Gilbert Top, it seemed like a good pattern to try. It’s described as “a button up shirt with a camp-style collar and a relaxed fit. View A has short sleeves and a tie-front. It is slightly cropped but still very comfortable with mid to high-rise bottoms. View B has long bell sleeves and a longer length, perfect for tucking into high-waisted pants.” Here’s the drawings (view B on the left, view A on the right):
I hesitated because the sleeves didn’t look like they would fit under my cardigans, and I’m trying to make a wardrobe that I can wear year round. But very quickly after the pattern release, Helen posted a hack to make a sleeveless shirt and I was sold.
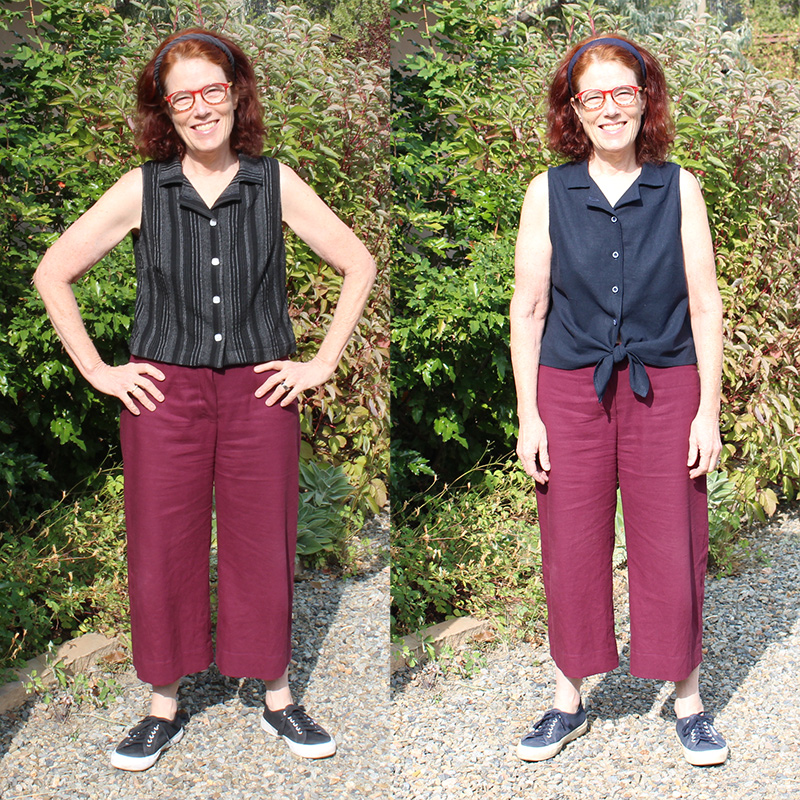
I’ve now made the top twice, once with the tie and once without. In the photo at the top of the post, the one on the left is a polyester viscose woven and the navy on the right is Kaufman Brussels Washer Linen Blend.
The instructions are thorough and the illustrations good, and both tops went together without a hitch. There are a number of steps to alter the pattern to make it sleeveless, but Helen’s instructions carefully walk you through what you need to do. Because there were so many alterations, I made a mock-up before cutting into my good fabric.
From the size chart, I would have made a size 6 (I’m B:35 W:29 H:40, 5’3″ tall). But Helen suggested sizing down for a more fitted shirt for the sleeveless version, so I made a size 4 after doing some flat pattern measurements and comparing the pattern to other button-ups I’ve made.
My pattern alterations:
- Brought in the shoulder seam 3/4″
- Altered the angle of the shoulder seam 1/4″
- Helen suggests shaping the armscye edge of the shirt back, and I used her measurements, but in my muslin/test garment, I found I had to shape a bit more (a total of almost 1/2″) to deal with my pointy shoulder blades
- She also suggests raising the armscye, which I tried, but in my muslin found I had to take the extra fabric out.
- Raised the bust dart 1/2″
- In my muslin, I found the first button too low. Also I wanted to be able to button the shirt all the way to the top, so I used 5 buttons rather than 3. If I made the tie version again, I’d have to figure out what to do with the bottom button, it’s too close to the ties, as you can see in the photo at the top.
- The pattern is drafted for someone 5’6″. For the tied top, I didn’t shorted the top. For the black/grey stripe, I did a 1-1/4″ hem rather than a 5/8″ hem.
I’m really pleased with my tops. They will both get a lot of wear. And I have earmarked some more fabric for another one with the tie front.