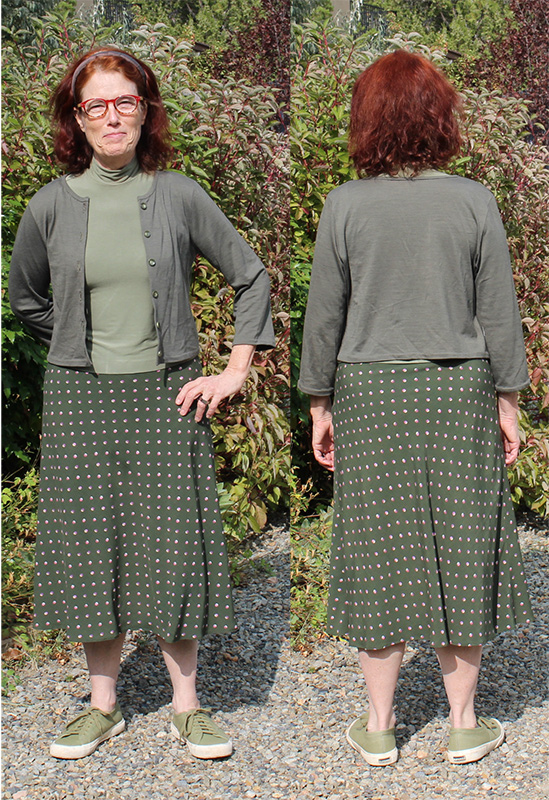
For the work from home module wardrobe sew-along challenge, I planned to make the Tessuti Evie Bias Skirt. But I decided to make a test garment first, to check the size and fit. I’ve had a 2 yard piece of rayon poplin in an olive green with pink/beige dots from Workroom Social in my stash for several years. The color and print are right up my alley, but while I’ve considered it for multiple projects, it never seemed quite right. But this year I’m determined to find uses for the orphan fabric in my stash, so it got drafted for the Evie test fit.
Little did I know how much fun this would be to sew, all the new things I got to try and how happy I am with the finished skirt!
The Evie is described as a “floaty and flared midi-length bias skirt pattern and includes two versions. View A is finished with a bound waistline and side zipper opening and View B is a pull-on version with scalloped elasticised waist.” You can see Instagram examples here and at the bottom of the post I’ve listed several blog reviews that I found helpful.
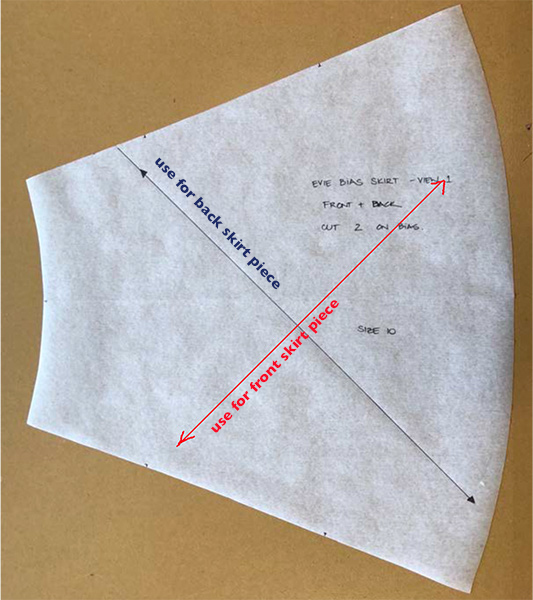
The pattern is very simple, with the same piece used for both the front and back. However, the PDF includes only 1/2 the piece, you have to make a tracing to get the entire front (or back). I made a size 8 at the waist, grading out to a 10 at my hips. I’m w: 29″, h: 40″, and 5’3″.
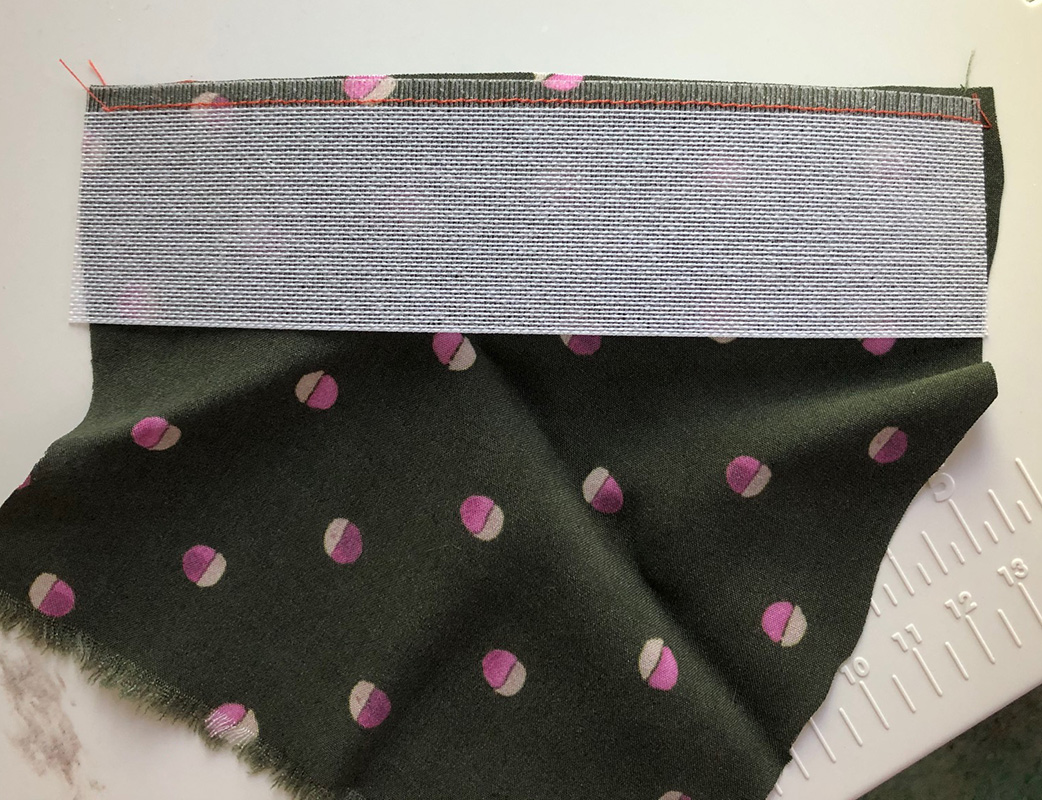
I decided to make view A, with the zipper, as my local Joann didn’t have the needed 5/8″ elastic (but they had lots of invisible zippers). But I also didn’t have enough fabric to cut the very long bias cut waistband piece that view A called for. While I procrastinated on what to do, I asked Google about sewing bias cut skirts. I found a Mimi G sew-along for Mccall’s 7931, a very similar pattern. That pattern has a facing, not a waistband, and Mimi G used a 1″ wide strip of grosgrain ribbon instead of the facing. Problem solved! I happened to have a piece of matching (beige) 1″ grosgrain ribbon that I could use to finish the top of the skirt rather than the waistband called for in the pattern.
Mimi G’s video has some tips for working with bias cut fabric — don’t handle the fabric or let it drape over the edge of the work surface or it will stretch out. Serge the side seams before doing anything else (sort of like stay stitching). And sew both side seams of the skirt from bottom to top.
I also found another helpful youtube video: Professor Pincusion’s How to Cut and Sew on the Bias. She suggests using a narrow zigzag stitch on the seams to add in some stretch. But she also has a lot to say about pattern layout. She says that fabric has 2 biases — perpendicular to each other. And it’s important to have the front of the skirt on one bias and the back on the other.
The Tessuti pattern doesn’t have a layout diagram, but does have both grainlines indicated on the pattern. So as not to get confused, I drew the grainlines in different colors, and wrote “Use for front skirt piece” and “Use for back skirt piece” on the pattern.
The pattern calls for using a tear-away interfacing for both the waist and the seam where the invisible zipper is inserted. That interfacing isn’t available in the US, and Professor Pincusion recommended iron-in lightweight tricot, so that’s what I used.
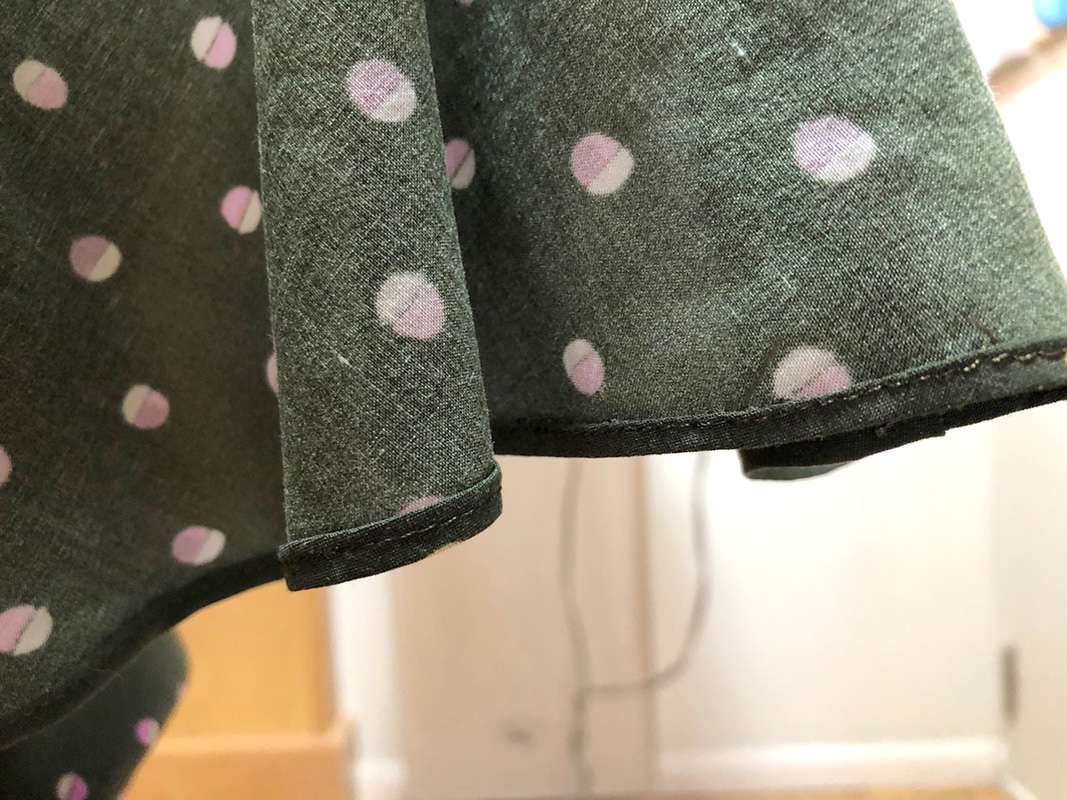
I thought the skirt was a bit short when I was done, so I wanted to make the smallest baby hem I could. Enter the Ban-rol waistband stabilizer. I got some from Style Maker Fabrics. They say Ban-rol can be used “as a stabilizer and guide for sewing tiny rolled hems on even the most difficult fabrics, like rayons, sheer, and more.” It made the job so much easier!
This video does a much better just than I can of explaining how to use the stabilizer, but here’s a picture of my first test. You sew the stabilizer to the edge of the front of the fabric, then turn the stabilizer to the back, sew the hem in place, pull out the stabilizer and you’re done.
It was surprisingly easy, although slightly awkward hemming a wide skirt, as you need a piece of ban-rol that is as long as the hem. And here’s my tiny hem.
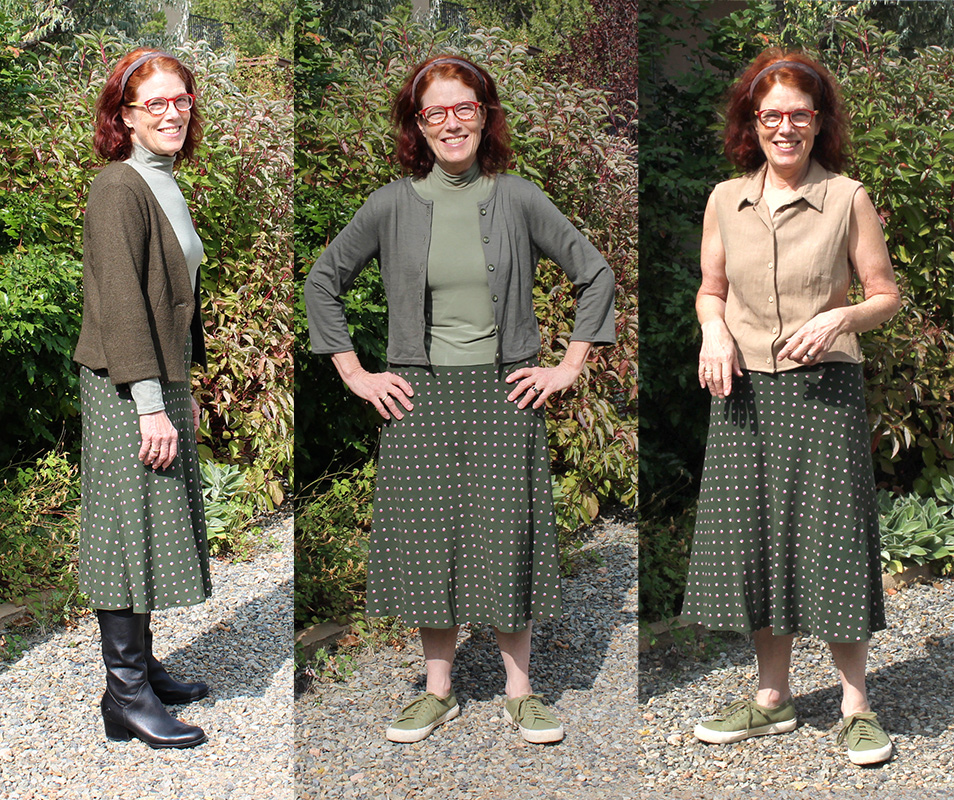
Turns out I have lots of tops and toppers to wear with my new skirt, all year round.
for winter: True Bias Nikko turtleneck and Decades of Style 3’s a Charm jacket
for fall and spring: True Bias Nikko turtleneck & self-drafted cardigan;
for summer: cropped V8772
Resources
Tessuti Evie Bias Skirt pattern
Evie on Instagram
Helpful blog posts: Fiona (Diary of a Chainstitcher), Hollydolly
Mimi G bias skirt sew-along
Professor Pincusion’s How to Cut and Sew on the Bias
Instructions for doing a baby hem with Ban-roll waistband stabilizer, which is available from Style Maker Fabrics