Helen’s Closet Patterns Gilbert Top

Monday September 21, 2020

2 Gilbert Tops

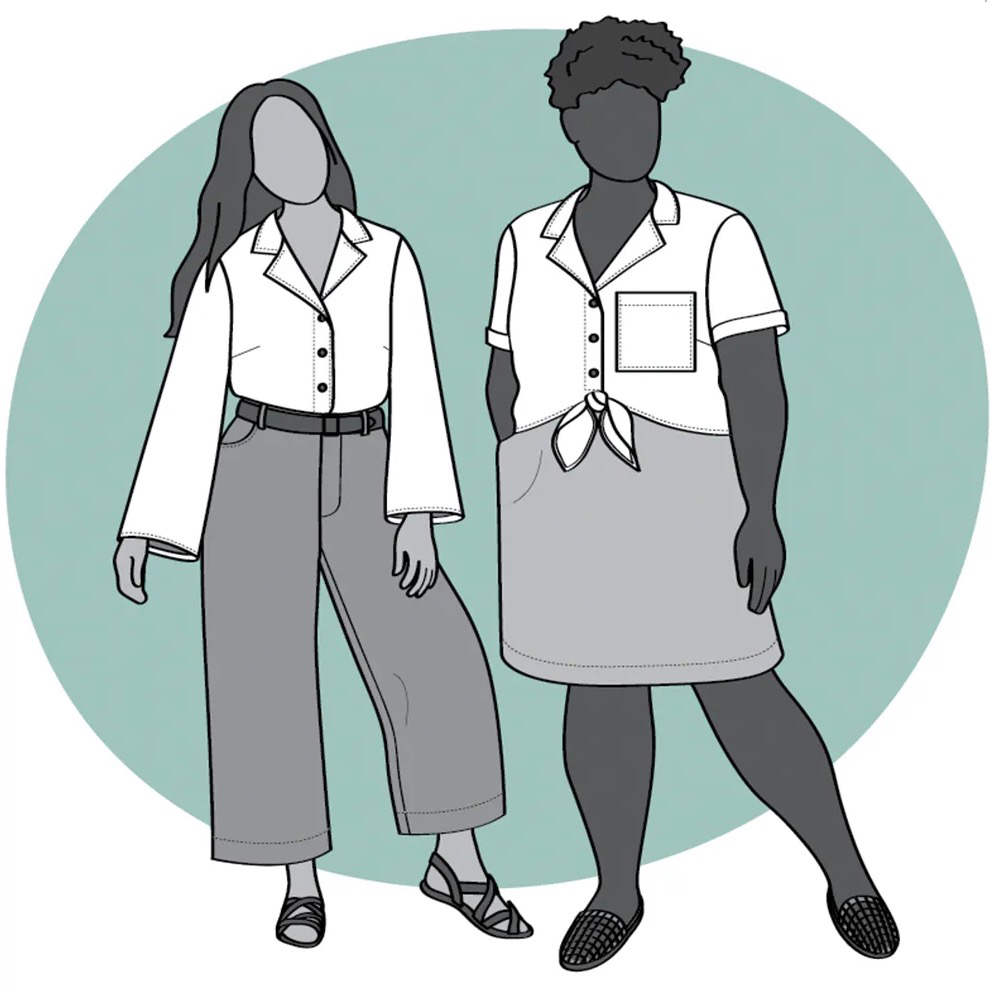
I’ve been wanting to add a tie front button up top to my wardrobe, and when Helen’s Closet Patterns announced their Gilbert Top, it seemed like a good pattern to try. It’s described as “a button up shirt with a camp-style collar and a relaxed fit. View A has short sleeves and a tie-front. It is slightly cropped but still very comfortable with mid to high-rise bottoms. View B has long bell sleeves and a longer length, perfect for tucking into high-waisted pants.” Here’s the drawings (view B on the left, view A on the right):

Helen's Closet Patterns Gilbert Top

I hesitated because the sleeves didn’t look like they would fit under my cardigans, and I’m trying to make a wardrobe that I can wear year round. But very quickly after the pattern release, Helen posted a hack to make a sleeveless shirt and I was sold.

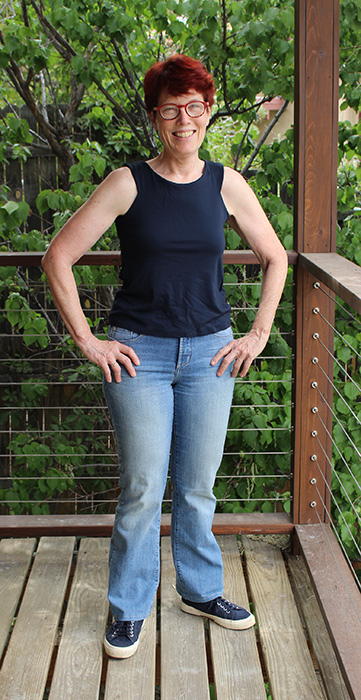
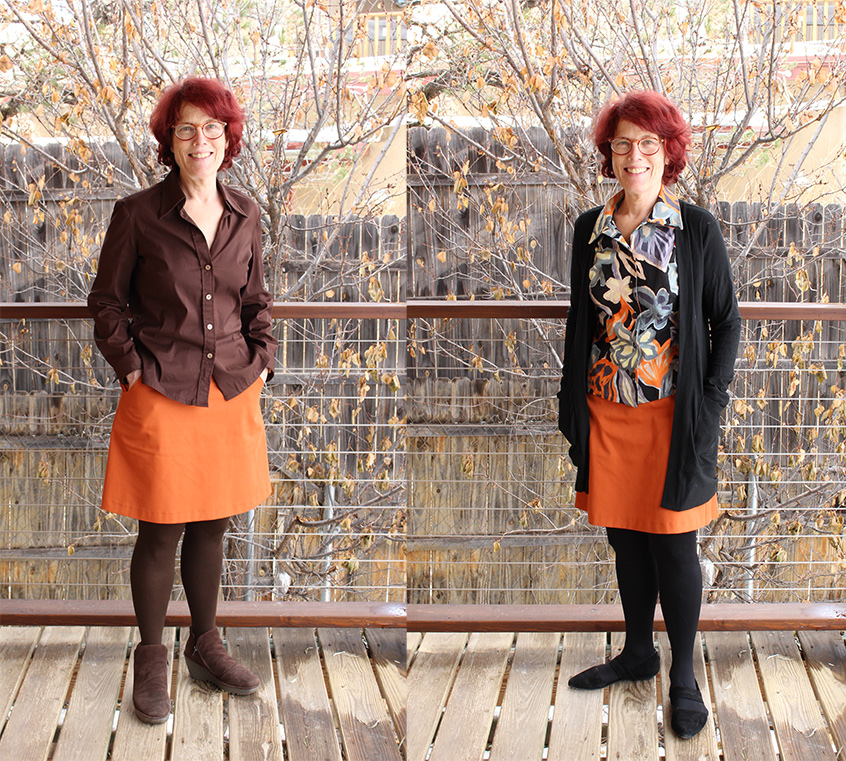
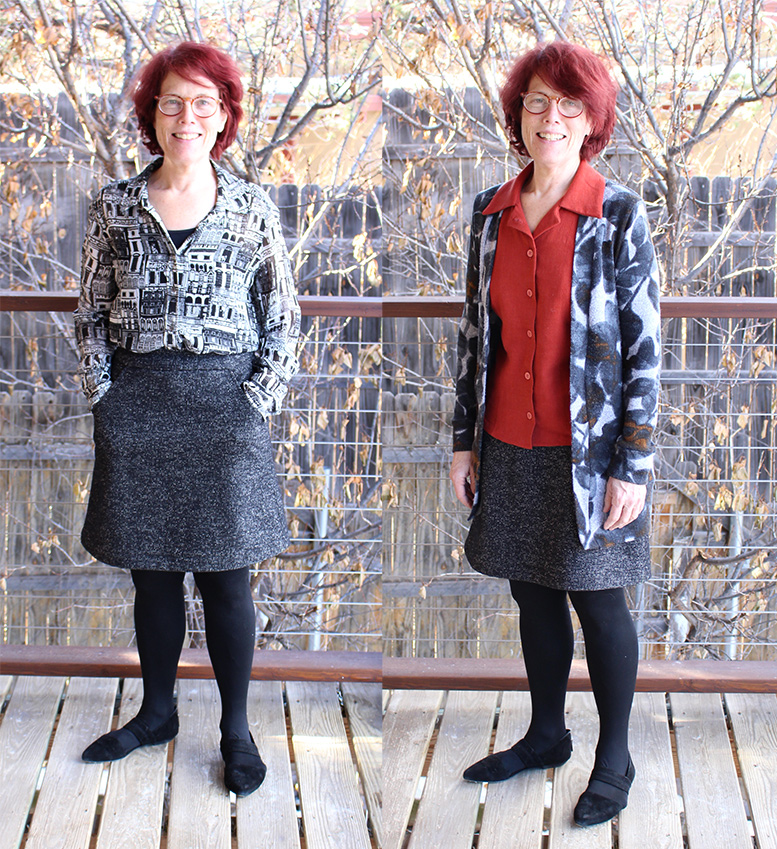
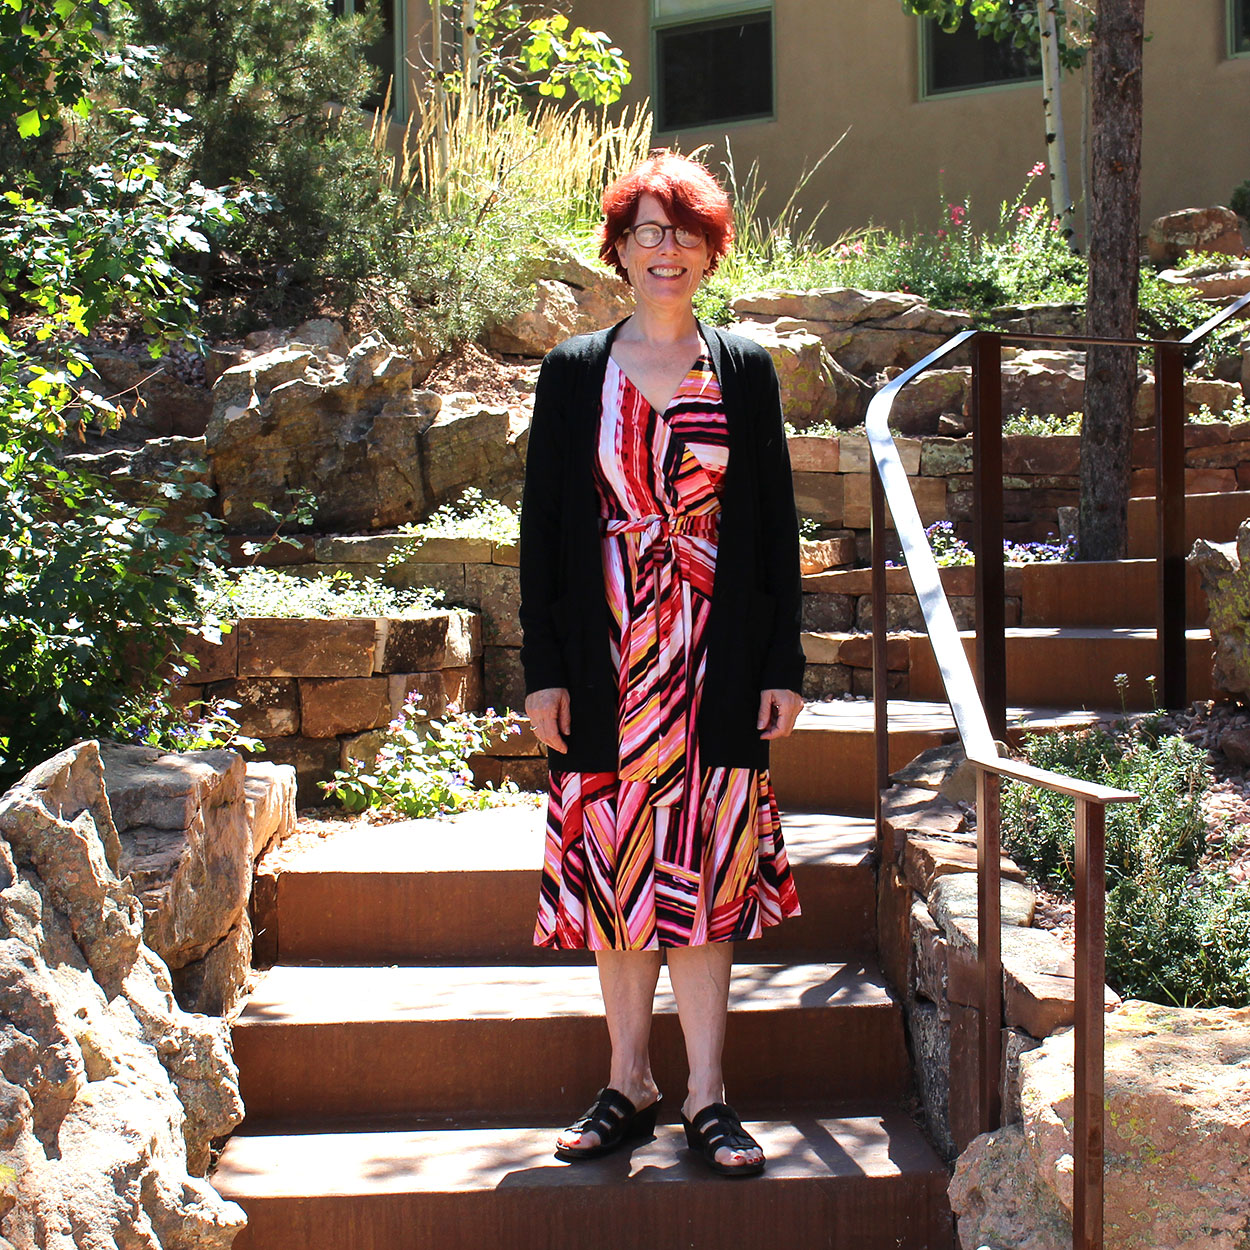
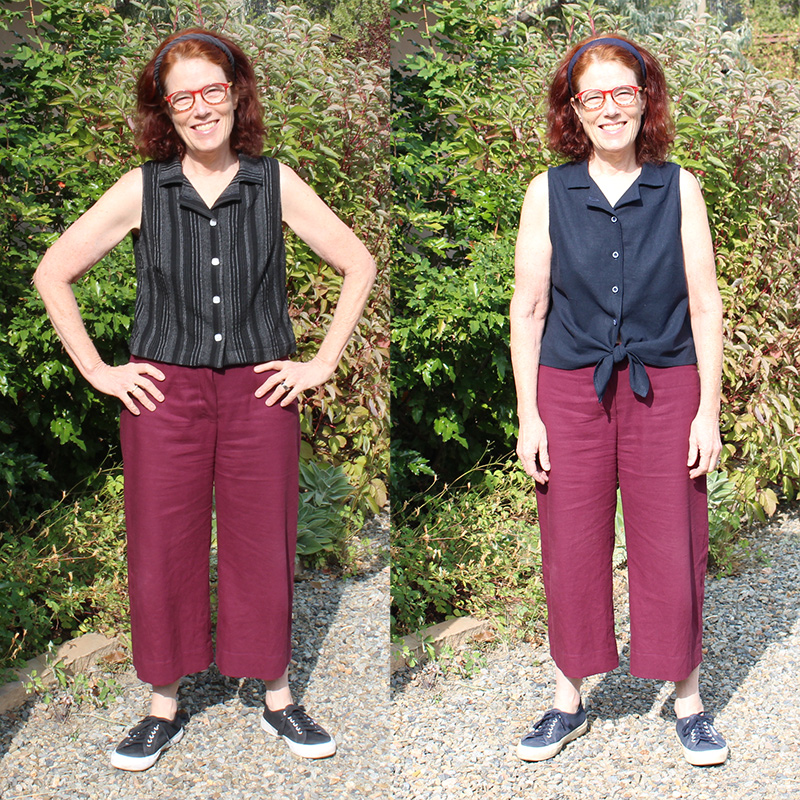
I’ve now made the top twice, once with the tie and once without. In the photo at the top of the post, the one on the left is a polyester viscose woven and the navy on the right is Kaufman Brussels Washer Linen Blend.

The instructions are thorough and the illustrations good, and both tops went together without a hitch. There are a number of steps to alter the pattern to make it sleeveless, but Helen’s instructions carefully walk you through what you need to do. Because there were so many alterations, I made a mock-up before cutting into my good fabric.

From the size chart, I would have made a size 6 (I’m B:35 W:29 H:40, 5’3″ tall). But Helen suggested sizing down for a more fitted shirt for the sleeveless version, so I made a size 4 after doing some flat pattern measurements and comparing the pattern to other button-ups I’ve made.

My pattern alterations:

  1. Brought in the shoulder seam 3/4″
  2. Altered the angle of the shoulder seam 1/4″
  3. Helen suggests shaping the armscye edge of the shirt back, and I used her measurements, but in my muslin/test garment, I found I had to shape a bit more (a total of almost 1/2″) to deal with my pointy shoulder blades
  4. She also suggests raising the armscye, which I tried, but in my muslin found I had to take the extra fabric out.
  5. Raised the bust dart 1/2″
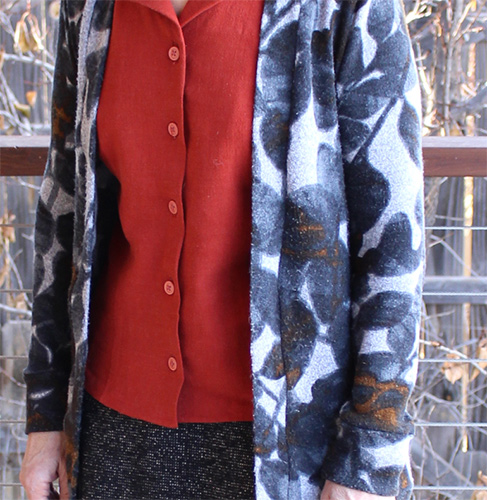
  6. In my muslin, I found the first button too low. Also I wanted to be able to button the shirt all the way to the top, so I used 5 buttons rather than 3. If I made the tie version again, I’d have to figure out what to do with the bottom button, it’s too close to the ties, as you can see in the photo at the top.
  7. The pattern is drafted for someone 5’6″. For the tied top, I didn’t shorted the top. For the black/grey stripe, I did a 1-1/4″ hem rather than a 5/8″ hem.

I’m really pleased with my tops. They will both get a lot of wear. And I have earmarked some more fabric for another one with the tie front.

Naughty Bobbin Patterns Cookie Knit Shirt

Thursday May 7, 2020

I think I would only were collared shirts, so I’ve made quite a few button-ups. But sewing them is fraught with challenges.

  1. getting the points on the collar to to be point-y, not round, and to match each other
  2. getting the collar stand and button placket to match vertically
  3. setting in the sleeves without puckers
  4. making a neat cuff placket
  5. making straight buttonholes
  6. getting the buttons sewn on in the right place

The Cookie Shirt from Naughty Bobbin Patterns is designed to be used with knits or stretch fabric and alleviates 2 of these challenges. The collar has a non-standard construction that make the points not a problem. And, as with a knit tee, the sleeves are set in flat, so no basting and crimping to get them into a too small round armhole.

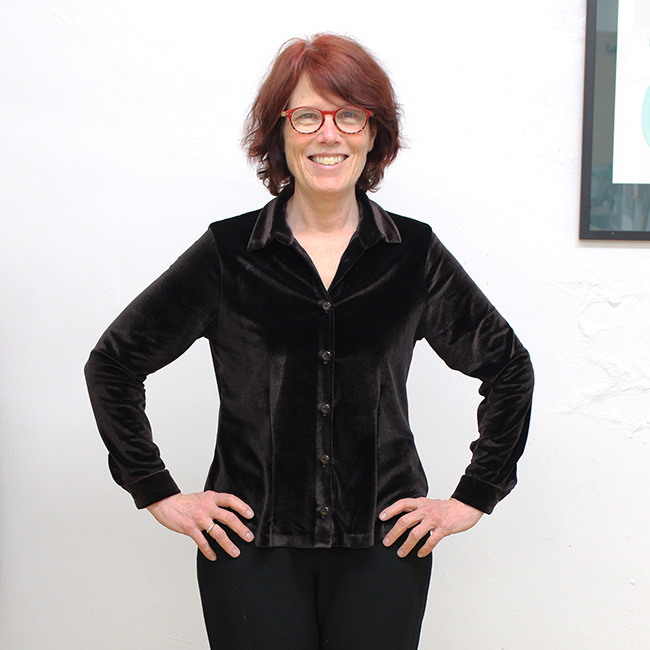
My fabric choice — a stretch velvet — isn’t ideal. It’s thick and my sewing machine didn’t like sewing it, but I’m pleased with the finished shirt.

The pattern

The PDF-only pattern comes in sizes S to XL, bust 32″-46″. It is “a knit version of the classic button-down dress shirt…featuring full length sleeves into 2” cuffs and a looser fit through the body.” There is no sew-along and the instructions are terse, much like the instructions in Burda Magazine. I wouldn’t attempt this as my first button-up shirt.

According to the size chart, I should start with the small and grade to medium at the waist and large at the hips (I’m B35 W29 H39). There are no finished measurements. So I compared my TNT woven shirt pattern to the Cookie pattern and determined a small would be fine, and probably a bit too big. So there is a lot of ease, especially though the waist and hips.

The construction

I made 2 fitting alterations — based on my TNT woven pattern, I shortened the length 4 inches, and shortened the sleeve 1 inch. Next time I would un-shorten the sleeves. I also removed the lined back yoke, thus making the back one piece. I didn’t think I’d like the velvet against my back. My fabric is quite thick and I also thought it would make the shirt bulky.

As I mentioned above, the collar construction is non-standard. It’s one long piece and sewn like a neck band on a t-shirt. This is the pattern piece below. You sew the short ends together to make a back seam, fold it in half vertically and sew the curvy edges together. The points aren’t formed by a pivoted sewing line, so when you unfold the collar, there’s no poking and prodding to get crisp corners. I’m going to adapt this to my TNT woven pattern.

Most of the seam allowances are 3/8″, except for the collar stand and collar construction, where they are 1/4″. My sewing machine hated this tiny seam allowance with the stretch velvet — no amount of pins would keep the collar stand and the shirt aligned as I sewed them (I used my walking foot and a stretch needle). After unpicking several times, I resorted to wondertape and a bit of washable fabric glue to get the job done.

The one problem I had with the instructions was the continuous lap sleeve placket — they didn’t make sense to me. My TNT woven pattern uses this same placket (a bias strip sewn around a slit in the sleeve), so I pulled out the instructions for that pattern. Sew-a-holic has a tutorial for sewing this type of placket here.

Pretty much everything else went together easily. For the hem, I used double sided fusible stay tape , just as I would on a knit tee. I attached it before I sewed up the sides of the shirt, leaving on the paper. After sewing in the sleeves and closing up the sides, I removed the paper, folded the hem up, using the edge of the stay tape as a guide, and ironed it down. I hand-sewed the hem, as I didn’t like top-stitching in the velvet.

The finished shirt

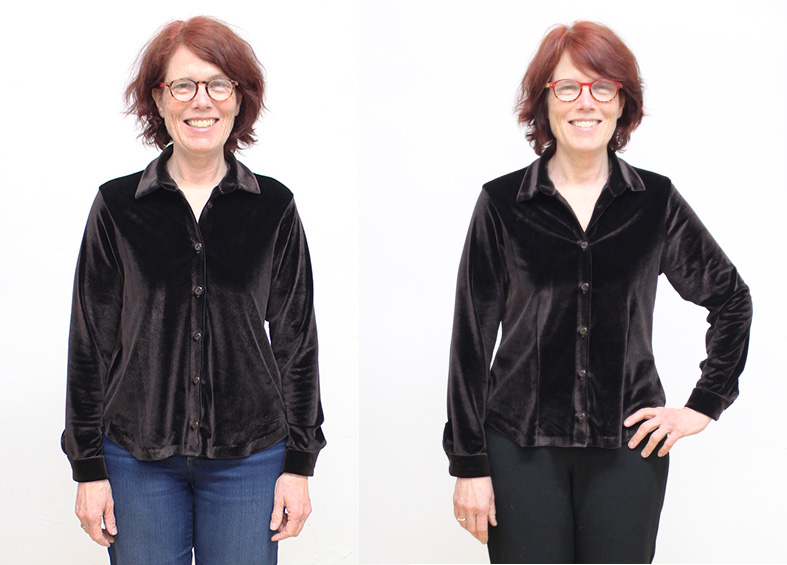
The finished shirt was really big in the front. I wore it for a day and knew I wouldn’t wear it again. There was too much fabric in front to properly tuck in the shirt and, untucked, cold air kept coming up the front. So I knew I had to make it sit closer to my body.

I took the sides in at the waist about 3/4″ on each side. That helped some but not enough. So I resorted to fish-eye darts on the front, starting below my bust, maximum at the waist, and ending at the hem. I was hesitant to put in the darts as the fabric was tricky to iron well. I put a piece of scrap velvet under the shirt when ironing and used a press cloth, but I wasn’t all that successful in getting the darts to lie flat.

Below, on the left is no darts. On the right, darts. I’m pleased with my shirt. But next time I’d use a thinner knit.

New Look 6459 Cropped Top, woven and knit

Sunday June 30, 2019

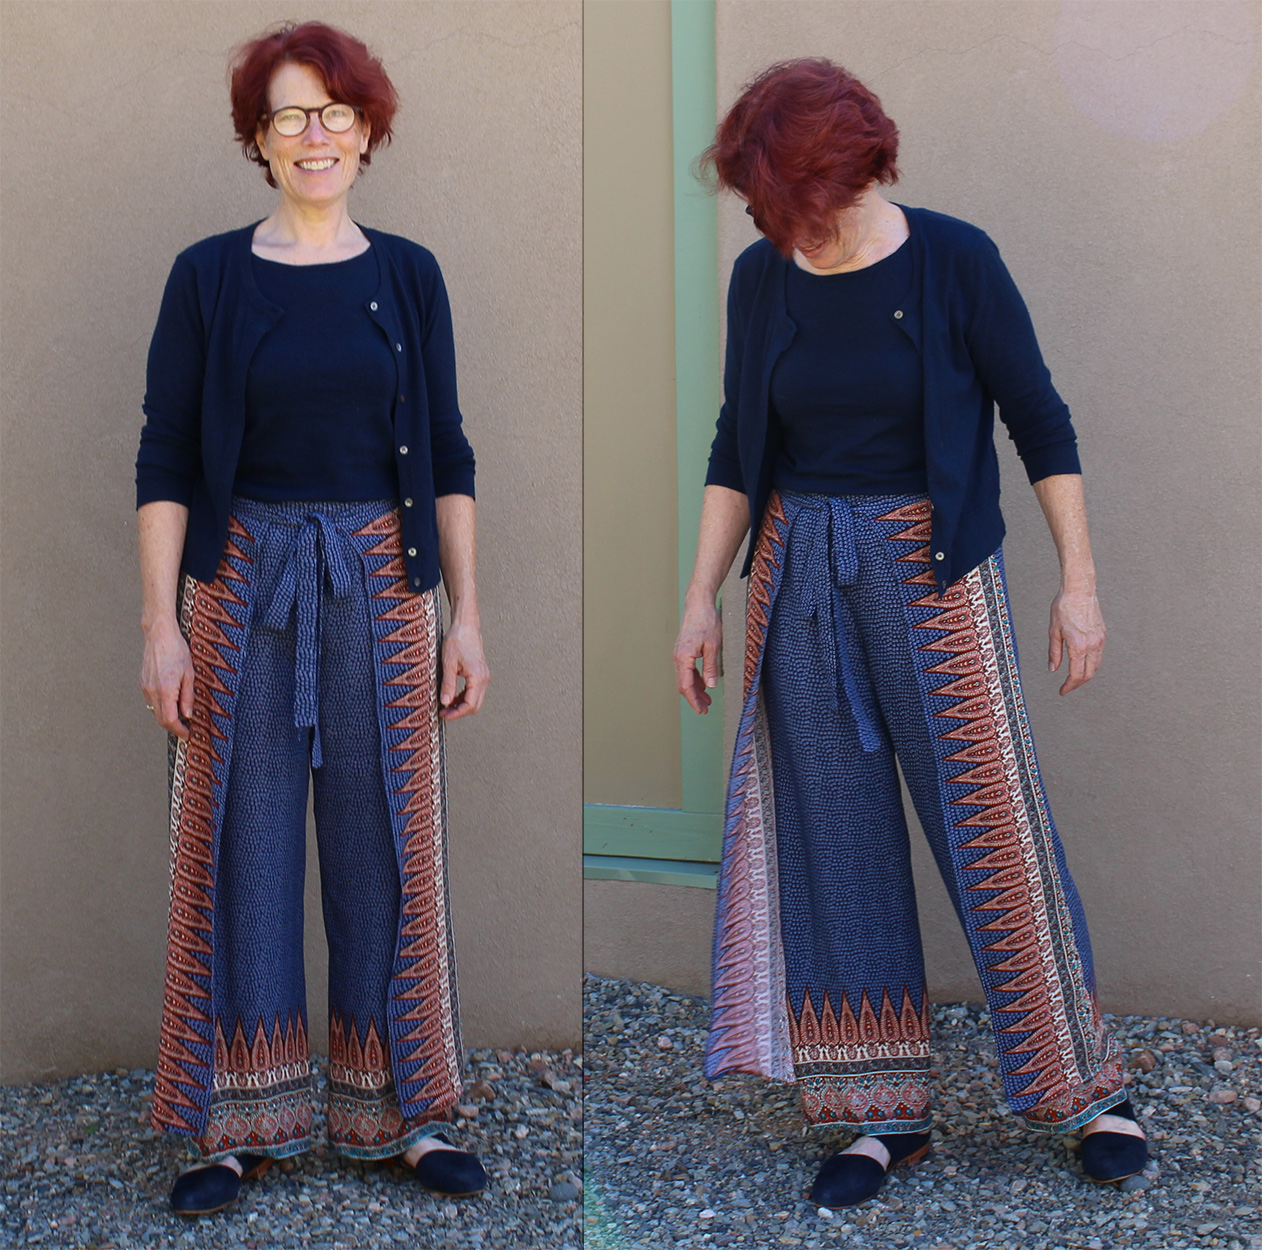
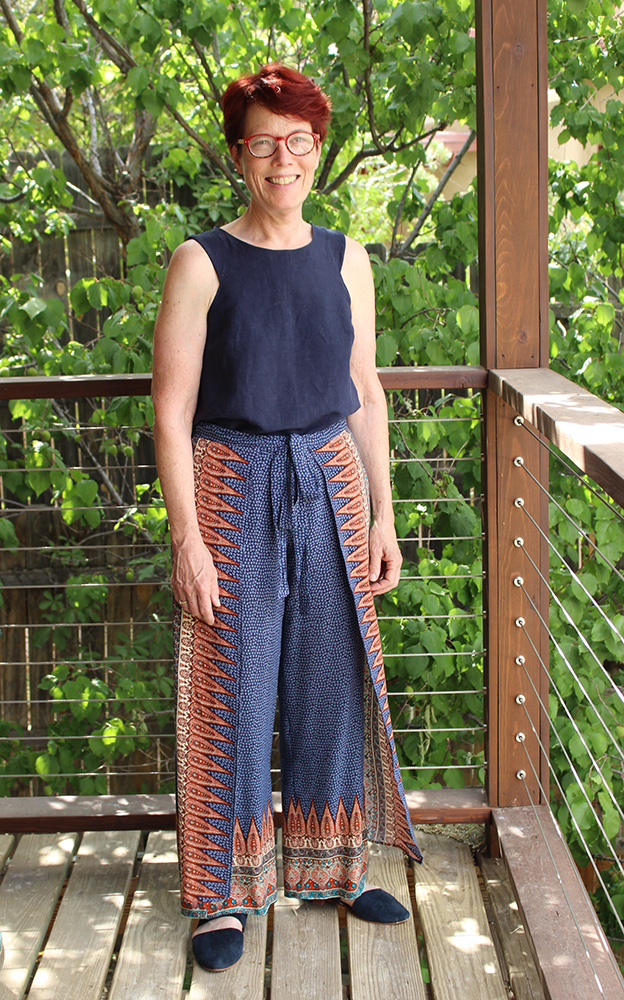
When I made the wrap pants shown below last fall, the only top I had to wear with them was a navy wool shell & cardigan. Much too itchy for summer, so this spring I looked for a more appropriate top. I wanted something sleeveless, and to use a piece of navy linen/rayon blend fabric in my stash.

New Look 8134 Wrap Pants

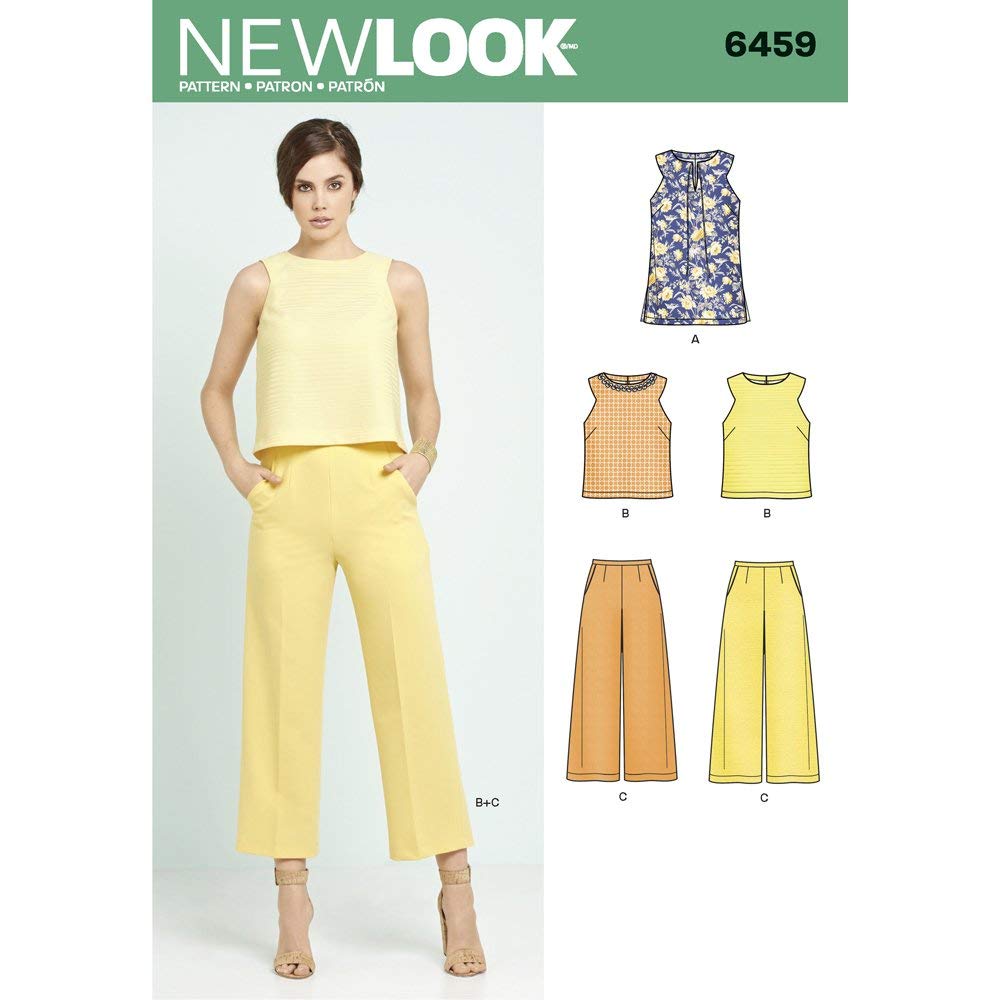
I looked through the patterns I already own first and was immediately drawn to the neckline on New Look 6459, view B. I had bought the pattern for the pants, but now the top looked like a good candidate.

New Look 6459 pattern envelope cover

The reviews on Pattern Review mostly said the top was really cropped and that the neck and armhole facings didn’t stay down. No biggie, I thought, I’ll just lengthen the pattern and draft an all-in-one facing.

My alterations

  • Made a straight 12
  • Lengthened the pattern by 2″
  • Made an all-in-one facing using this tutorial. I attached it using this youtube video.
  • I have pointy shoulder blades, so I usually have to make a prominent shoulder blade adjustment to the back of woven tops (the result is a neckline dart). I use this video for the alteration.

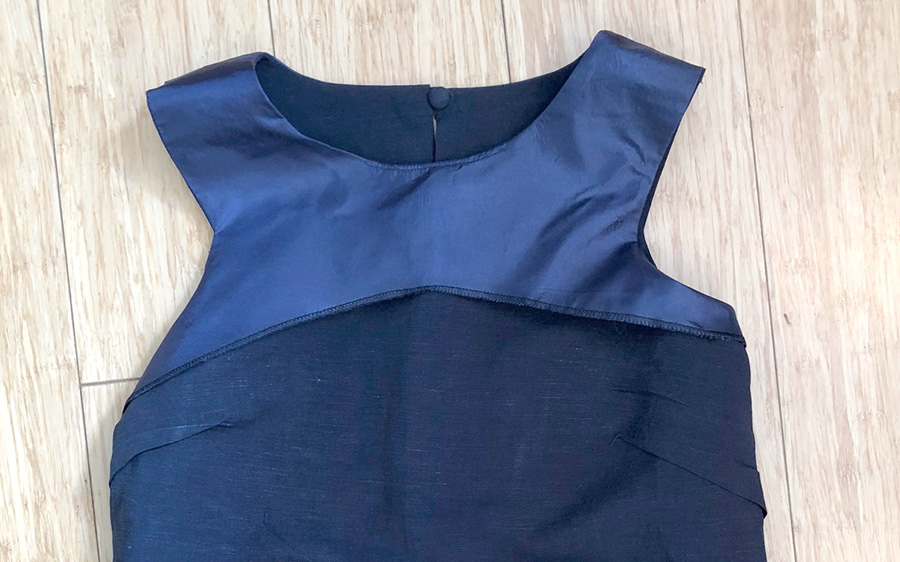
Here’s a photo of the shirt inside out so you see the facing, as well as the button/loop closure on the back. The facing is made from some left over lining.

shirt inside out so you see the facing, as well as the button/loop closure on the back

And the finished top….

Finished top, NL6459 in linen-rayon blend

The problem that no one on Pattern Review mentioned is that the top isn’t particularly bra friendly, even when I added lingerie holders, so I’m wearing a strapless bra.

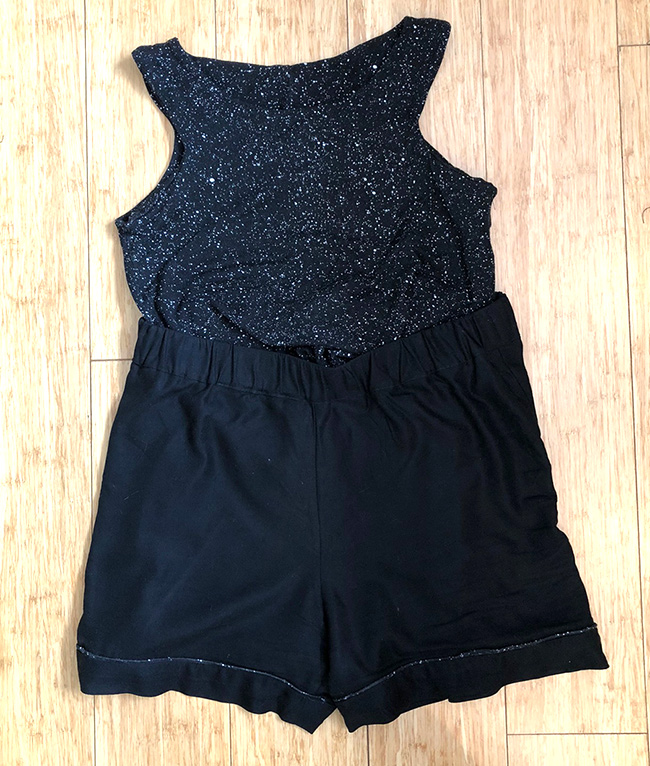
But I like the neckline, and thought if I made it up in a knit rather than woven fabric it would make a good alternative to a tank top. I compared the pattern to a t-shirt pattern I’ve made before, and decided to size down 1 size, to account for the stretch in the knit fabric. I also made the strap a little wider and the cut-in a little less, to alleviate the bra-showing problem.

I kept almost everything else the same — the added length, the shoulder blade dart and the all-in-one facing. The woven version has a center back seam with a loop & button closure. I kept the back seam, in case I had problems with gapping at my neckline, but sewed up the entire back, removing the closure. I could get the woven version over my head without undoing the button, so figured I definitely wouldn’t need it for the knit version.

Using a small piece of cotton jersey left from another project, I made up a test version. It turned out so well I made a pair of Closet Case Carolyn Pajama shorts to go with it. I made the piping at the top of the cuff on the shorts from the knit used in the top.

And here it is in a lighter-weight ponte (navy Ponte Leggero from Stone Mountain)

Naughty Bobbin Patterns Presto Popover Top

Sunday March 3, 2019

I’ve wanted to take part in one of the many many Instagram sewing challenges that keep popping up, but don’t seem to be able to find one that works with my current sewing plans. Then when the #sewOver50 organizers announced the #so50Visible challenge, I decided to make more of an effort to participate. The challenge is aimed at raising awareness and calling for pattern makers to include older models on pattern covers and in other marketing for their patterns. To participate, you post a make of a pattern that features an older model in the marketing.

I started watching the #so50Visible tag on Instgram and browsing the list that Sue Young put together of pattern companies that use older models. My criteria was to find something that was cold weather appropriate so I could wear it now, not require too much fitting, and use fabric I already had.

Eventually I found the Presto Popover Top by Naughty Bobbin Patterns. It’s a knit top — so easy to fit. It’s got a collar to keep my neck warm, which I like, and long sleeves. And there are quite a few positive reviews on Pattern Review. But I didn’t have any appropriate fabric. Fortunately I was about to place an order at Gorgeous Fabrics and she had a knit pattern that I thought would work.

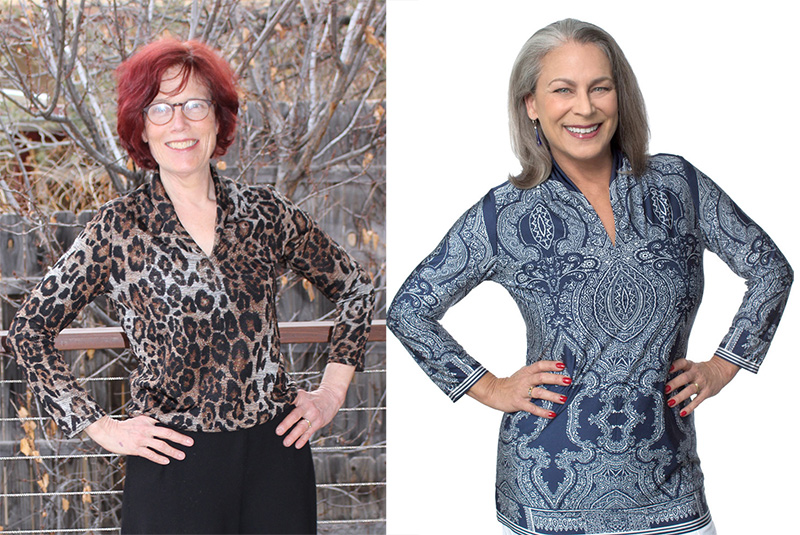
And here I am, on the left, modelling my new shirt and attempting to pose like Coco Savage, the pattern designer, on the right.

Naughty Bobbin Patterns Presto Popover Top

About the pattern: It’s got a clever construction where you cut 2 fronts, sew them together vertically along center front, then connect this to the back using the “burrito method” to get a completely enclosed neckline. The instructions are quite minimal and there are no diagrams or pictures — so I did what I do with Burda patterns and made a doll-sized version of the pattern using scrap fabric to work out the construction. To make the doll-sized pattern, I enlarge the pattern drawings in the layout page of the PDF, cut out the fabric, and use a 1/4″ seam allowance when I sew it together.

I made a size medium, after comparing the pattern pieces to pattern pieces of a t-shirt I’d made previously. And I made 2 alterations: lengthened the sleeves by 4″ to get bracelet length, and shortened the body by 4″ as I wear shirts untucked and most of my pants and skirts are high-waisted (I’m 5’3″).

For next time, I would raise the v-neck a bit (there are 2 options for the v on the pattern, and I made the higher one).

Because the top requires 2 fronts, it uses more fabric then a conventional t-shirt. And I had to do a bit of pattern matching along center front where the 2 fronts meet.

I’ve worn the top 3 or 4 times already, so it’s definitely a keeper. And I’ve been keeping my eye out for fabric to make a second one.

Skirt-a-palooza: New Look 6106

Sunday January 27, 2019

As fall approached in my first full year of garment sewing, I began to feel as if the things I was making weren’t working well together, and a bit more planning was called for. Then I read Sew Altered Style‘s blog post about her Seasonal Sew 3 challenge. The challenge: “Each season, choose 3 patterns that you want to make that season and then commit to making them over a 3-month period.” The example she gives is a small capsule set — pants, shirt, topper. I had just finished making a pajama set — top, pants, kimono/robe — and was really jazzed about how they coordinated, so I decided to try another set. This time it would be a skirt, cardigan and collared blouse.

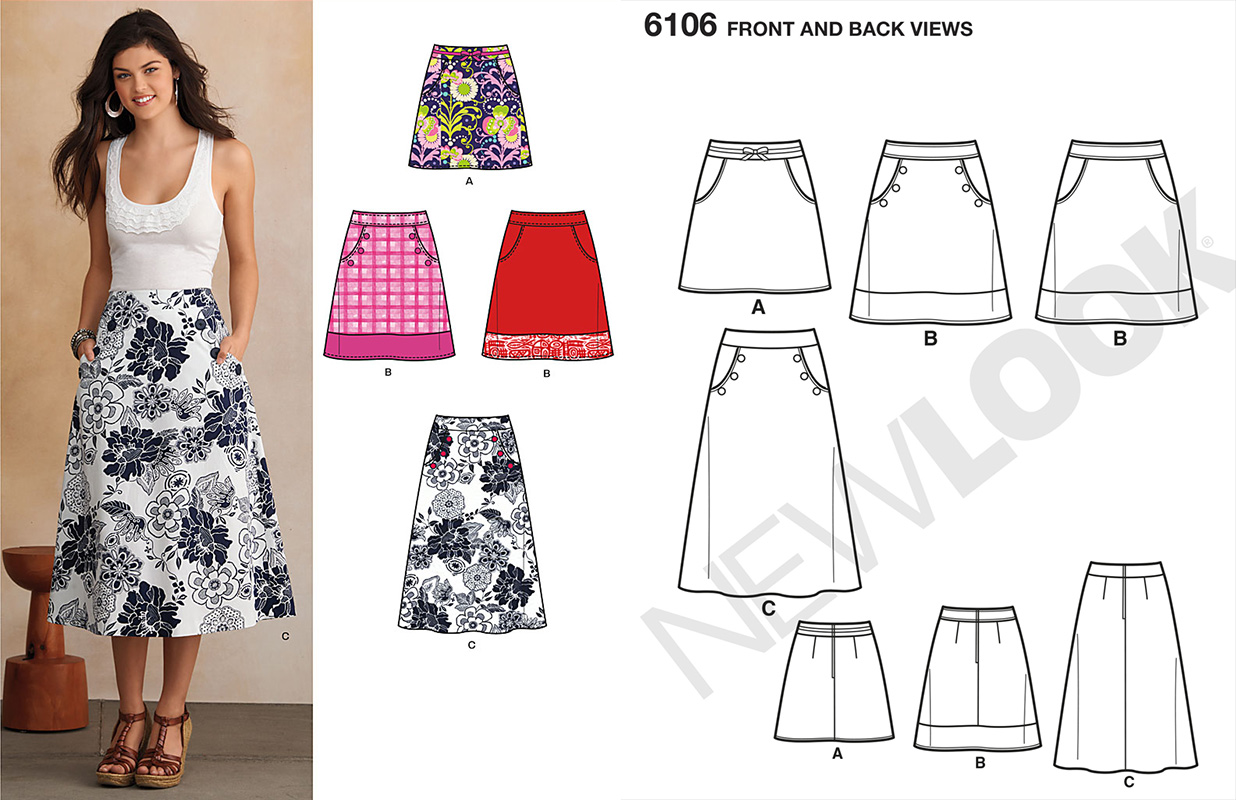
I started with New Look 6106, a simple a-line skirt with a curved waist-band, that I bought when I first started sewing, but hadn’t made yet. I started with View A, without the ribbon at the waist.

New Look 6106

I made a trial version from Eco Twill in Sweet Potato from the Confident Stitch. Eco Twill is “a midweight (7 oz.) fabric made from 65% recycled polyester and 35% organic cotton. The polyester comes from Polyethylene Terephthalate (PET) bottles used for drinking and soda packaging.”

It fit pretty much out of the package, with the following changes

  • Cut a 12 at the waist, grading to a 14 at the hips
  • Used an invisible zipper instead of a lapped zipper, using this tutorial by Kenneth King
  • After sewing it up, the ease in the hips and width at the bottom was way too much, so I took 6 inches off the circumference at the bottom, tapering to nothing at the bottom of the pocket opening.

And I was pleasantly surprised that it went with several things I already had in my closet. And with 52″ fabric, it only uses a yard if you make the facing and pocket lining out of scraps.

On the left, with a ready-to-wear shirt. On the right, with 2 me-mades: blackwood cardigan and sleeveless button up s2215

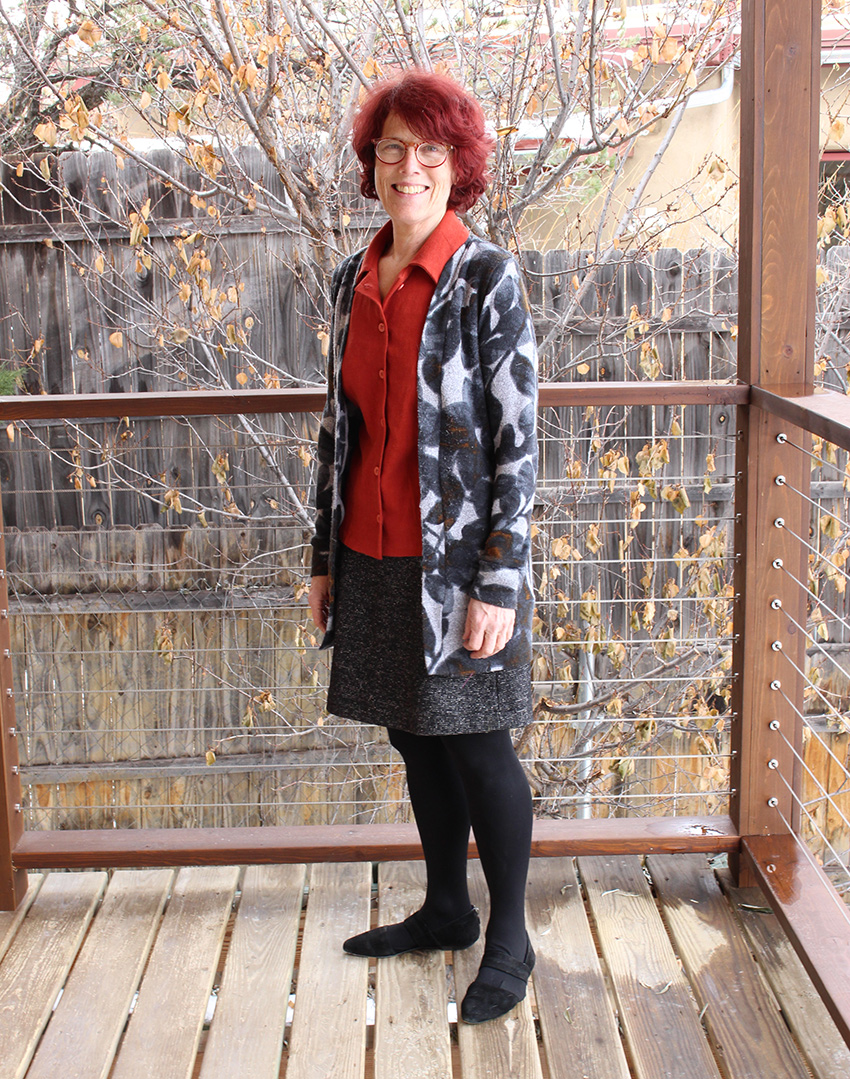
Next up I made the skirt for my seasonal sew 3 — from a wool blend from Style Maker Fabric. This time I drafted a lining, so it wouldn’t, like the sweet potato version, stick to my tights. The lining is a static-free one I got at Joann. Below on the right is my seasonal sew 3 outfit — skirt, blackwood cardigan in a sweater knit from Marcy Tilton and another s2215 made from mora slub linen from Stone Mountain Fabric.

Fall 2018 Seasonal Sew 3Left: with my favorite ready-to-wear silk shirt, Right: seasonal sew 3 capsule

I was really happy with the rust color match between the blouse and sweater for my seasonal sew 3. Unfortunately, the sweater knit catches on everything and has gotten quite pilly. I’ve de-pilled it a few times since I made it in November, and I’m not sure it will last very long.

good match but pilly sweater knit

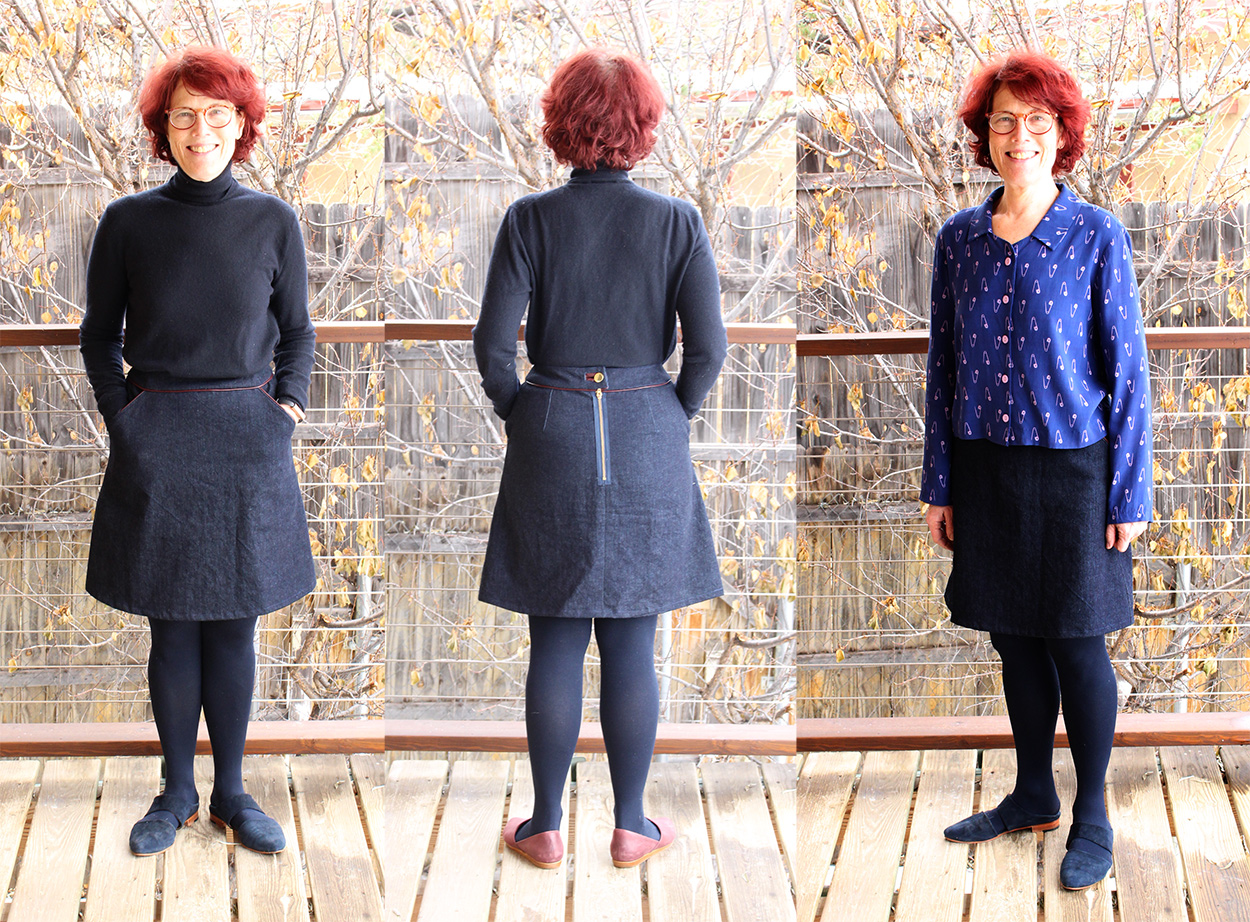
But I wasn’t done with the skirt pattern quite yet. I had just-large-enough piece of cone mills denim to make a 3rd version. This time I made it a little extra by

  • cuting the pocket opening straight across rather than curved
  • adding piping, made from a piece of leatherette from my stash, to the bottom of the waist band and top of the pockets
  • installing my first ever exposed zipper
  • making a welt buttonhole on the back waist band using the leatherette.

New Look 6106 in cone mills denimLeft: dressed like a crayon, Middle: back with exposed zipper and welt button hole, Right: the top is a hacked Carolyn Pajamas top made from the nicest behaving rayon challis from Workroom Social.

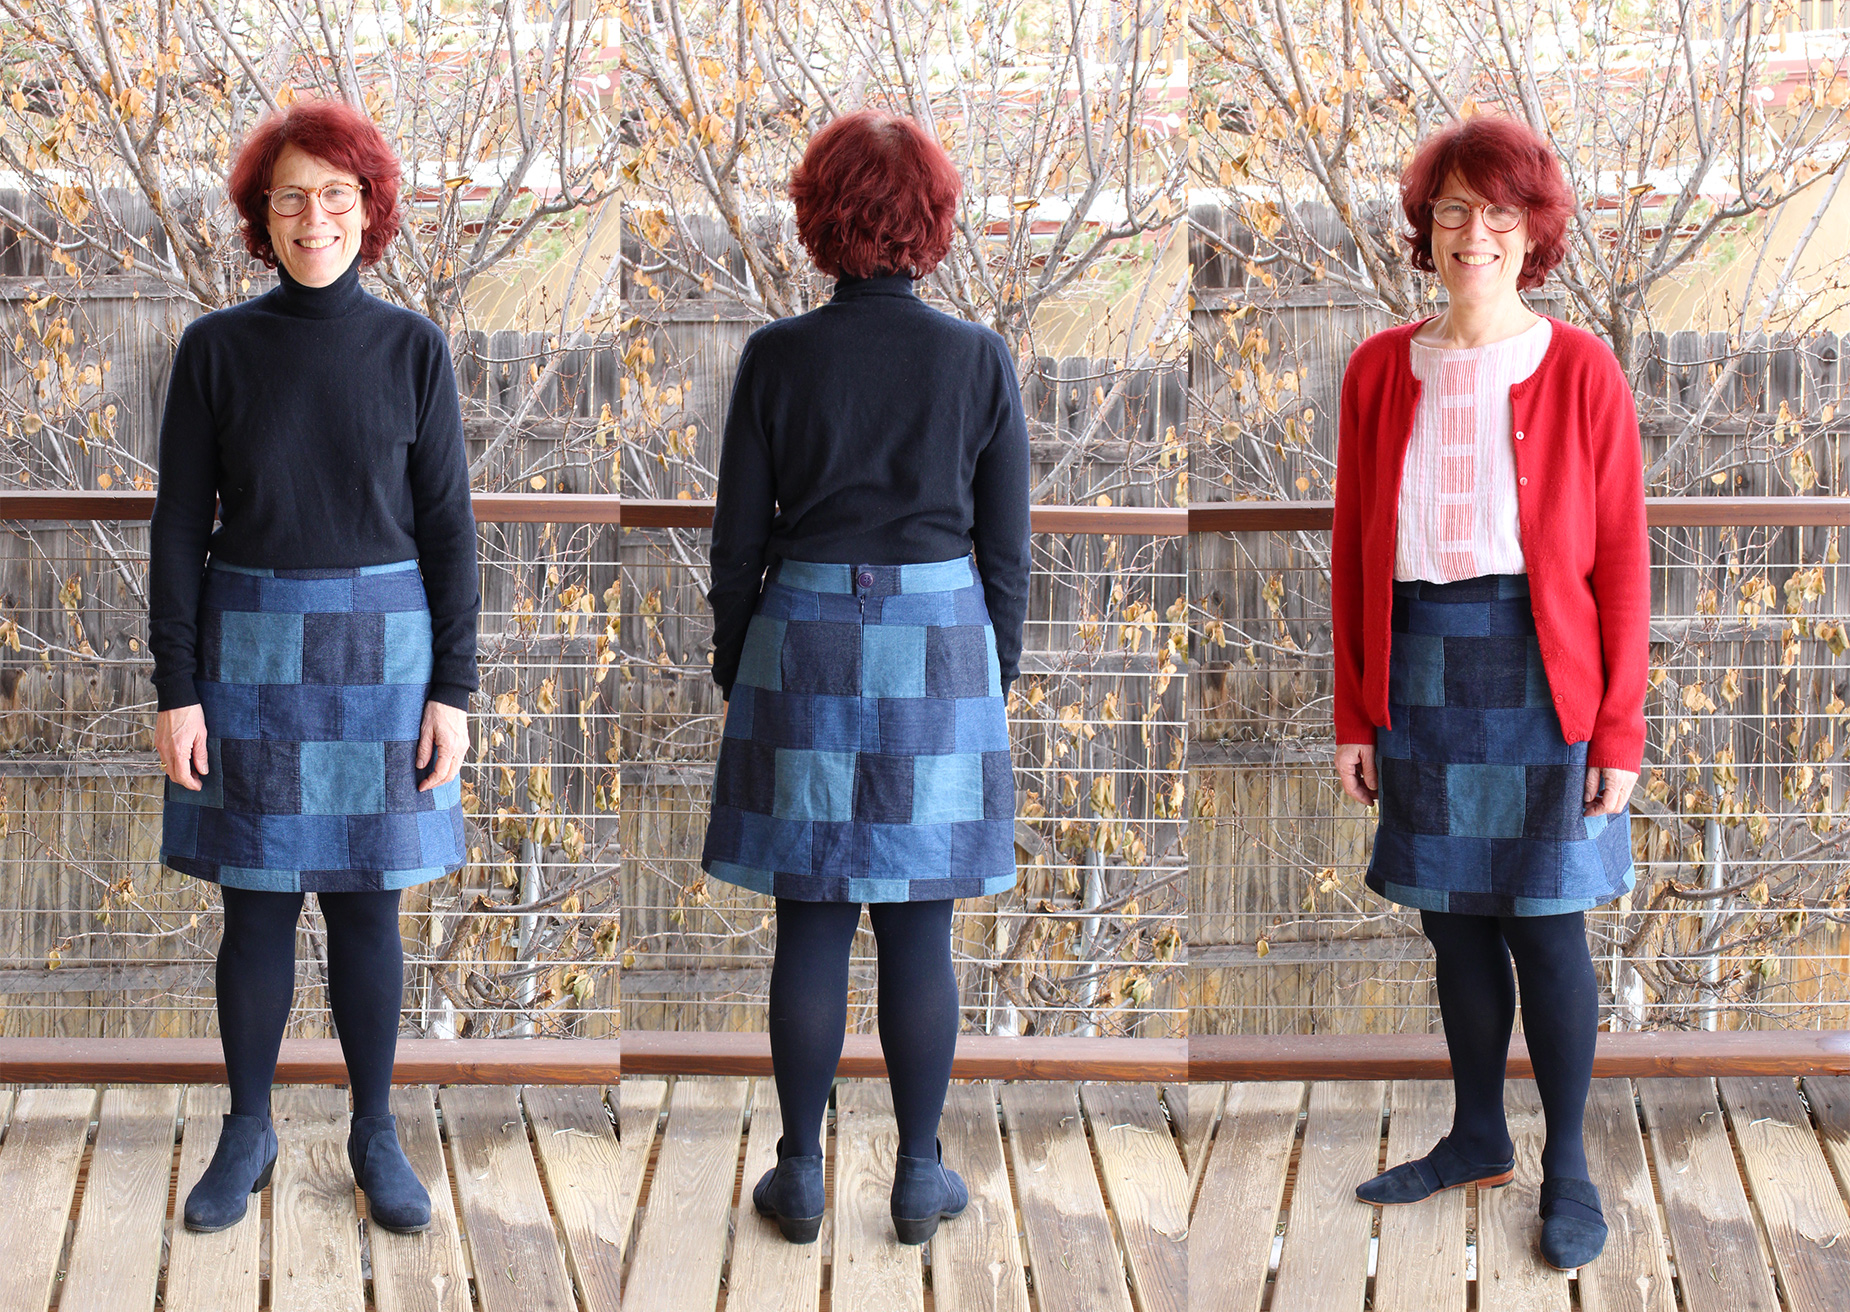
And last, the one I’ve worn the most, a couple of times a week. I saw this patchwork denim at Joann and couldn’t resist (plus I had a coupon). I see Style Maker Fabric has it too. This one doesn’t have pockets.

Left, dressed like a crayon again, Middle: I had fun planning the pattern-matching on the stripes created by the patchwork, Right: the top is a Maya top made from a dress that fell apart, and with a ready-to-wear cardi.

My #SewingTop5 for 2018

Sunday January 20, 2019

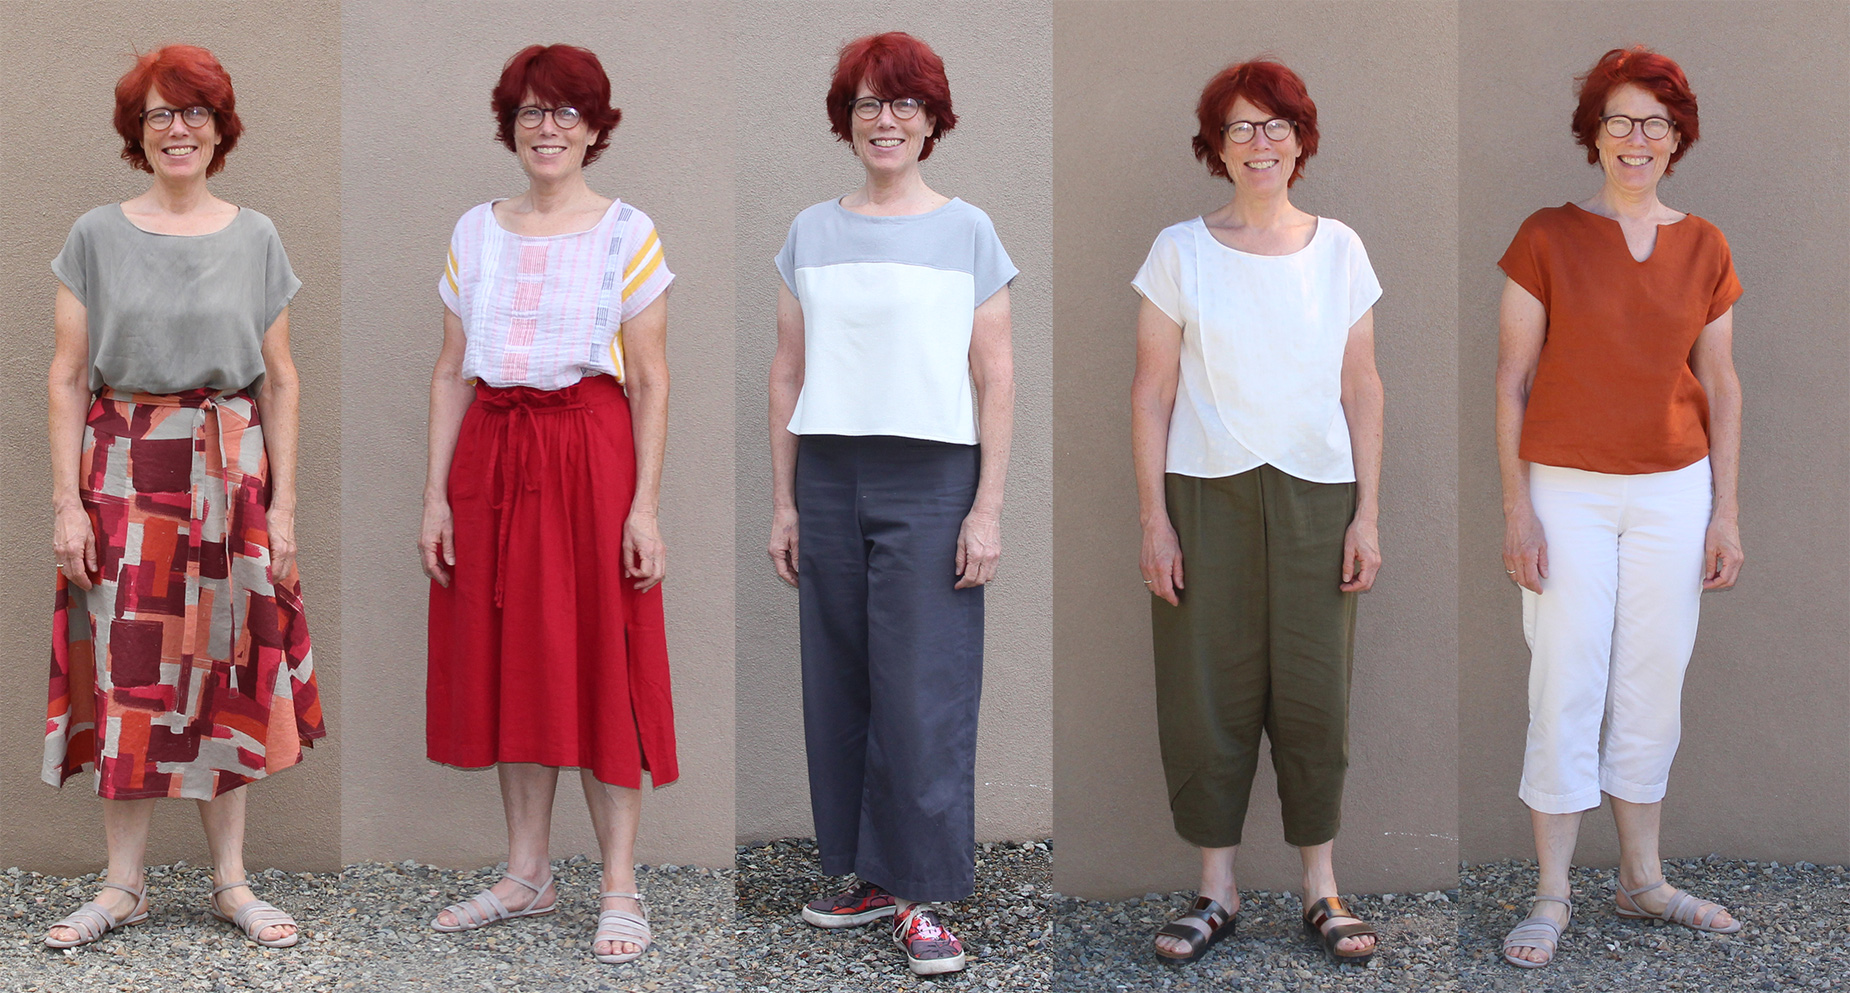
2018 was my first full year of garment sewing (I started in the fall of 2017). Like many beginners, I started with quilting cotton and patterns for boxy woven tops. With encouragement from Craftsy classes and reading lots of blogs, I progressed to knits, bought a serger, made a coat. So I thought it would be fun to join in the #SewingTop5 blog series hosted by Gillian from Crafting a Rainbow where she encourages sewing bloggers to post about their highlights (and lowlights) for 2018. Here’s my top 5.

1) Pattern Hacking

I like to cook. I like finding new recipes and new techniques. But I don’t alter them — even ones I’ve made for years. If I want to recreate a dish I’ve eaten at a restaurant, I look for a recipe that’s close, and if nothing turns up, I go on to the next thing. So when I started sewing and immediately started pattern hacking, I was pretty surprised to see this new side of myself. For instance Marilla Walker’s Maya top — I’ve color blocked it, made it in different fabrics, altered the neckline, altered the front into a tulip shape… I’ve done the same thing with a skirt pattern.

Maya top pattern hacking
My mayas: (left to right) original in rayon (no alterations), made from a cotton dress that fell apart, color-blocked with silk noil, tulip hem in a double gauze, “madewell” neckline in linen (from a Grainline Studio pattern hack).

2) A Halloween surprise

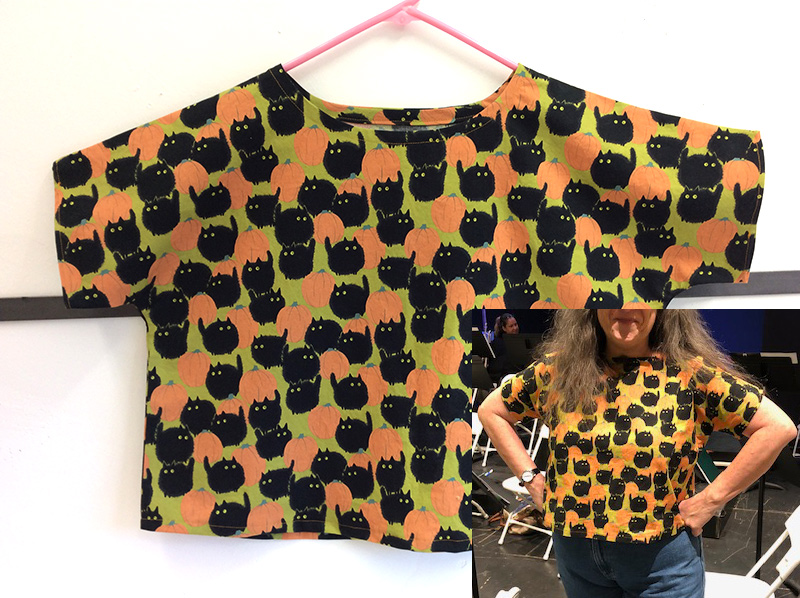
One of my first makes in 2017 was a Shirt No 1 for my Mom. It was October, and she loved cats and holidays, so I choose a fall/Halloween themed quilting cotton. I made another one for Christmas. When my Mom passed away last February, my sister was tasked with sorting through all her clothes. Imagine my surprise and pleasure this past October when my sis sent me a photo of her in the Halloween shirt — she’d saved both my makes to wear for herself.

3) Me-Made-May

I was also surprised that within 6 months of starting to sew I had enough tops (and a few other things) to wear a me-made garment every day of May without too many repeats. And even more proud of myself for getting a photo every day (although I should thank my husband, who took the photos and reminded me on the days I forgot!) You can see the recap here.

4) Where’s the black?

My husband has teased me for years that I wear only solids in black, navy and dark brown. Sewing has changed that. I never would have predicted in January that I’d make these pants and wear them outside the house (and more than once at that)!

S8134 wrap pants

5) And the lowlights?

I’ve had wadders and patterns I couldn’t figure out how to fit, I made a lovely blouse only to spill cooking oil down the front the first time I wore it, I tried unsuccessfully to make slim fitted flat front pants (3 times, actually), but I had to think hard to remember the failures. Mostly I’m left with the pleasure of dreaming up a garment, finding the pattern, sewing it up and wearing it.

Adventures in coat making: M7481

Sunday January 13, 2019

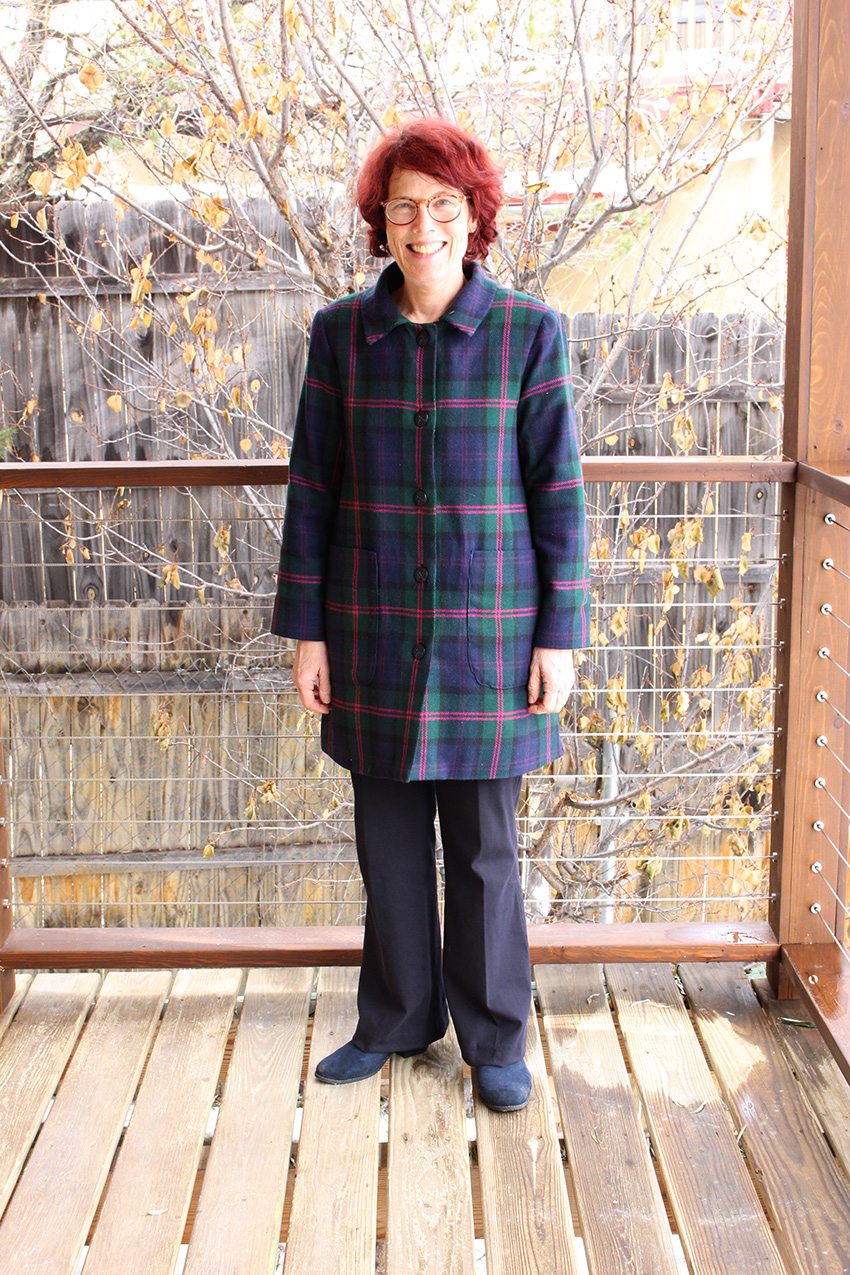
Front of the coat

One of my friends selects a word at the beginning of every year, rather than a resolution. The idea is to apply that word to the things she does throughout the year — words like “play” or “ease.” At the beginning of 2018 I hadn’t been sewing very long, and picked “coat” as my word, hoping that in the coming months I would pick sewing projects that gave me the skills and confidence to make a winter coat.

I knew from the start I wanted to make a plaid wool coat. And something like this Lisette Pattern
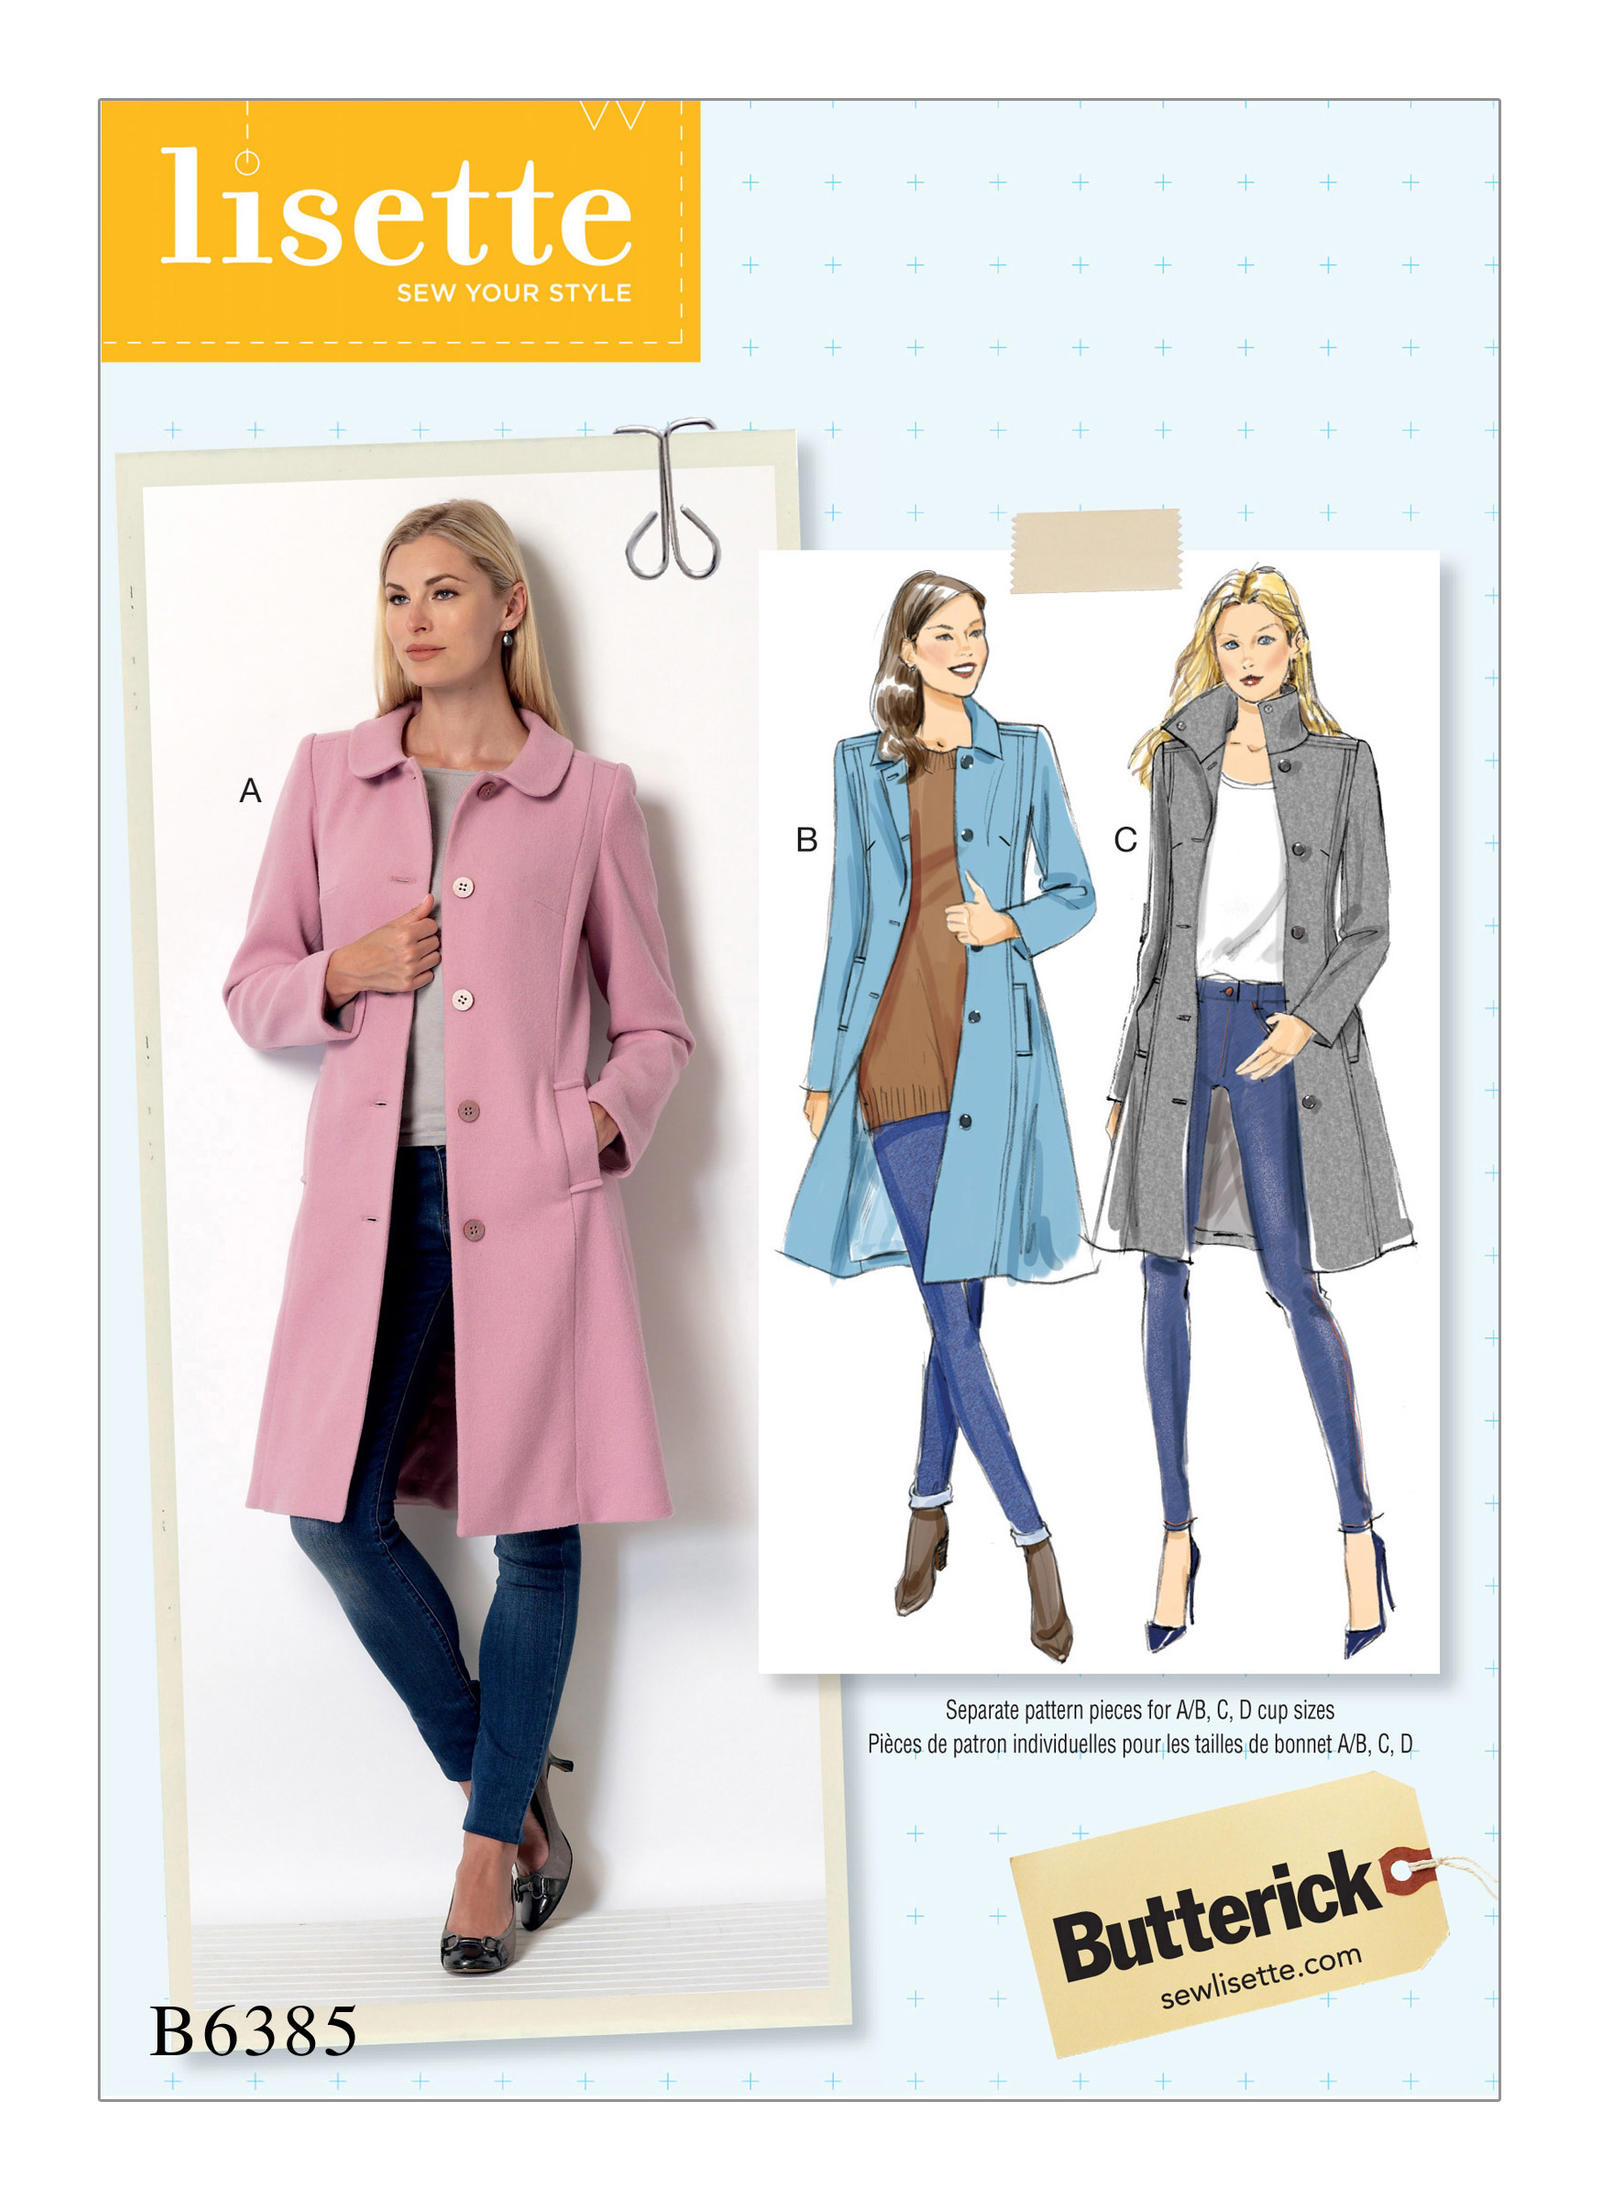
Butterick 6385

And I found the fabric (a wool coating) this fall, from Stone Mountain and Daughter.
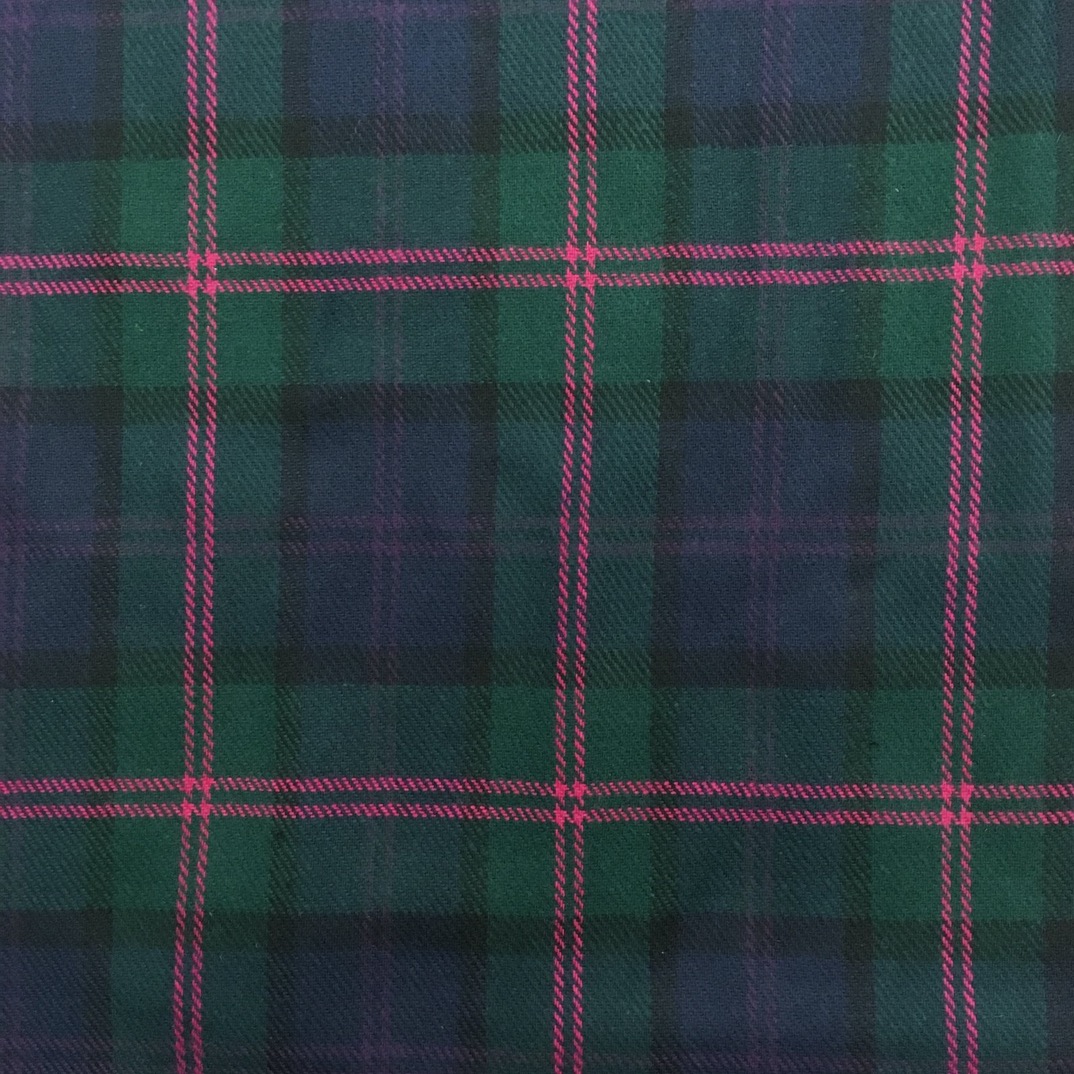
The Lisette coat has princess seams, and while there are lots of examples and blog posts about making the coat, I only found one sewist that made it in other than a solid color. That made me nervous — plaid matching princess seams was maybe beyond my current skills. So I looked for another pattern. I found a couple of candidates, and bought the most promising. But I didn’t like the look after I made a muslin (the sleeves fit very oddly and I had no idea how to fix them). Same went for the second coat pattern (raglan sleeves, not what I wanted). But whoa did I learn a lot from making those muslins and what I was in for. They left me with a lot of questions too. Should I bag the lining? How wide should the hem be? When exactly during the coat construction do I make bound button holes — maybe before attaching the facing? So to boost my confidence a bit, I also watched several Craftsy classes about linings and tailoring.

The third pattern I bought was McCalls 7481, to make view C. It’s described as “Lined vest and coat have front snap closing with sleeve and/or pocket variations. C: Collar and patch pockets.” My plan was to use buttons instead of snaps.
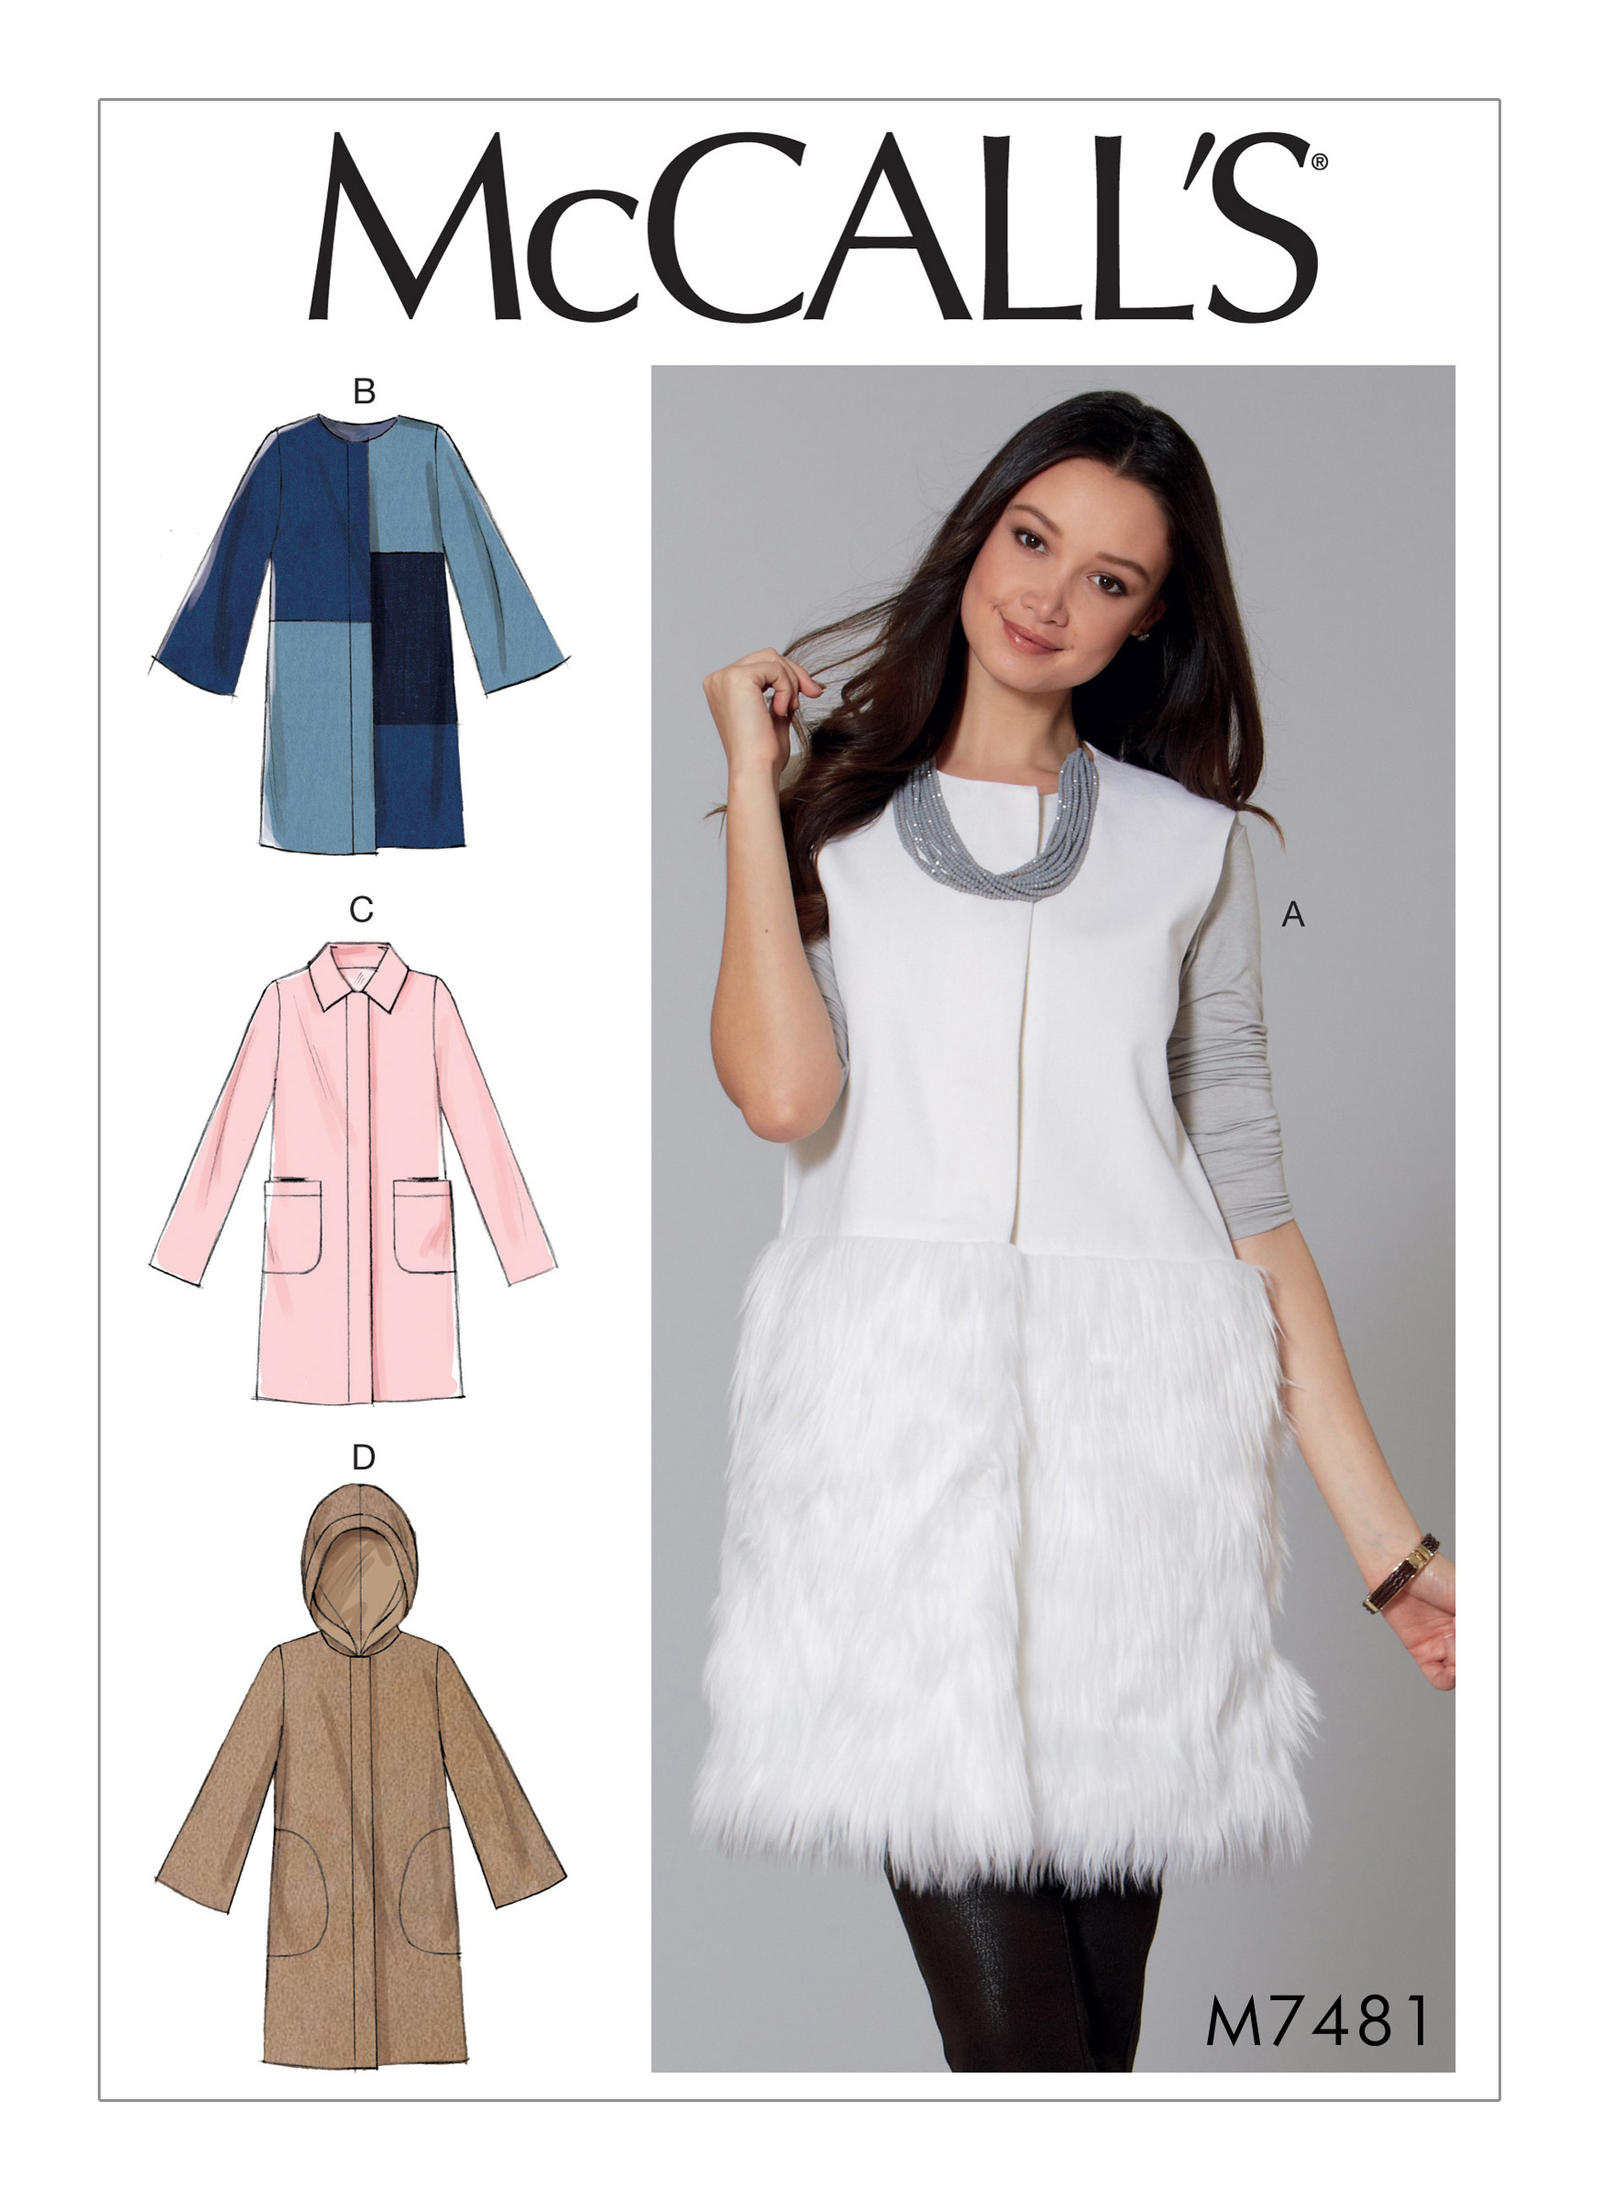
M7481 Misses' Hooded, Collared or Collarless Coats and Vest

I made up a muslin out of a sheet, and liked the way it looked. Then I made these changes

  • Made a size 12, grading to 14 at the hips. I widened the bottom even more, as it didn’t seem to close properly
  • Raised the arm hole using this Threads video
  • 1″ full bicep adjustment using this tutorial from Helen’s Closet
  • Added length to make a 3″ hem, rather than a 5/8″ hem.
  • Drafted a separate lining after watching Linda Lee’s Craftsy class Underneath it All
  • It looked like the lining would show at the top when the coat was open, so I also drafted a back facing.
  • And finally I merged the front facing with the coat front, so it was cut-on and a fold line rather than seam, to eliminate the bulk (Abby Mats shows how to do that on Instagram here)
  • The pattern had you just interface the collar and front facing. But after reading Lucinda Hamilton’s post here, I also used weft fusible for the bottom and sleeve hems, upper back and front, as well as the place where the pockets were to be placed. I got the interfacing from Vogue Fabrics.

Okay, at this point I knew the pattern did me no favors, and I probably should have kept looking for something else. But it was mid-December by this point, and I blundered along, reasoning that this is my first me-made coat, and I had procrastinated enough.

After I’d sewn the shell and tried it on, I realized I needed something at the shoulder. First I added a sleeve head using this Threads tutorial, but that didn’t make it look much better. Threads has a pattern for shoulder pads here and I had some quilt batting at home, so I tried making a set. I got to use the 3 step zigzag on my sewing machine — something I hadn’t used before! — but the resulting pads were pretty wimpy, so I ended up getting a pair at Joann.

About my lining. I decided on Sunback lining (satin on one side, flannel on the other) because the wool I’d bought wasn’t really that thick. I got it at B&J Fabric. I’m glad I got a thicker lining, because the finished coat isn’t as warm as I’d hoped.

One of the coat patterns I’d considered, but hadn’t muslined, was Vogue 1479, an Isaac Mizrahi design with something like 9 pockets (patch, welt, inside, outside…). It seemed more complicated than I was up for as a first coat-making project. But I read all the directions, and was intrigued by the patch pockets — they have 2 separate openings, from the top and from the side. They also had a facing for the top, which the patch pockets on my pattern didn’t. The construction seemed straight-forward, and the top facing seemed like a good idea, so I swapped in the Vogue pockets.

After a lot of head-scratching, I made the welt button holes before folding the facing and attaching the lining. I made 3 practice button holes before attacking the actual coat. Sadly the practice ones are very nice and the ones on the coat are pretty iffy. But they work, and I like the buttons I found.

Bagging the lining. I read several blog posts about bagging (here and here), and in Linda Lee’s Craftsy class Underneath it All she shows how to bag a coat, with the opening at the hem. I decided to use Lee’s method — rather than the bagging opening in the sleeve. I found hand sewing the hem once the coat was right-side-out to be very awkward (Lee’s lining drafting directions has the lining fold over the hem for extra ease), so next time I make a coat I’ll try the opening in the sleeve method.

Here’s the final coat. As I said, it’s not as warm as I hoped, but I’m really pleased with how it turned out. I’ve worn it every day since finishing it at on January 4th. The sleeves are too short — maybe because I added shoulder pads? There’s something wonky happening at the hem where the coat closes… but YEAH, I finished!

Front of the coat Front of the coat
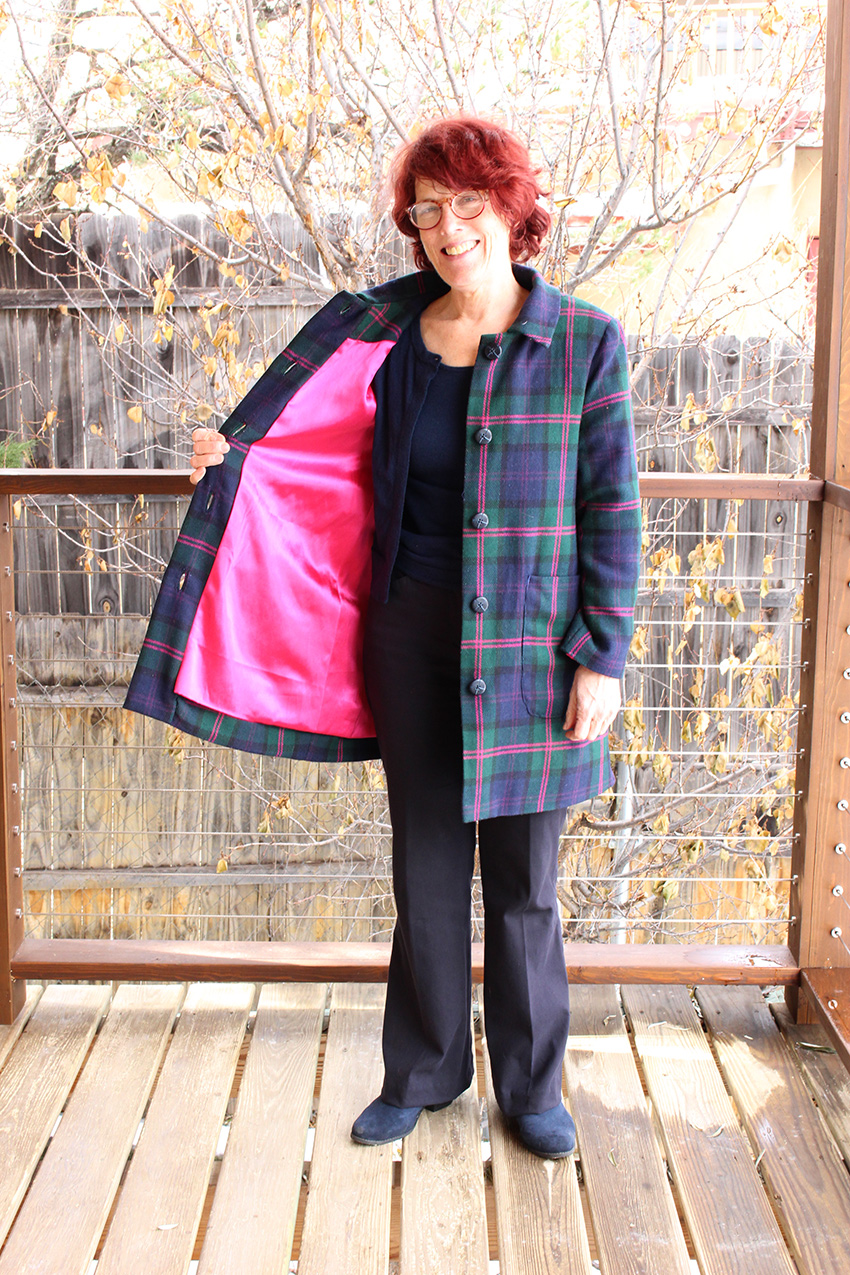
Sunback lining in very bright fuchsia Sunback lining in very bright fuchsia
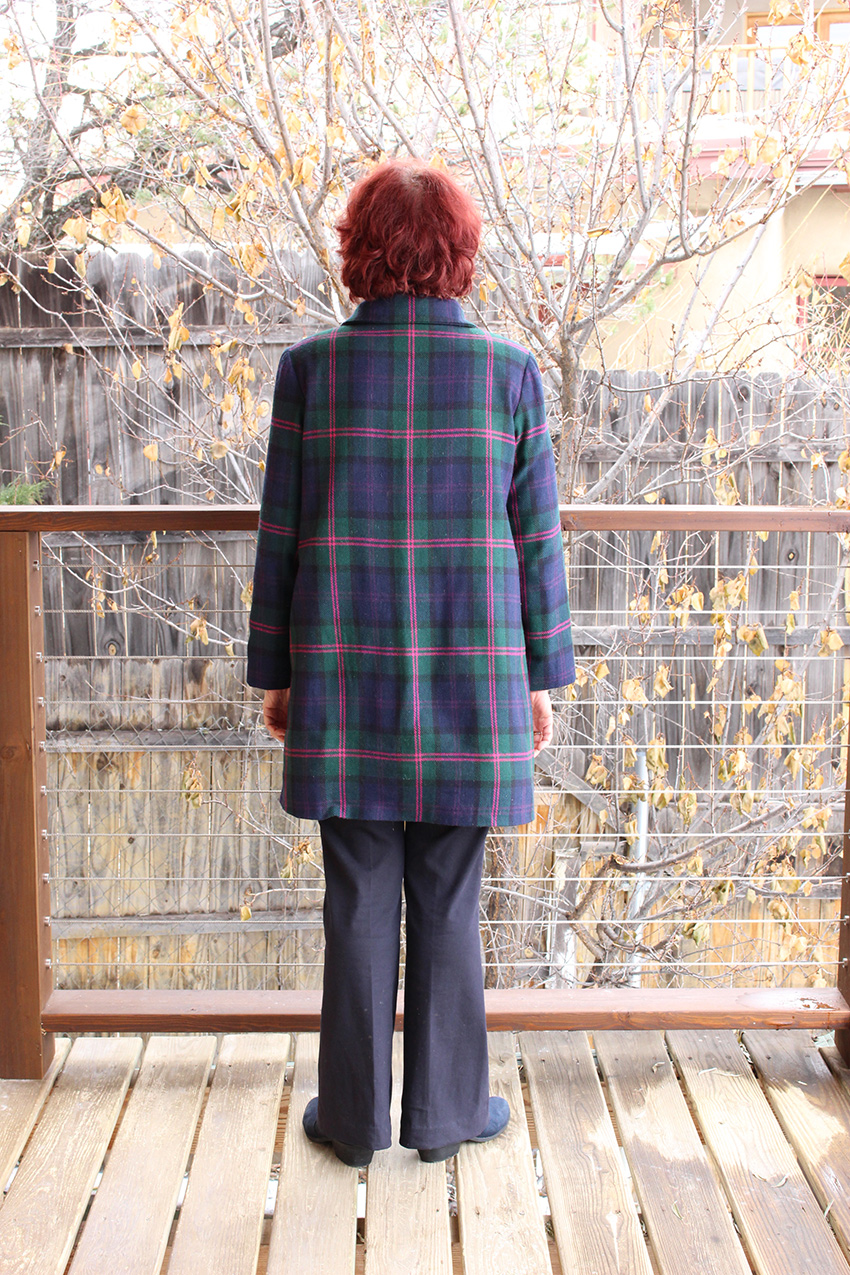
Back of the coat Back of the coat
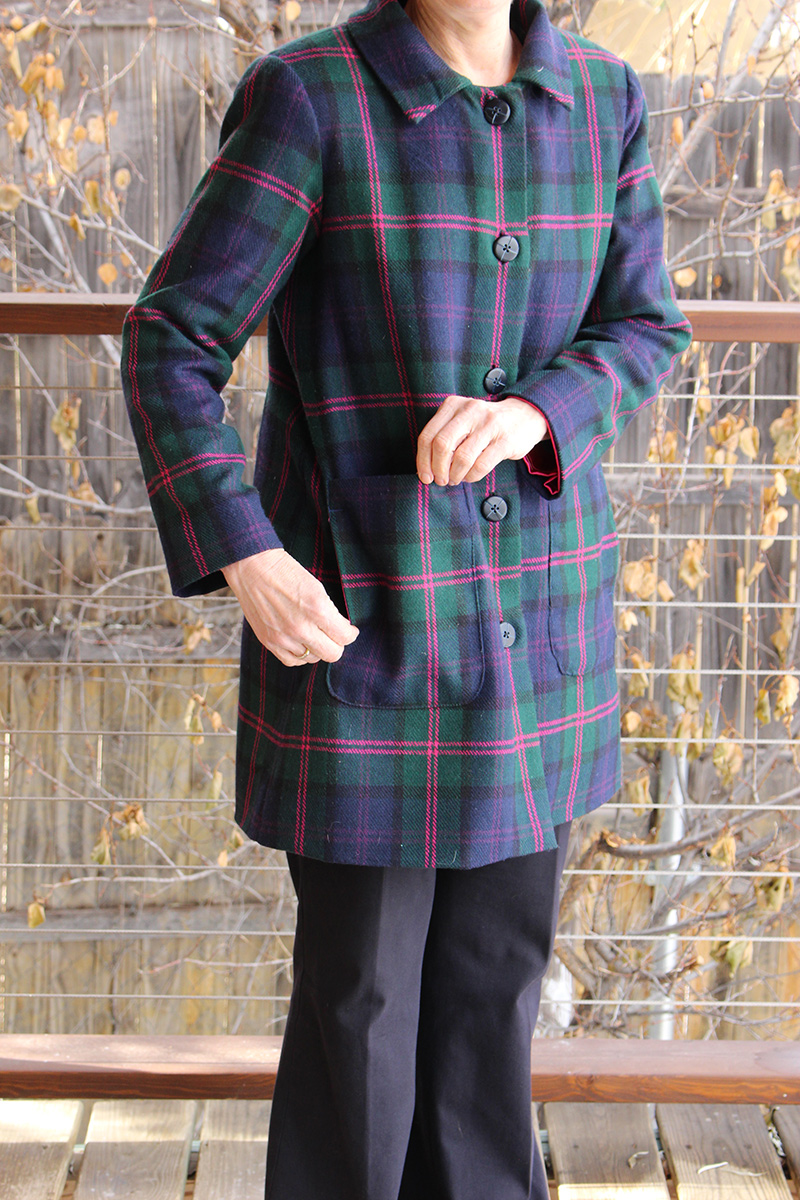
Pocket detail -- opens from either the top or side Pocket detail — opens from either the top or side
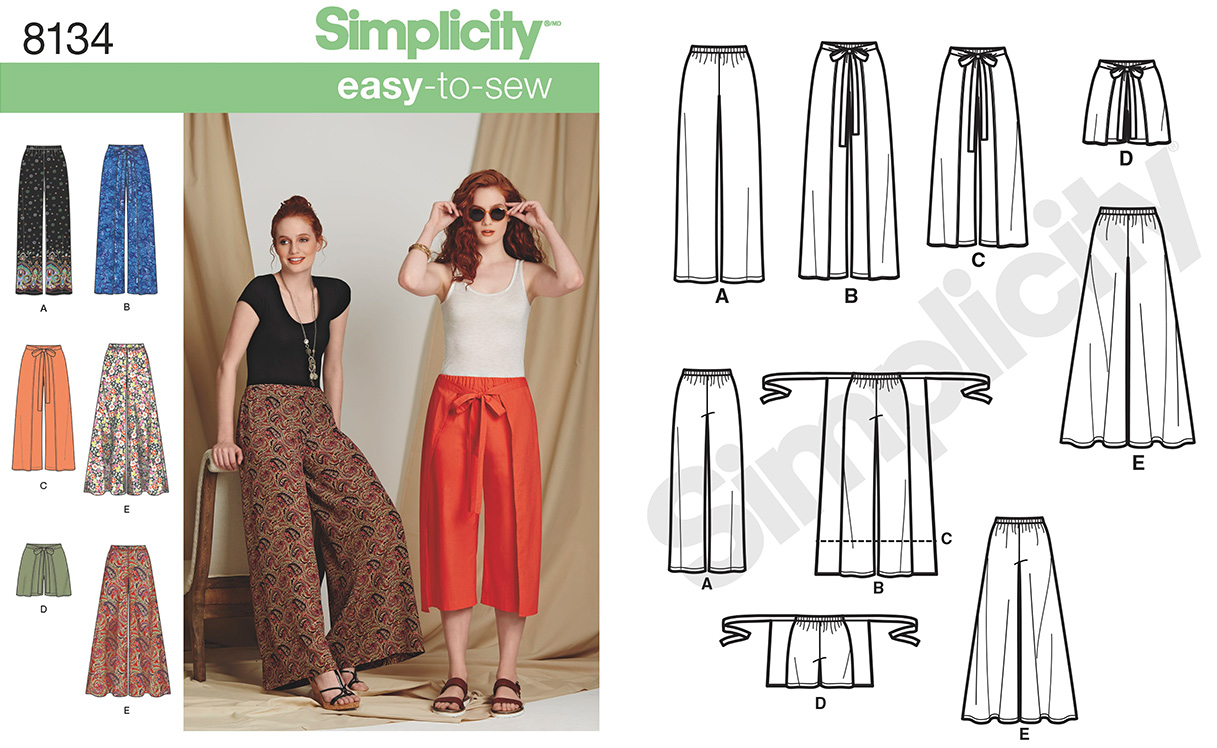
Simplicity 8134 wrap pants

Thursday October 4, 2018

Since May I’ve been working on and off to find a fitted pants pattern that actually fits me. I think I’ve finally got the crotch curve and other adjustments figured out, and I wanted to see how my basic pattern could be applied to other patterns. After seeing Manju and Lori’s version of Simplicity 8134, I bought it as my first test. The wide legs would cover up some of my fitting issues — heavy thighs and extended calves — and I could practice transferring my fitting block to the Simplicity pattern.

Simplicity 8134 envelope

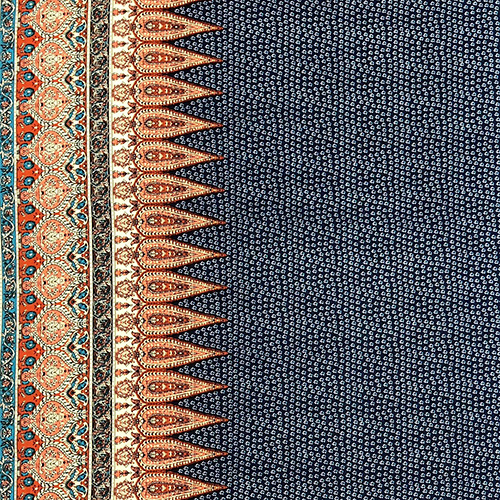
When I looked at the reviews on Pattern Review, I saw these in a border print, so I decided to give that a try. I found the perfect rayon challis from Sly Fox.

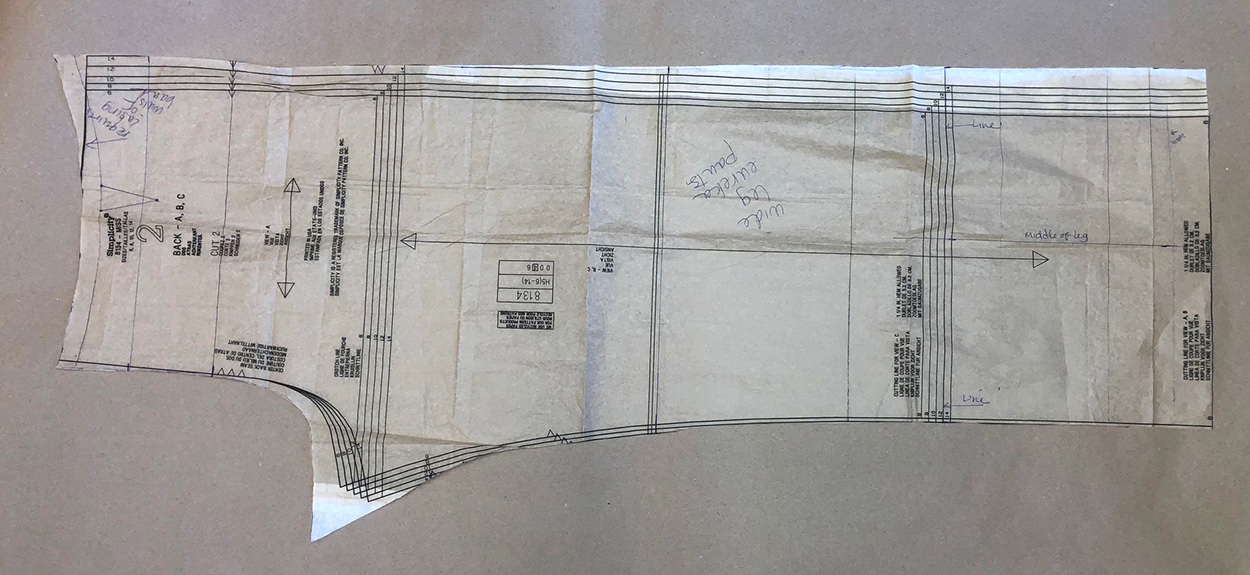
Happily transferring my pattern to the Simplicity one was really straight-forward. I used the top of my pattern (from the crotch up) and the Simplicity pattern legs. My pattern has a flat waist band with a zipper and the Simplicity one has an elastic waist. The wraps on these pants are sewn into the side seams, so I also had to modify the top of the wrap pattern.

Keeping in mind that this was all an experiment for me, here a bit of detail about how I merged the 2 patterns. I started by laying the Simplicity on top of my pants pattern, lining up the waistline. The rise on the Simplicity pattern was higher than my pattern, so the crotch lines didn’t match. I adjusted the rise on the Simplicity pattern so now a line horizontal across the crotch was the same for both. From there I figured out the leg width. My pants pattern is based on Sarah Veblen’s Eureka pants, and the directions for that pattern emphasize keeping the width of the pants symmetrical around the middle of the leg — so same amount of fabric on both sides of a line running perpendicular to the middle of the bottom of the pants. Keeping that in mind, I drew the middle line from my pants pattern to the hem of the Simplicity, and used that line to figure out the new width. I tried to make the pants straight from about the knee down. Here’s a photo of the finished back pattern:

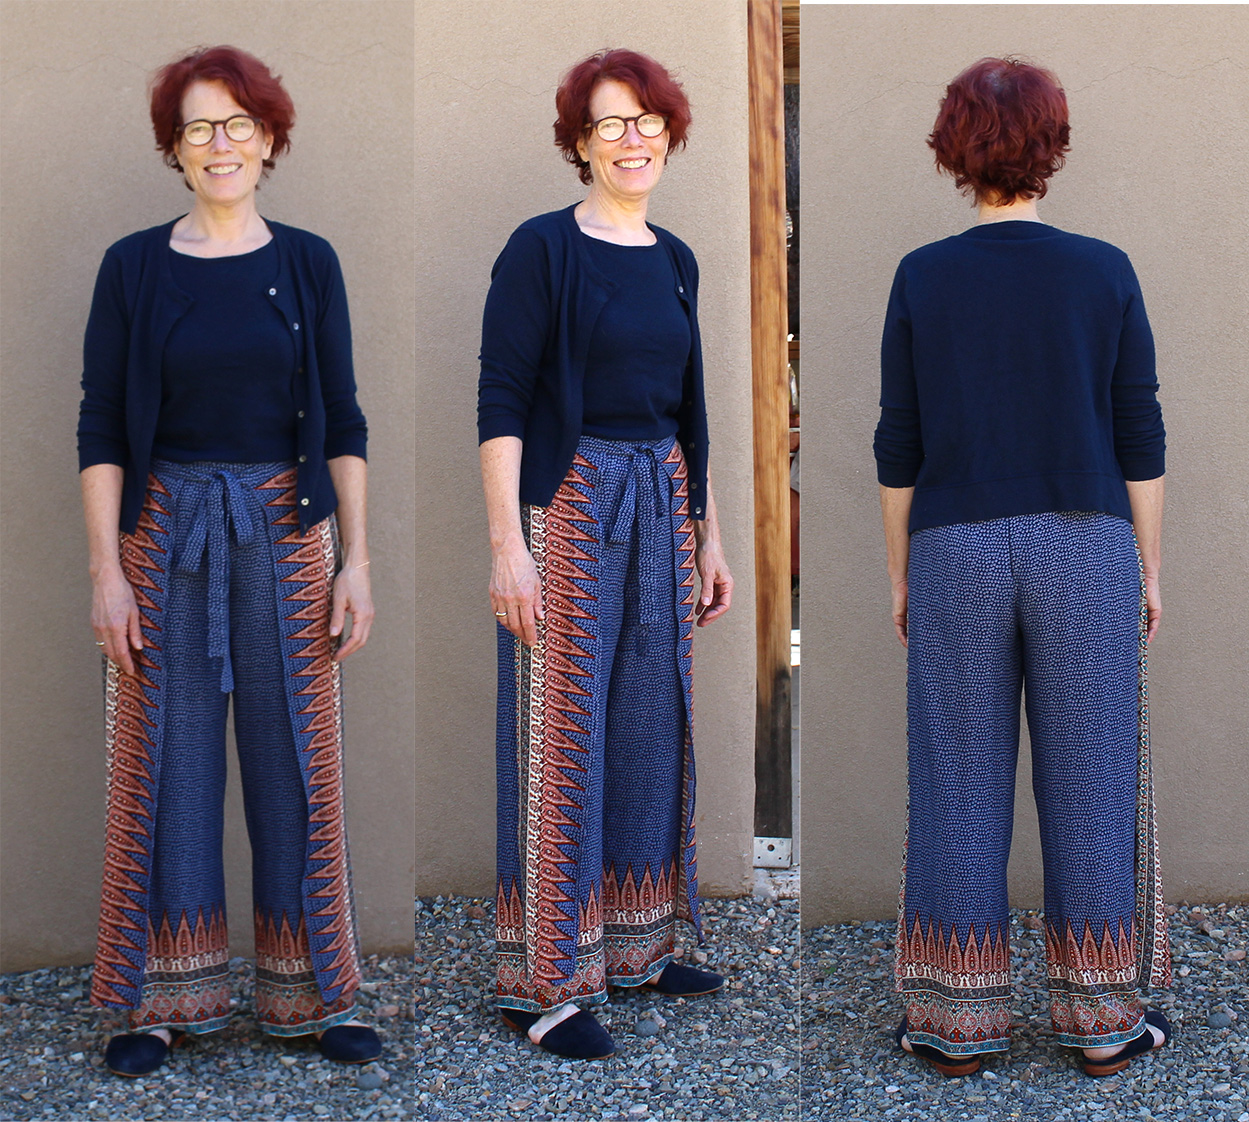
They were easy to sew up, the fit is really nice, and the fabric is soft and comfy. But as you can tell from the first picture in this post, I didn’t take into account that when I walk, the wrap flutters open and you see the wrong side of the fabric. I’m still debating whether that’s a big problem. I’ve worn the pants several times now, so maybe it really doesn’t bother me!

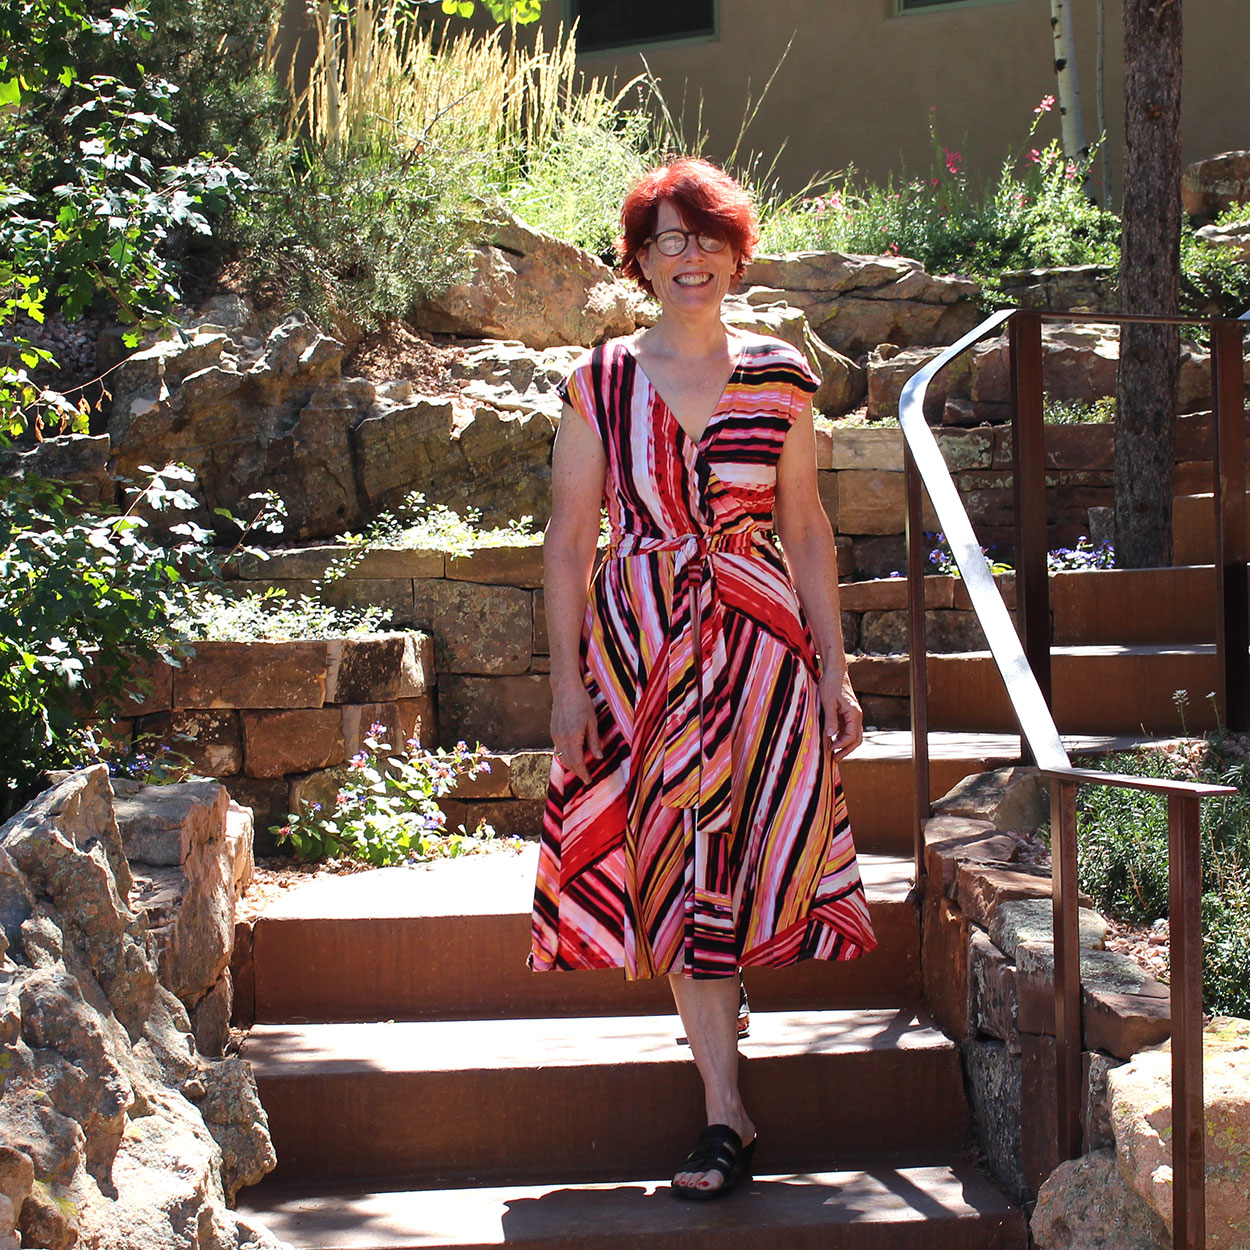
Here it is from all sides:

Thanks for reading!

Vogue 1027, a faux wrap dress

Monday September 10, 2018

Last month, Gillian, at Crafting a Rainbow, posted about fabric she liked, including ITY (Interlock Twist Yarn) knits. She said “ITY knit makes for fantastic dresses all year round.” I was looking for a fabric to make up Vogue 2017, a knit faux wrap dress (it’s a wrap bodice on top of a circle skirt), and since I thought I’d have to make a muslin first, I decided to give ITY a shot. And it’s all polyester, so I wasn’t sure how I’d like it. But after a bit of searching on-line, I discovered it comes in really wild colorful designs that seemed just right for this dress.

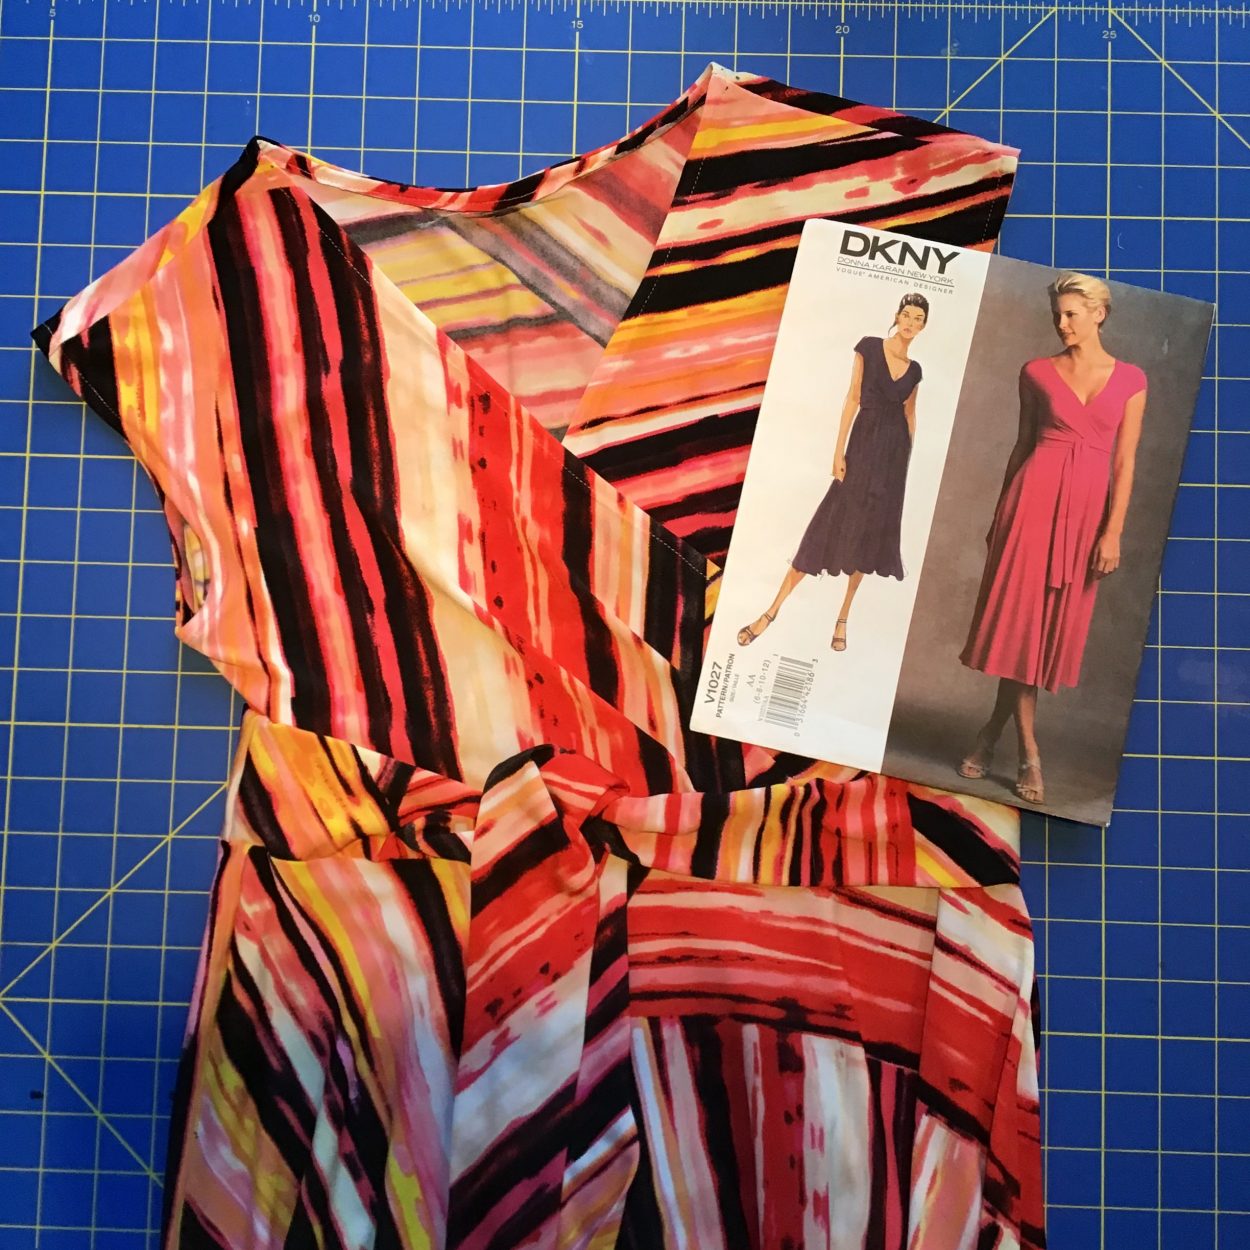
Vogue 1027 v1027

The pattern is out of print (I got mine on Ebay) and before I bought, I read the over 80 reviews on Pattern Review and a bunch of blog posts from people who had made the pattern. I thought the dress looked best in something colorful, and I found a pink, red, black & yellow print from Gorgeous Fabrics that seemed perfect (well, I was leery of the yellow, but hoped the black might down play it!)

Pattern & Construction

Making the dress was straight-forward, especially since the Pattern Review & blog posts mentioned some pitfalls. As drafted, the tie shows the wrong side of the fabric and the neckline is folded over to hem but the armscye has a facing. Several bloggers gave solutions for the tie (here’s one), and I cut a piece of fabric for the neckline and sewed it on like bias tape finish. I also reinforced the neckline with fusible stay tape, which is what I’ve done on my Blackwood cardigans as well. (Don’t know if that was necessary, but seemed prudent.) I basted the bodice and tried it on before attaching the skirt and found the armscye pretty tight, so I removed a bit of fabric from the bottom of the armhole to fix that issue.

My biggest problem was cutting the skirt — it’s 2 big pieces cut on the bias — and it didn’t fit on my cutting table, so I had to use the floor (awkward! and not back friendly). The other issue was marking the dots and such. My water solvable pen is purple and didn’t show up on the black, and my white chalk didn’t work very well either. So after a bit of Googling, I discovered “tailors tacks” — marking the dots by sewing a piece of thread through them.

Lots of people mentioned the pattern ran really large, so I cut a 10 for the top and graded to 12 at the bottom. Usually I would cut a 12 top and grade to 14 at the hip. This is the first pattern I’ve made where I didn’t have gaping problems at the neckline (especially the back), so aside from the tight armscye, fitting was pretty easy.

The Fabric
The ITY feels soft to the touch, the edges curl like my experience with cotton jersey. But the curling was only annoying for the little strips I made for the neckline facing. I used my walking foot on my regular machine for the top stitching and basting, and my serger to finished the seams. When I got everything together and put on the bodice with the skirt, I was surprised by how heavy it felt on my shoulders. But I wore it out to dinner over the weekend, and didn’t notice the weight. Actually the skirt feels pretty airy and float-y.

Result
I was surprised how much I like the finished dress. It’s sweater friendly (no sleeves to bunch up), so I’ll be able to wear it in the fall and spring as well as the summer. And I like the design on the fabric — I was really dubious about yellow, but it’s okay.

I took 3 inches off the hem, but I think I’ll make it a bit longer next time around. I’m planning to make another one in a darker print.

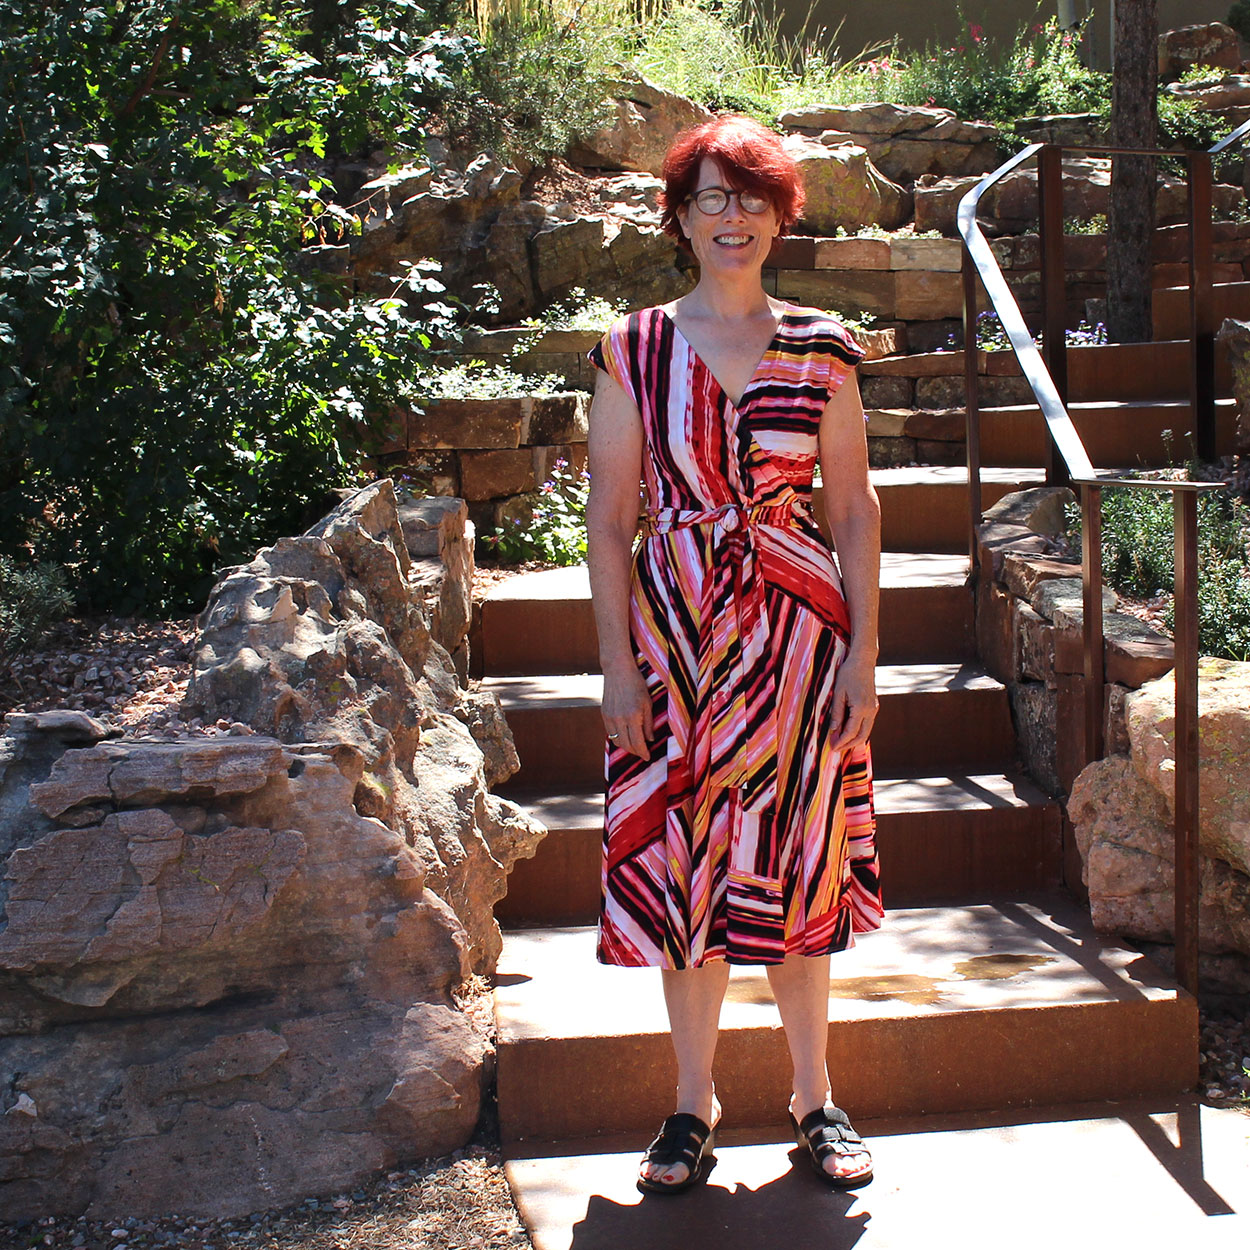
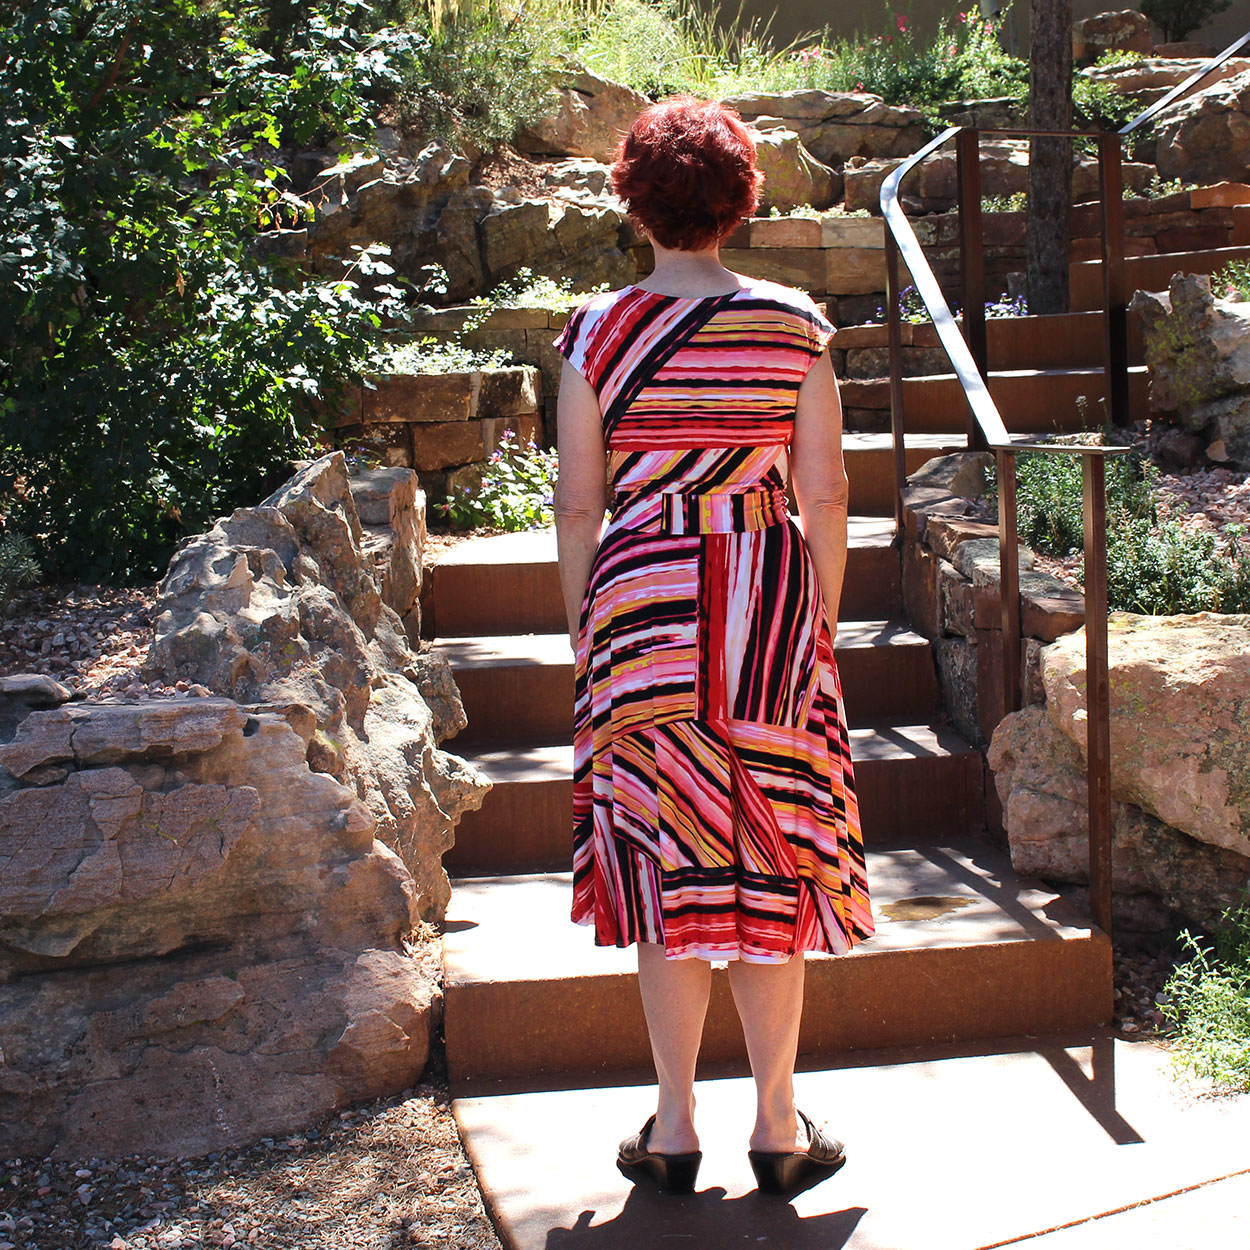
Here’s some pictures.

I didn’t notice the wrinkle in the back when I looked in the mirror before my husband took these pictures!

And if the pattern just feels like too much, it looks fine toned down with my Blackwood cardigan.

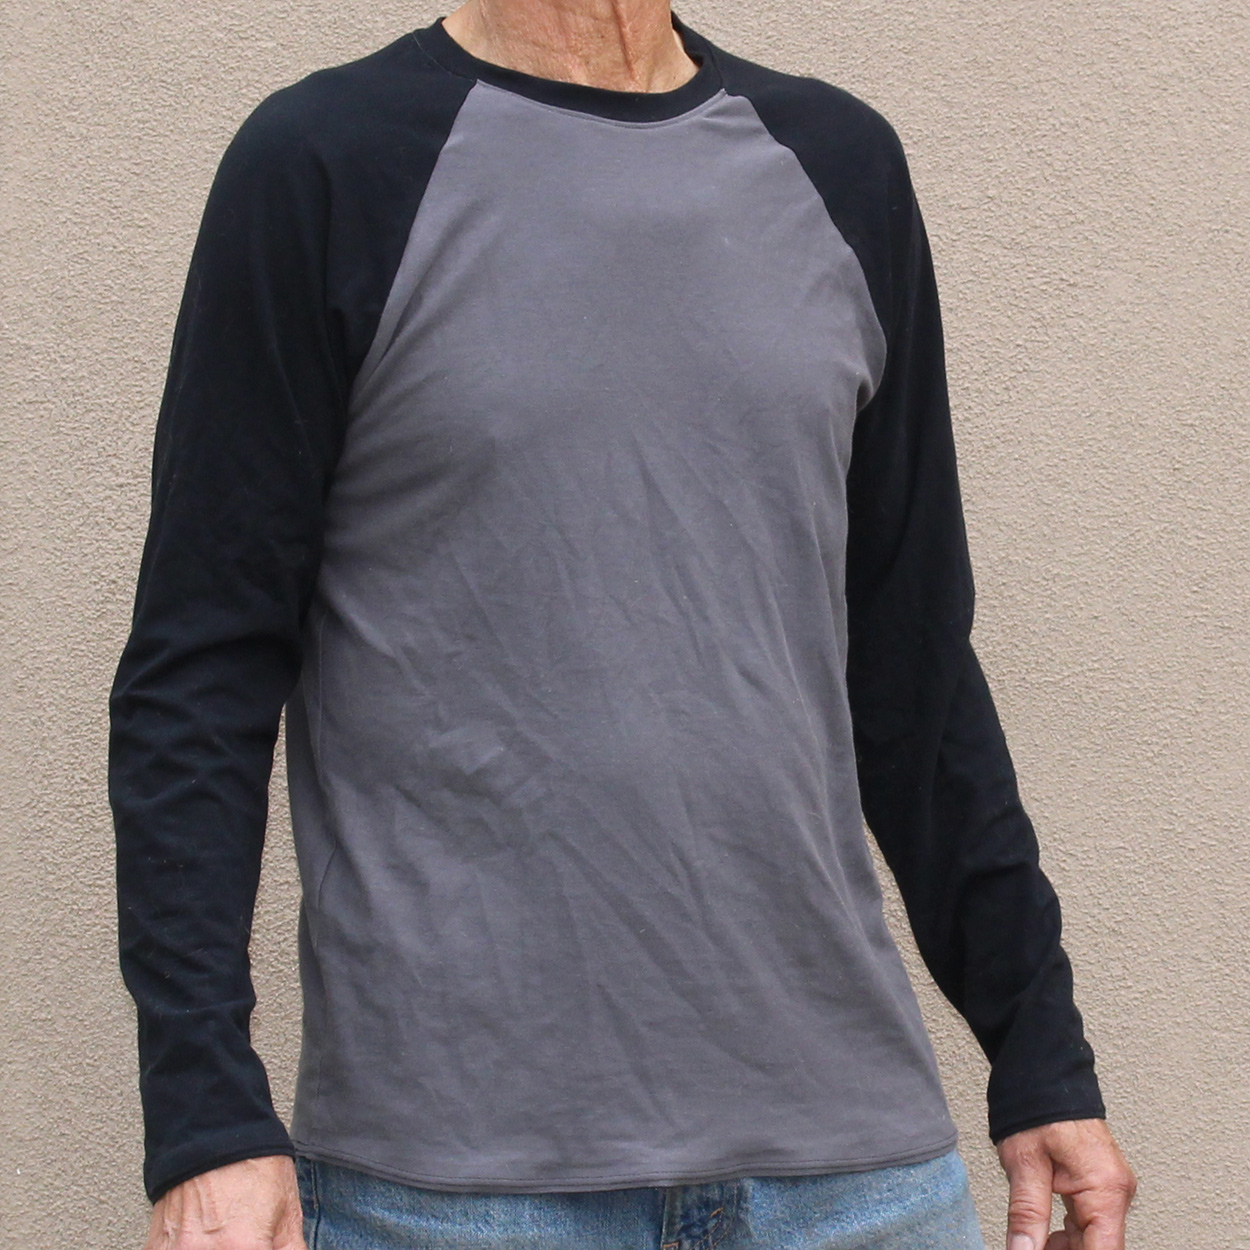
Jalie Nico Raglan Tops

Monday July 30, 2018

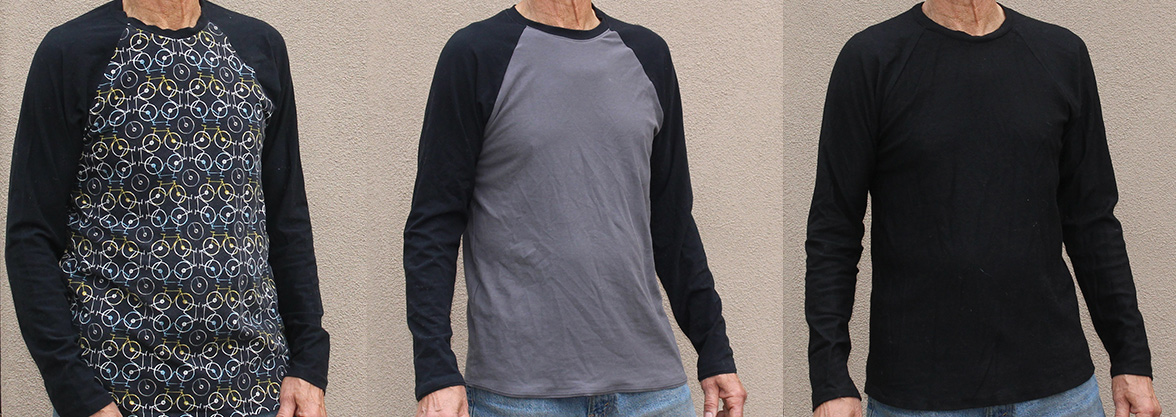
3 Nico raglan tops

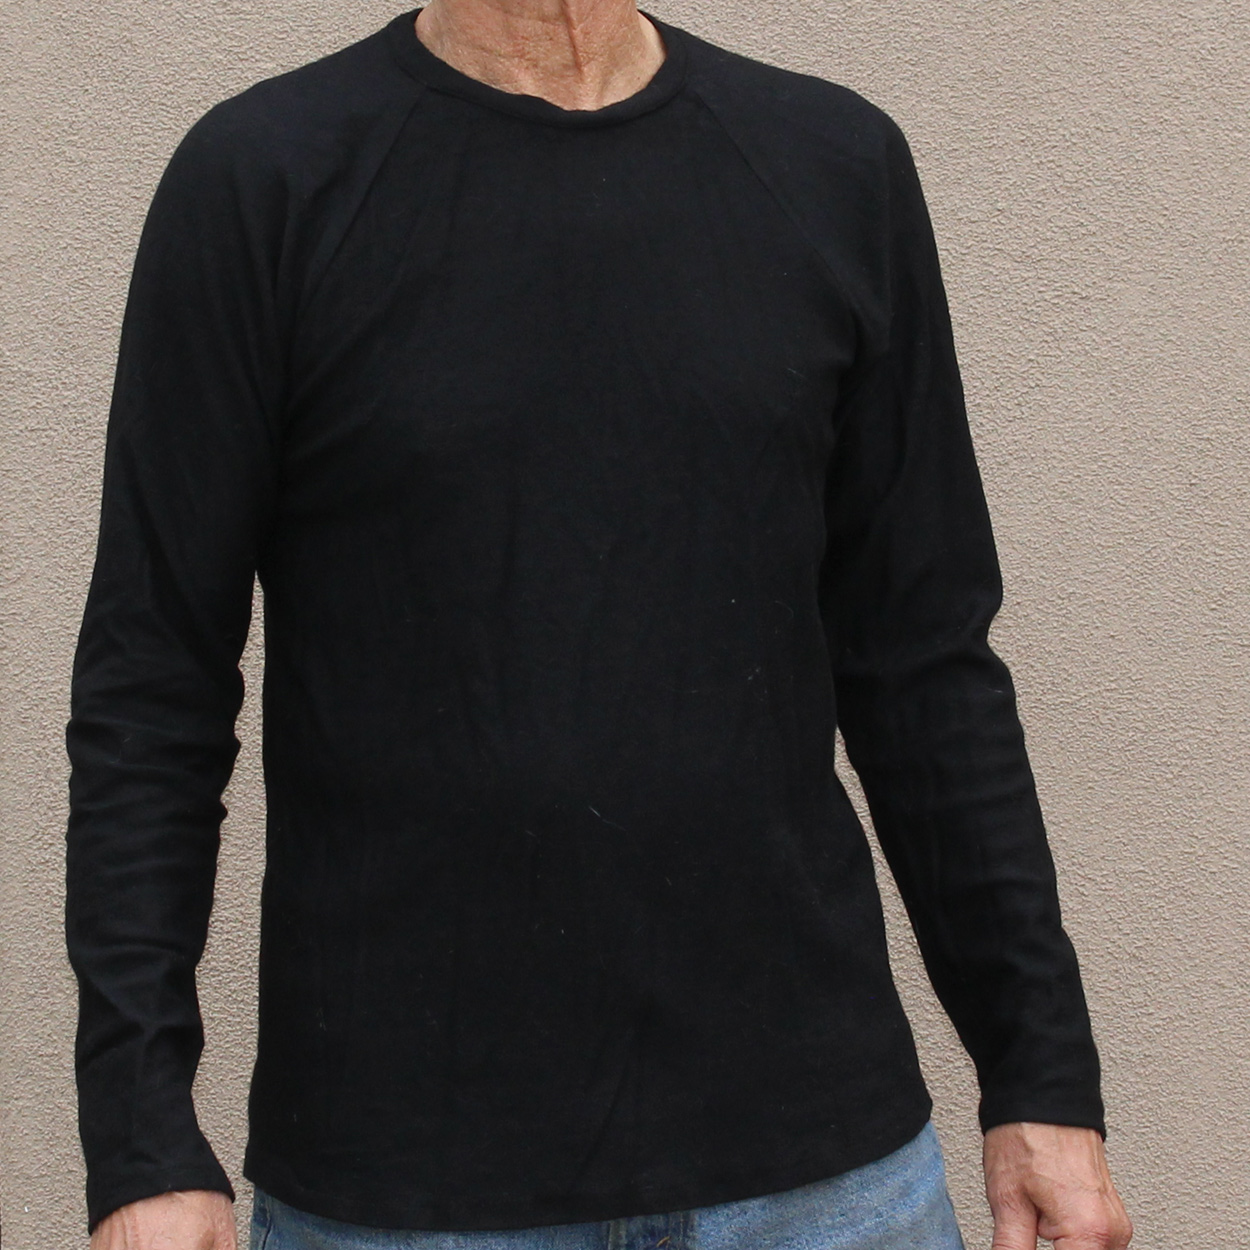
My husband has a much-loved merino under-layer he wears when he bikes in the winter. When I noticed Gorgeous Fabrics had some black merino jersey on sale, I snapped it up to make him a birthday present.

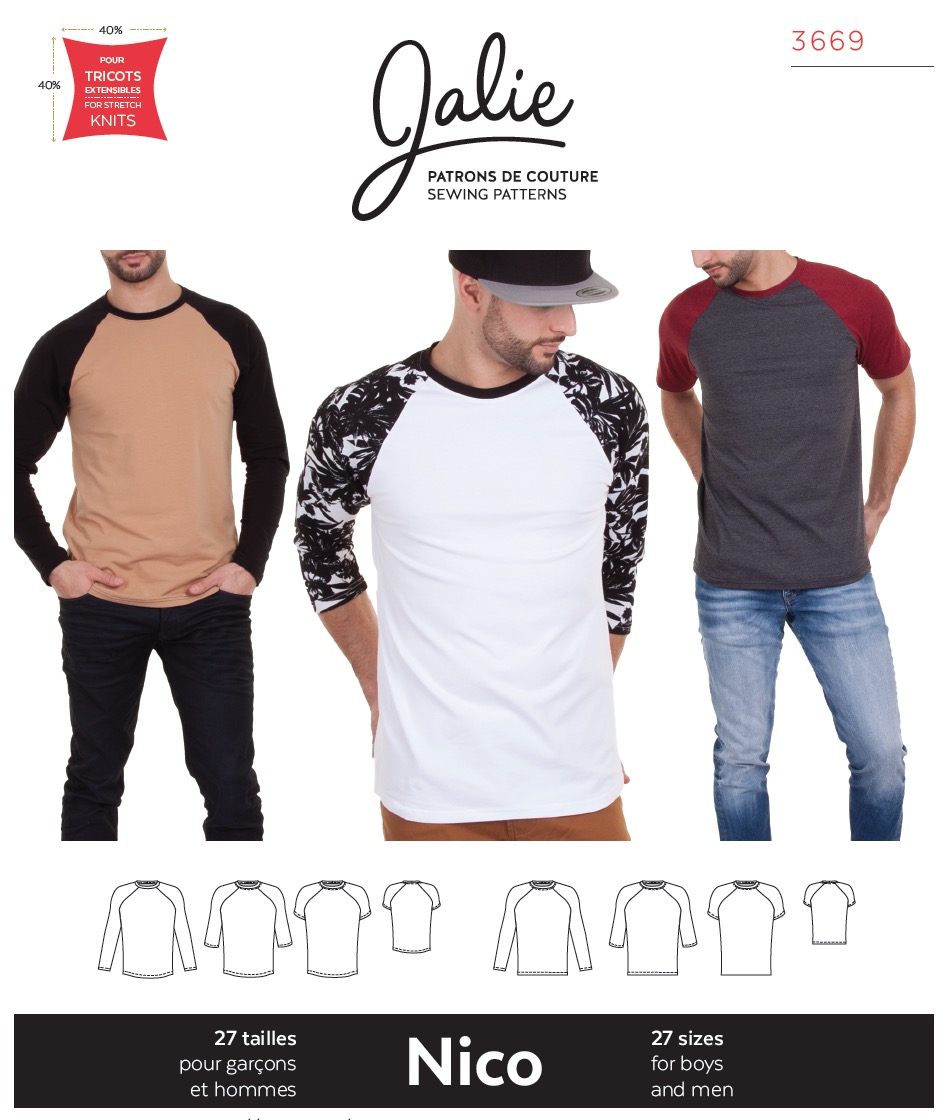
I thought a raglan top would be more interesting than a straight long-sleeve tee. Dawn, who blogs at Two On Two Off, has had a lot of luck with Jalie patterns, so I settled on Jalie’s Nico.

After some measuring, I decided to make a size V, basically a men’s medium, which is what my husband wears in ready-to-wear shirts. Right off I made 1 alteration to the pattern — the seam allowance is 1/4″ and I have a lot of trouble with my walking foot on my Janome catching such a small seam allowance. So I increased it to 3/8″. I had 2 left-overs in my stash — a black jersey and a bike print — so I used those to try out the pattern. In her Craftsy class Sewing With Knits, Meg McElwee recommends stabilizing the neckline, back shoulder seams, and using fusible tricot tape on the hem before sewing it. I used these 3 tapes from Emma Seabooke: fusible tricot for the hem, woven stay tape for the shoulders, and knit stay tape for the neckline.

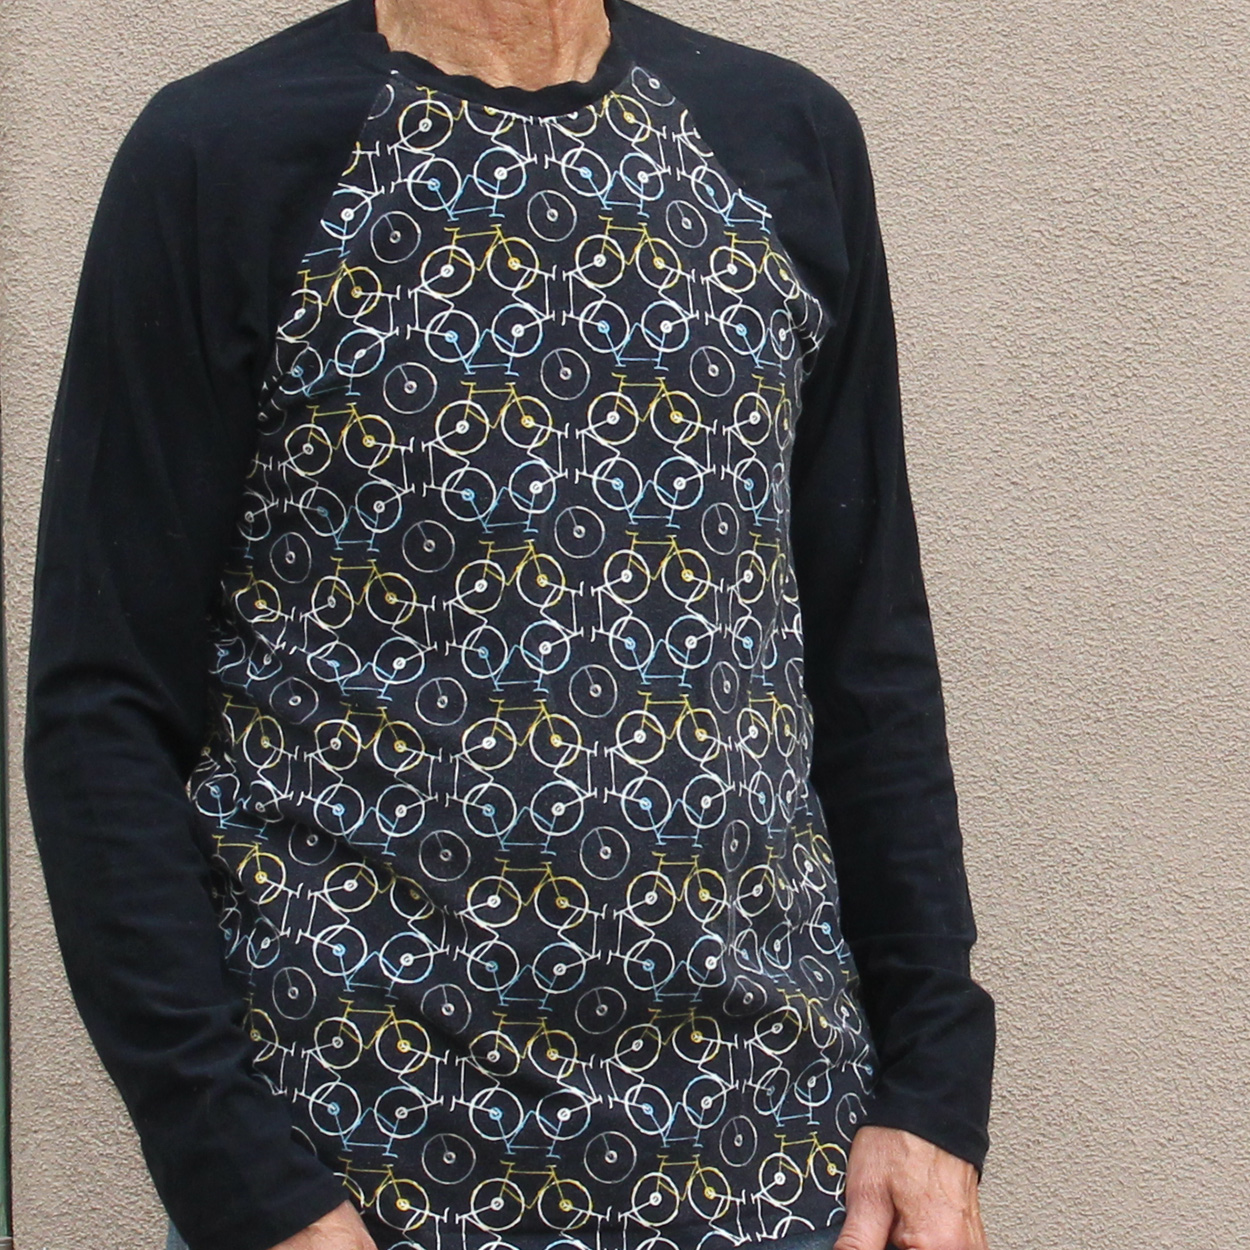
Jalie in bike print jersey

The arms and torso fit fine. But the neckband was too big for the drafted neckline, and the neckline was too small for my husband’s head (a bit of tugging required to get it on). I made this one up during the winter, and despite the neckline issue, he wore it as lounge-wear in the evenings until it got too hot to wear sleeves.

For my second attempt, I used the same Art Gallery black jersey for the sleeves as the first one and an Art Gallery grey jersey for the body (both from Hawthorne Threads). I took 1/8″ off the neckline and left the neckband the same. This was a much better fit about the neck. And the fabric is really soft and my husband has worn this one a lot. I also tried a twin needle on the hem for the first time. I was afraid I wouldn’t be able to get the needles threaded, but it wasn’t too hard when I used the head-mount magnifier that my husband bought me for just this problem!

Jalie in grey and black jersey

Now I was ready to make the merino version. It went together really quickly and I was excited to give it to my husband.

Merino jersey

Sadly, he finds the fabric really itchy, and by the time I had it finished, it was too warm to wear. So I’ll have to wait until winter to see if the itch goes away or he’ll have to wear a tee underneath. But the pattern is a winner, and I’ve got plans to make a few more.