Burda Style 05/2010 #122

Sunday July 15, 2018

I bought some Robert Kaufman Brussels Washer Linen in Brick Red from the Confident Stitch to make a wrap skirt and to compare the linen to what I’d gotten online at the Fabric Store and locally at Joann. But then I saw an Instagram post by @paperbagwaist. She posts RTW garments and suggestions for patterns so you could make them. Once I saw this RTW skirt, I knew that’s what my red fabric was destined to be.

It would be pretty straight-forward to copy. It’s rectangles sewn together with a casing and draw string, plus pockets and hem embellishments. But @paperbagwaist suggested this faux paper bag waist skirt, Burda Style 05/2010 #122. It’s described as “a unique take on the drawstring waistband that only cinches at the front.”

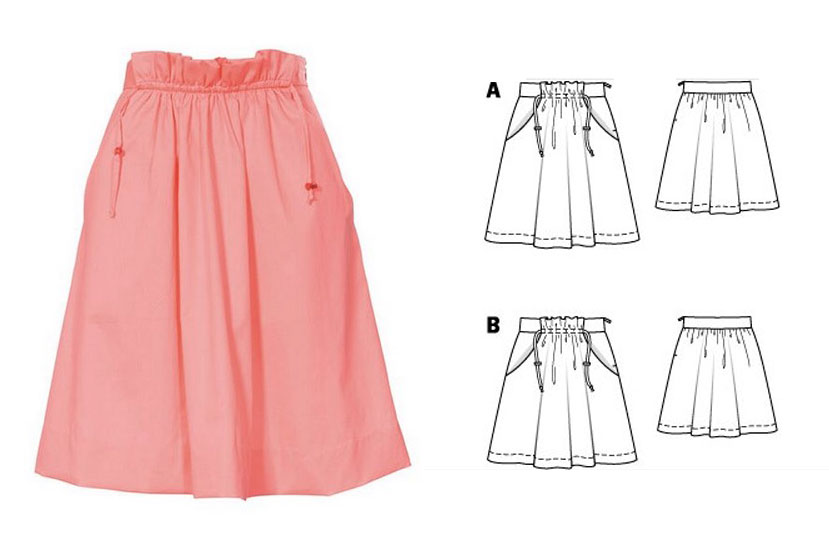
I’ve never made a Burda pattern. And it wasn’t quite the inspiration skirt. So I hemmed and hawed for a while about which one to make. The DIY pattern would be easier but the Burda pattern waist band seemed a better fit for someone hippy like me. Finally I decided to buy the pattern and see how hard it might be. The instructions are brief and on first reading kind of made sense. I printed and taped the pattern, and the instructions made more sense. But I was unsure about whether some of the pieces needed seam allowances.

PDF pattern to the rescue! I remembered that the first page of the pattern had a miniature image of the taped paper layout. I could use that to make a doll-sized mock-up of the skirt and figure out how it is constructed, answer my questions about seam allowance, and figure out a strategy for finishing the edges. I read the page into Photoshop and up-sized it to fit on a piece of 8-1/2×11 paper, added a 1/8″ seam allowance where I thought they were needed, and then made my doll sized skirt out of some fabric leftovers.

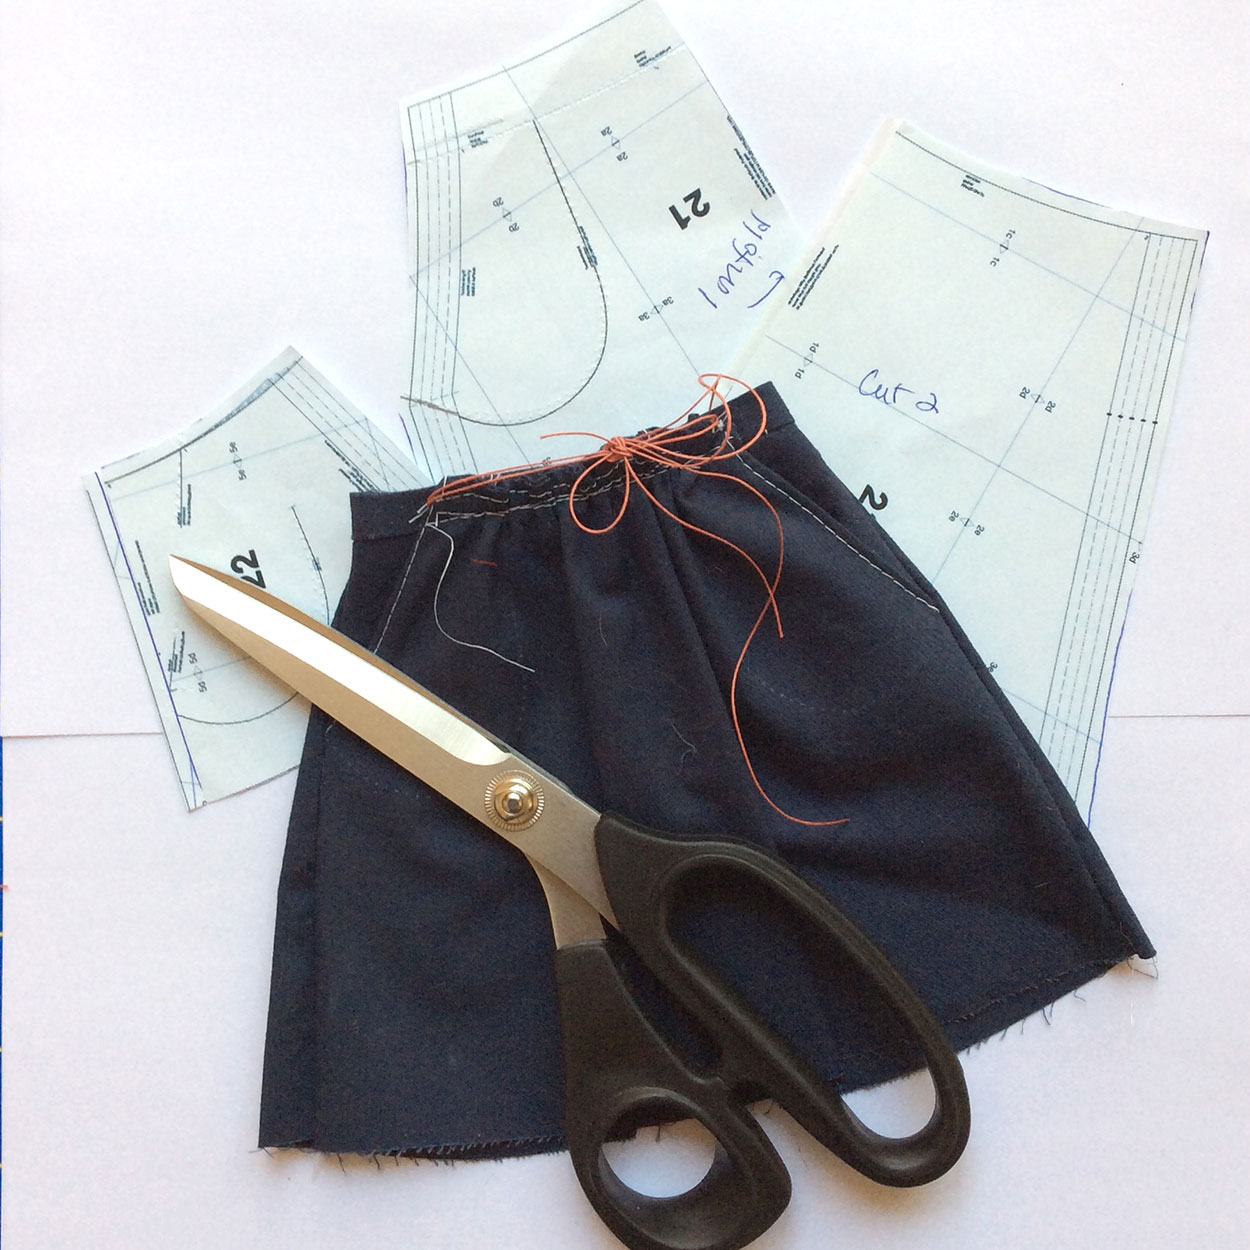
That was fun! And quite informative, since I had misunderstood what size to cut the waist-band and, yes, the pockets do need to have a seam allowance on one side. I also figured out how to fit the skirt, which included moving the zipper from the side to the back and cutting the back in 2 pieces rather than one.

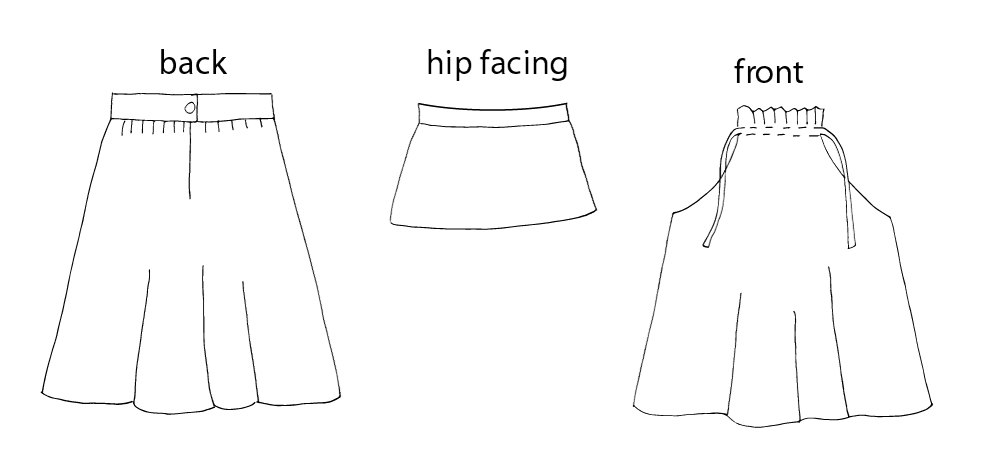
The skirt has essentially 3 pieces. The front is attached to the hip facing (by the pockets) and then attached to the back piece. I cut the hip facing and back first and basted them together to make sure the skirt would fit. I wasn’t confident that I could make fitting changes on the side seams without having to alter the front piece. The fit is all determined by the waist band on the back & hip facing — the gather in the front is mostly decorative & can’t be cinched much once the skirt is assembled (enough for loosen it after too much supper!)

I ended up taking an inch off the center back seam and gathering the back more than the pattern called for.

The planning and fitting were time consuming, but after several long weekends, I had a skirt!

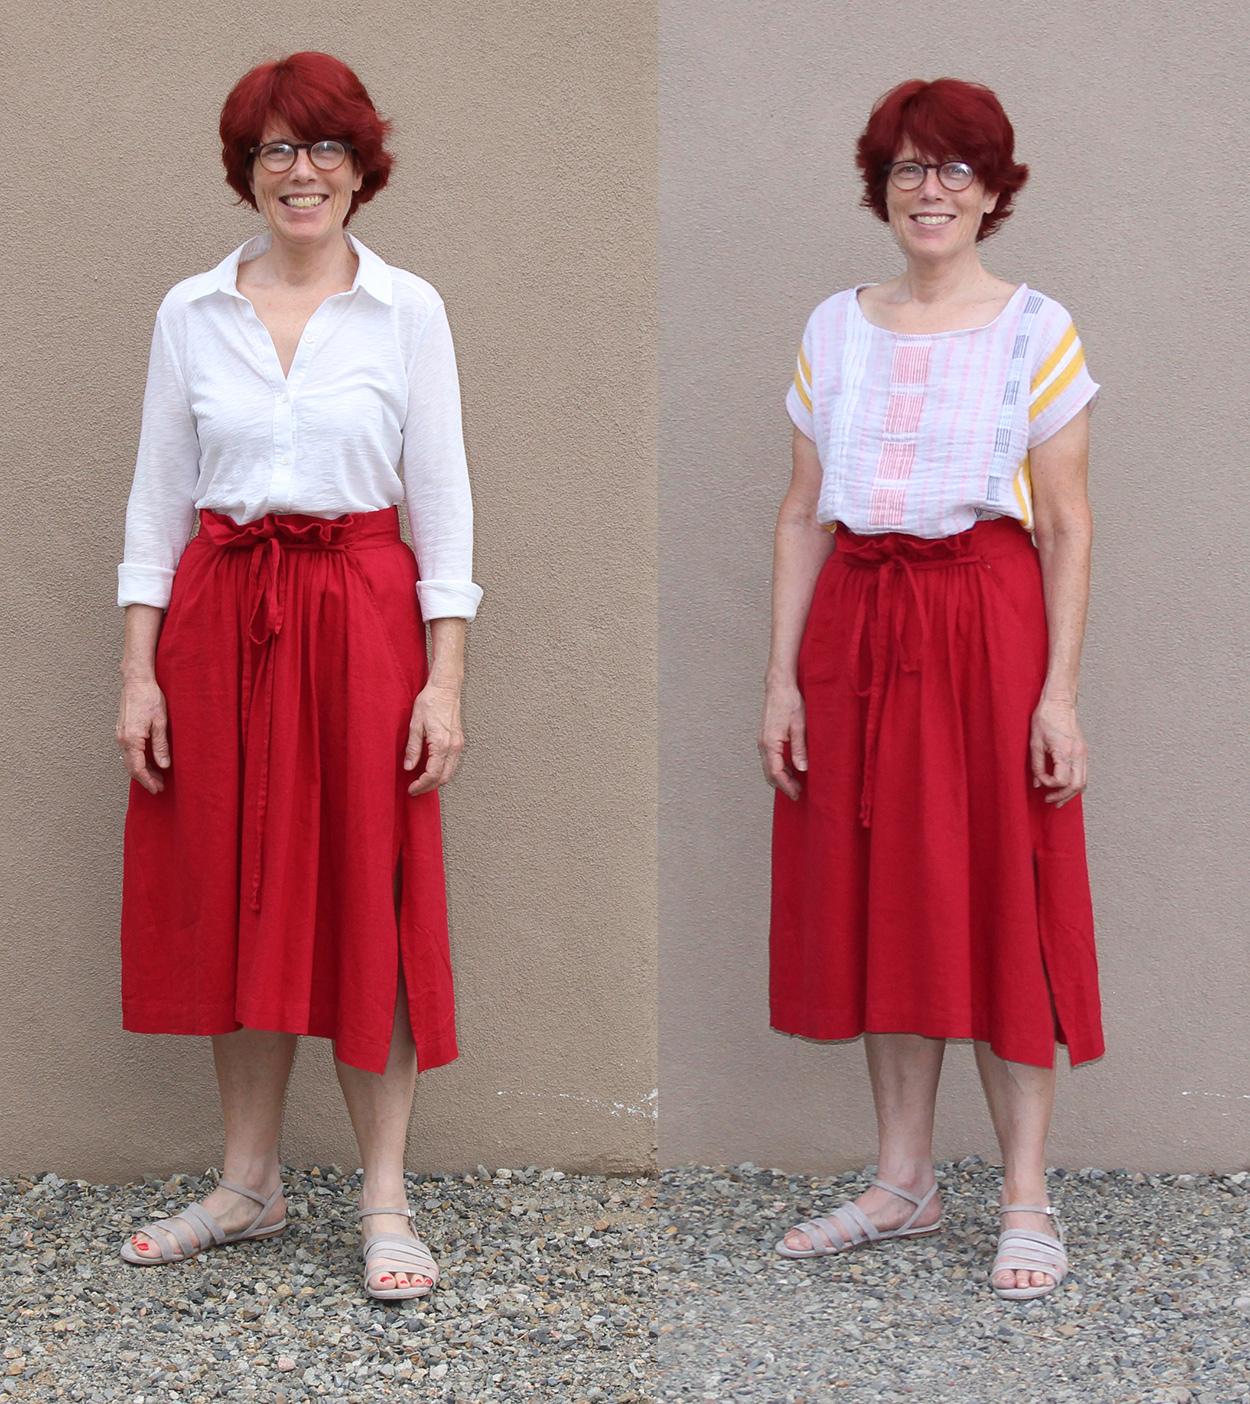
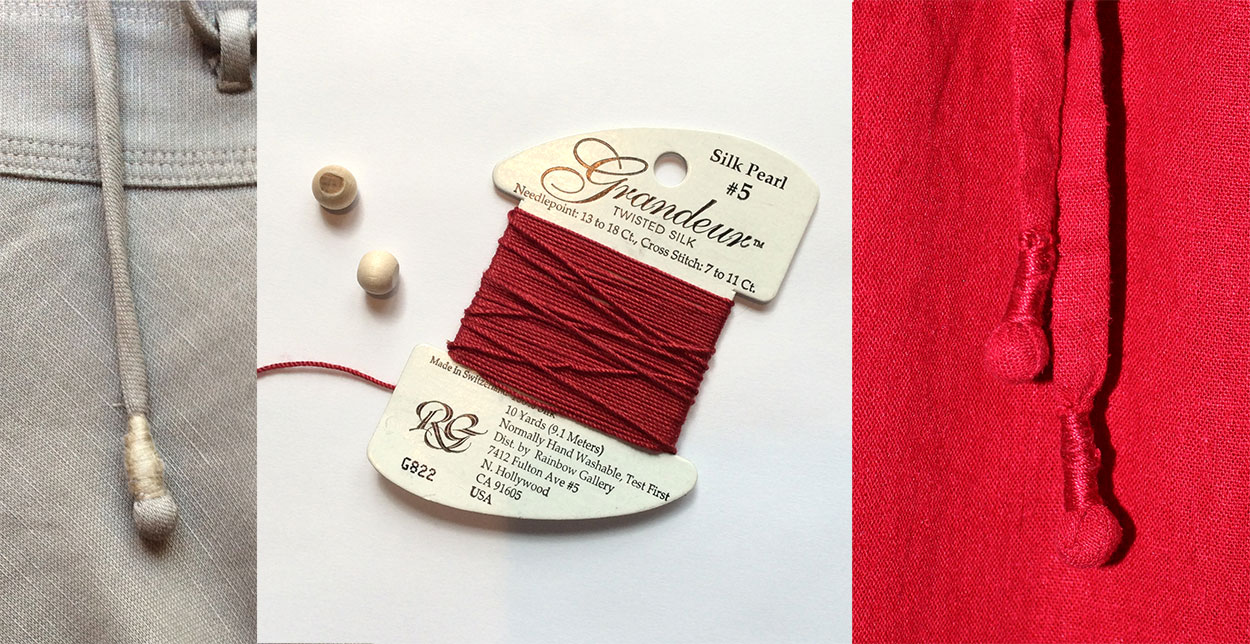
One last detail. I made the draw string much longer than the pattern called for, so I could tie it in front like my inspirational skirt. I have a RTW wrap skirt with a clever method for finishing off the ends of the drawstring. Below left is my RTW skirt. In the middle, from my crafting stash, I found several round wooden beads and some needlepoint thread that exactly matched my skirt color! I pushed a bead into the end of the drawstring about an inch, then folded the excess fabric over, wound my silk thread tightly upwards from the bead until I’d covered the folded fabric, and tied a knot. The result is on the right.

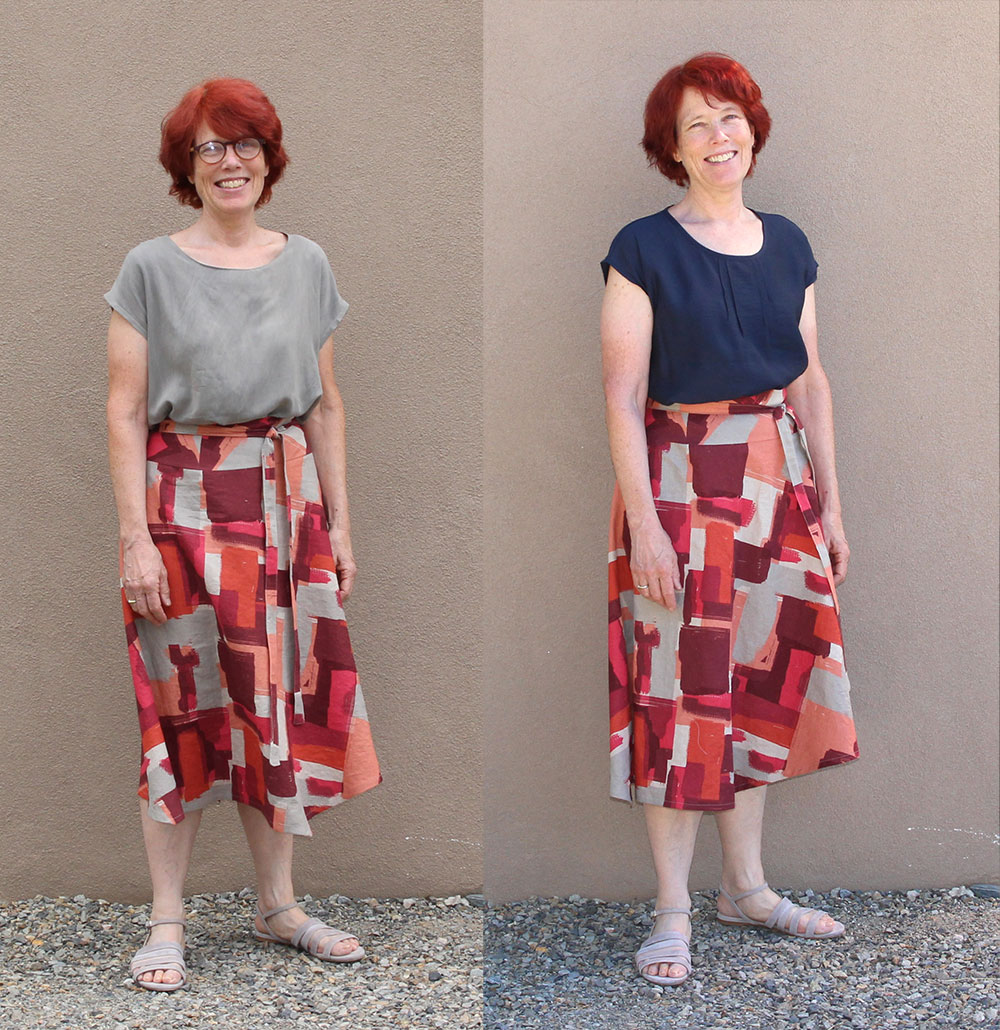
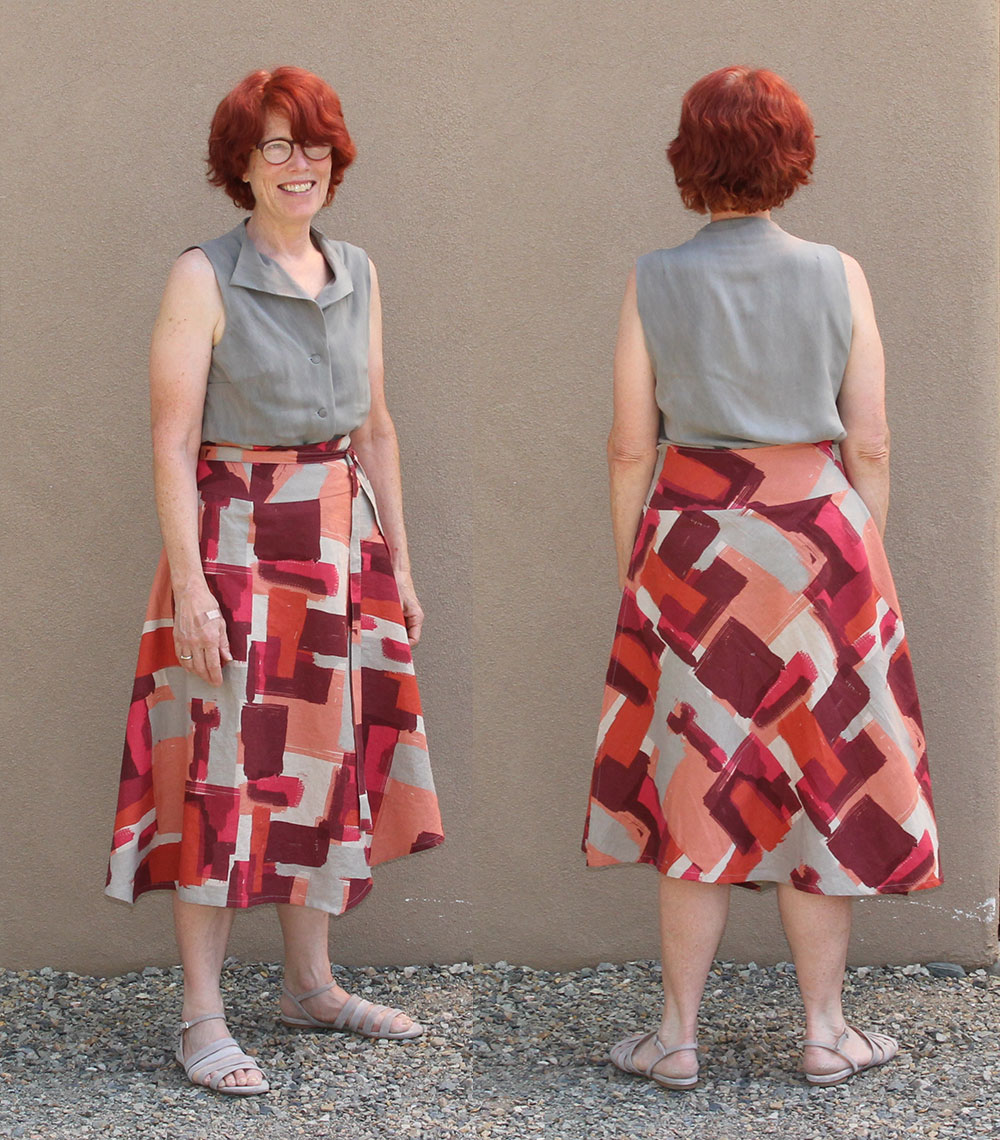
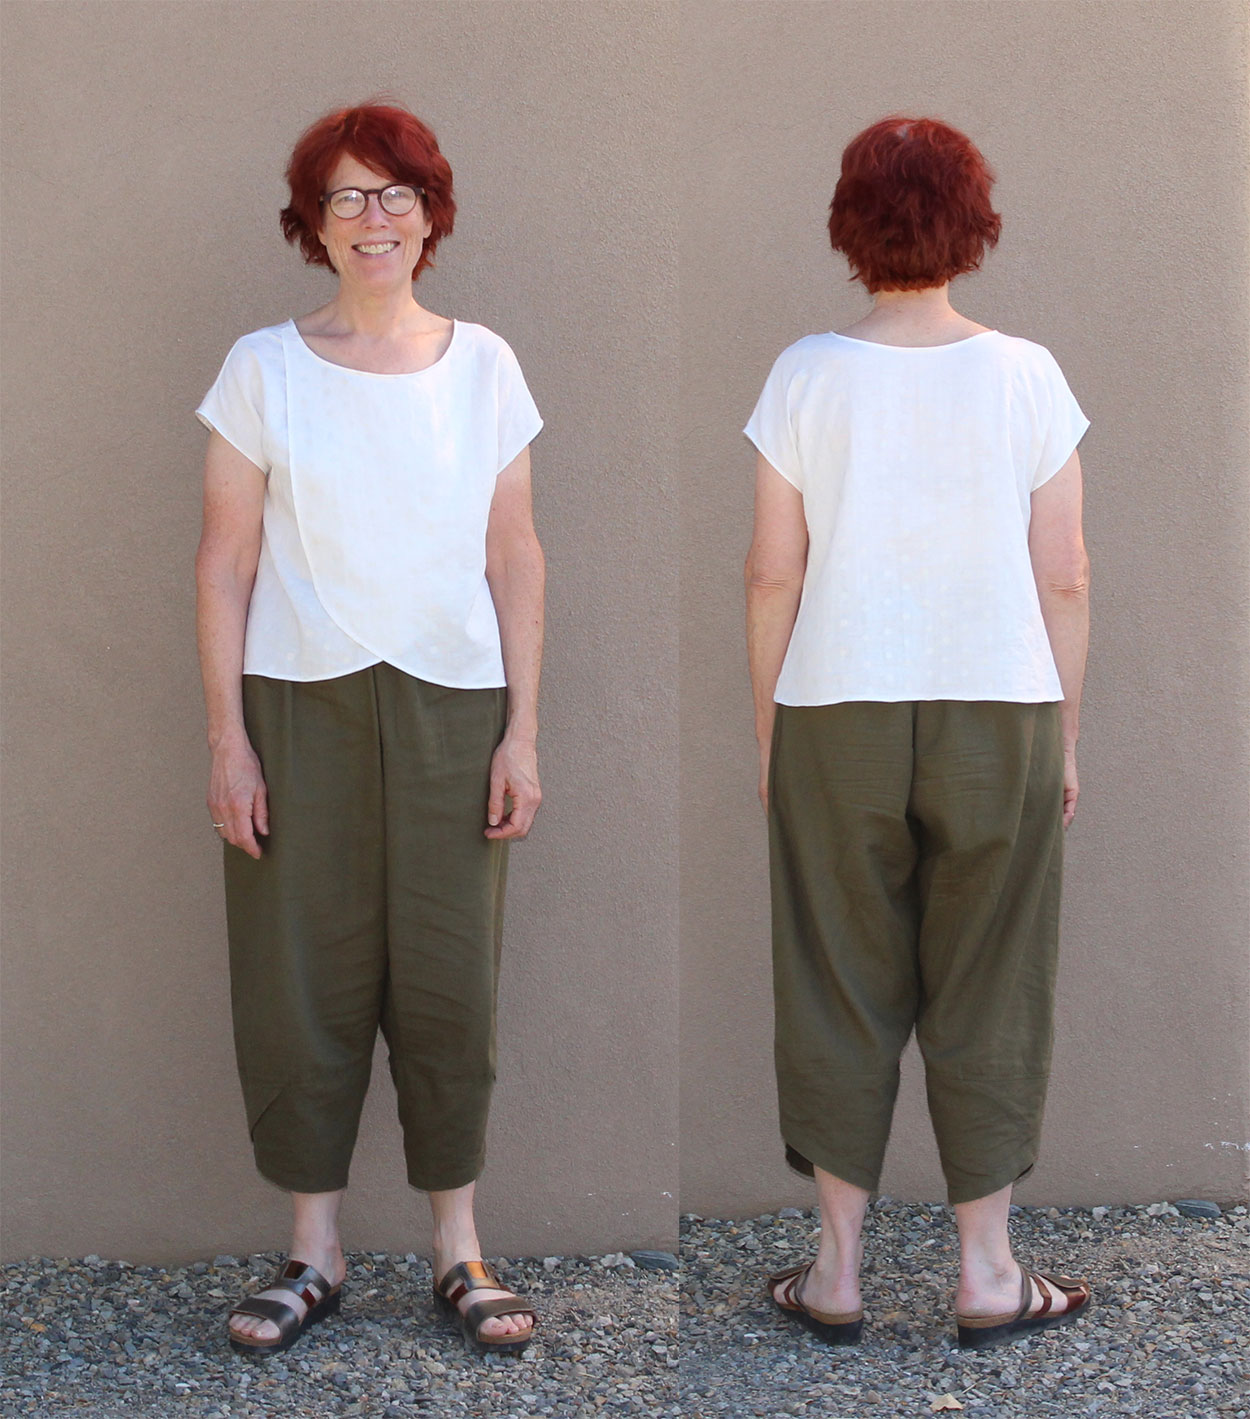
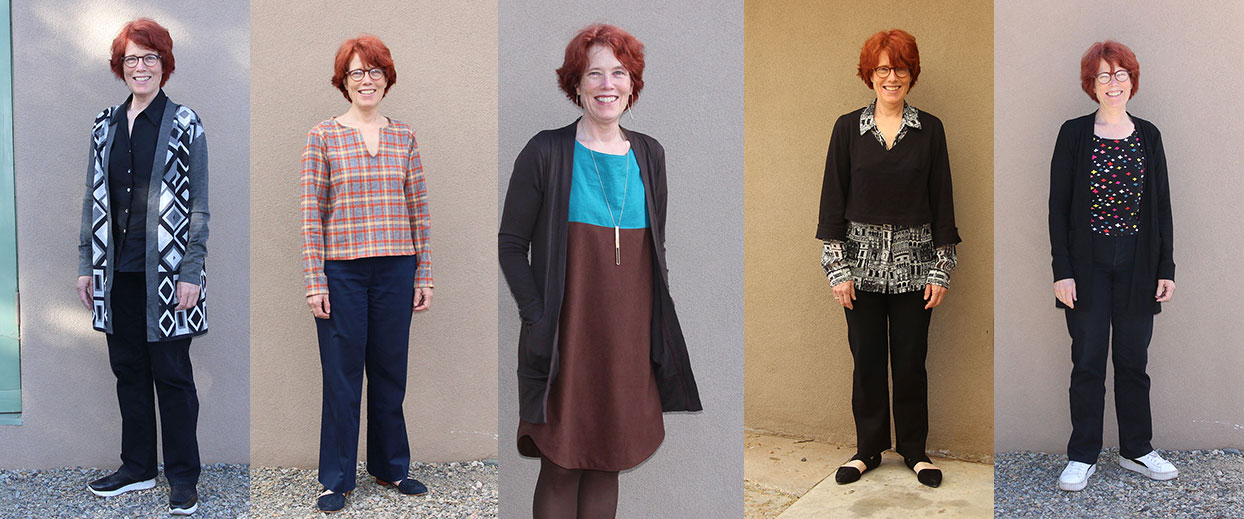
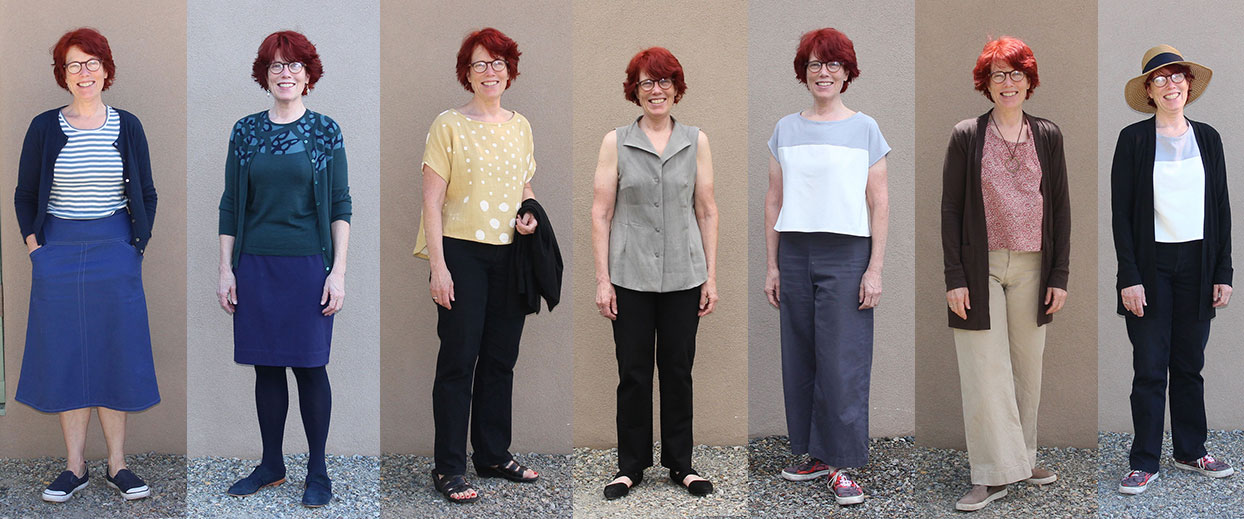
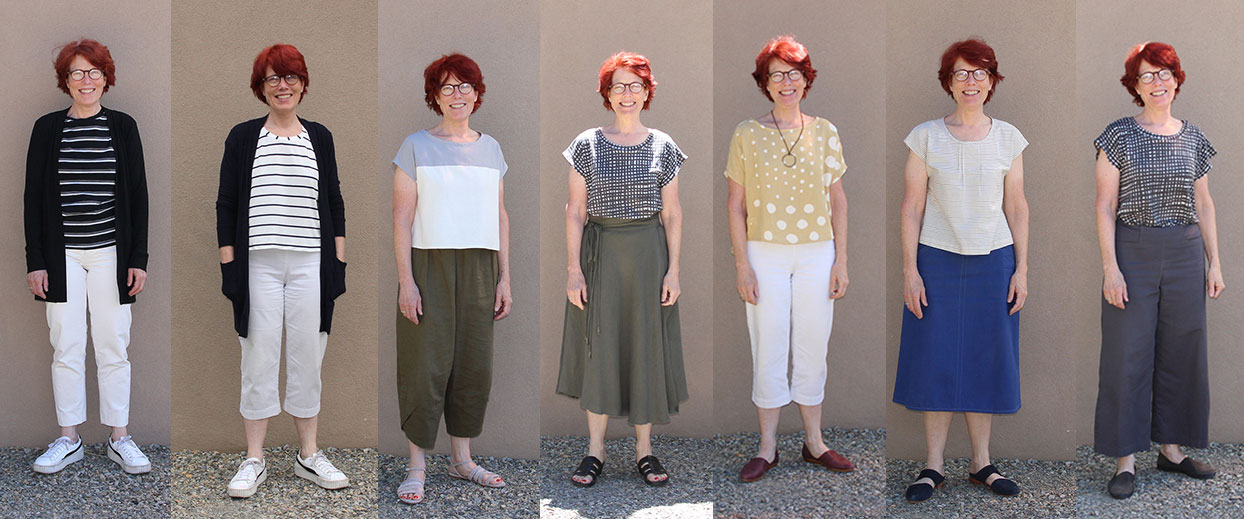
And here’s my skirt, worn with several different tops:


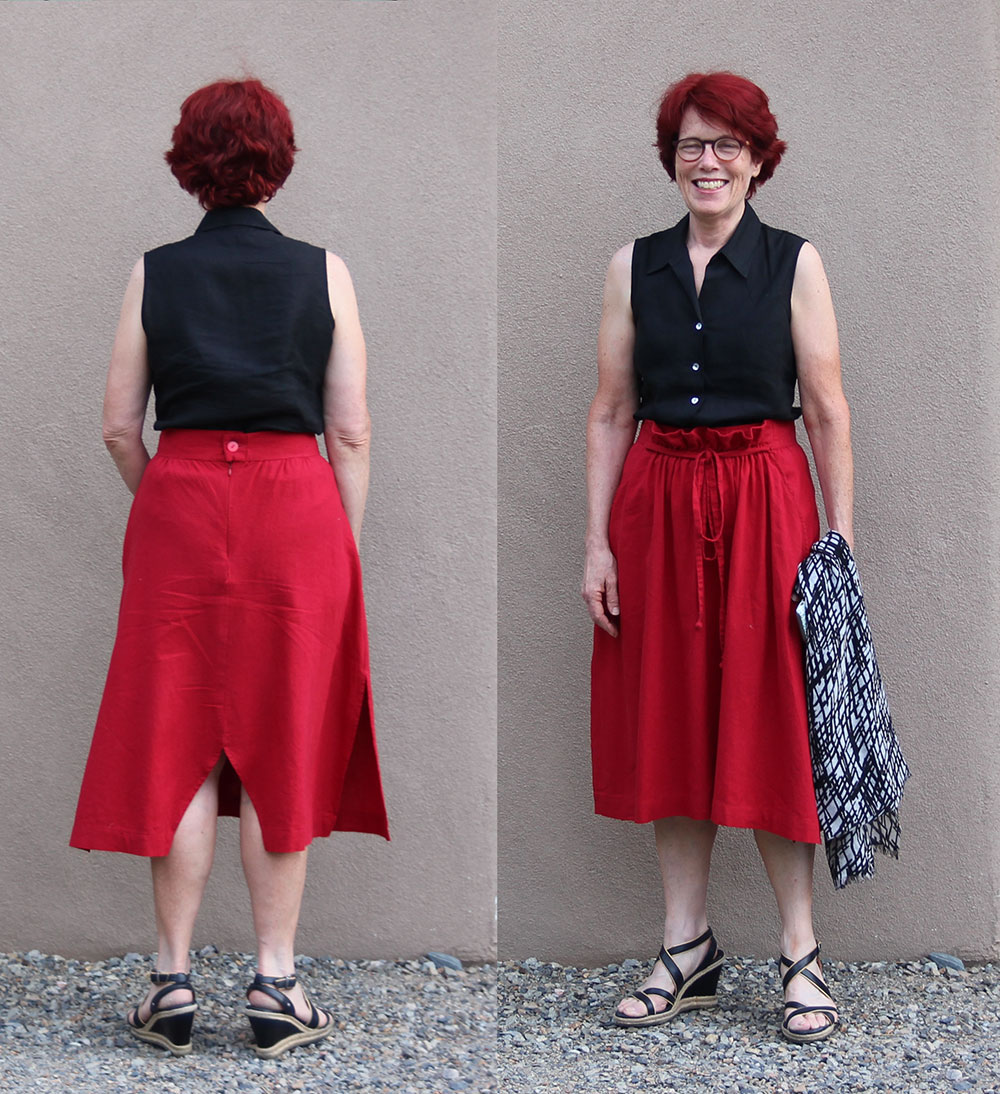
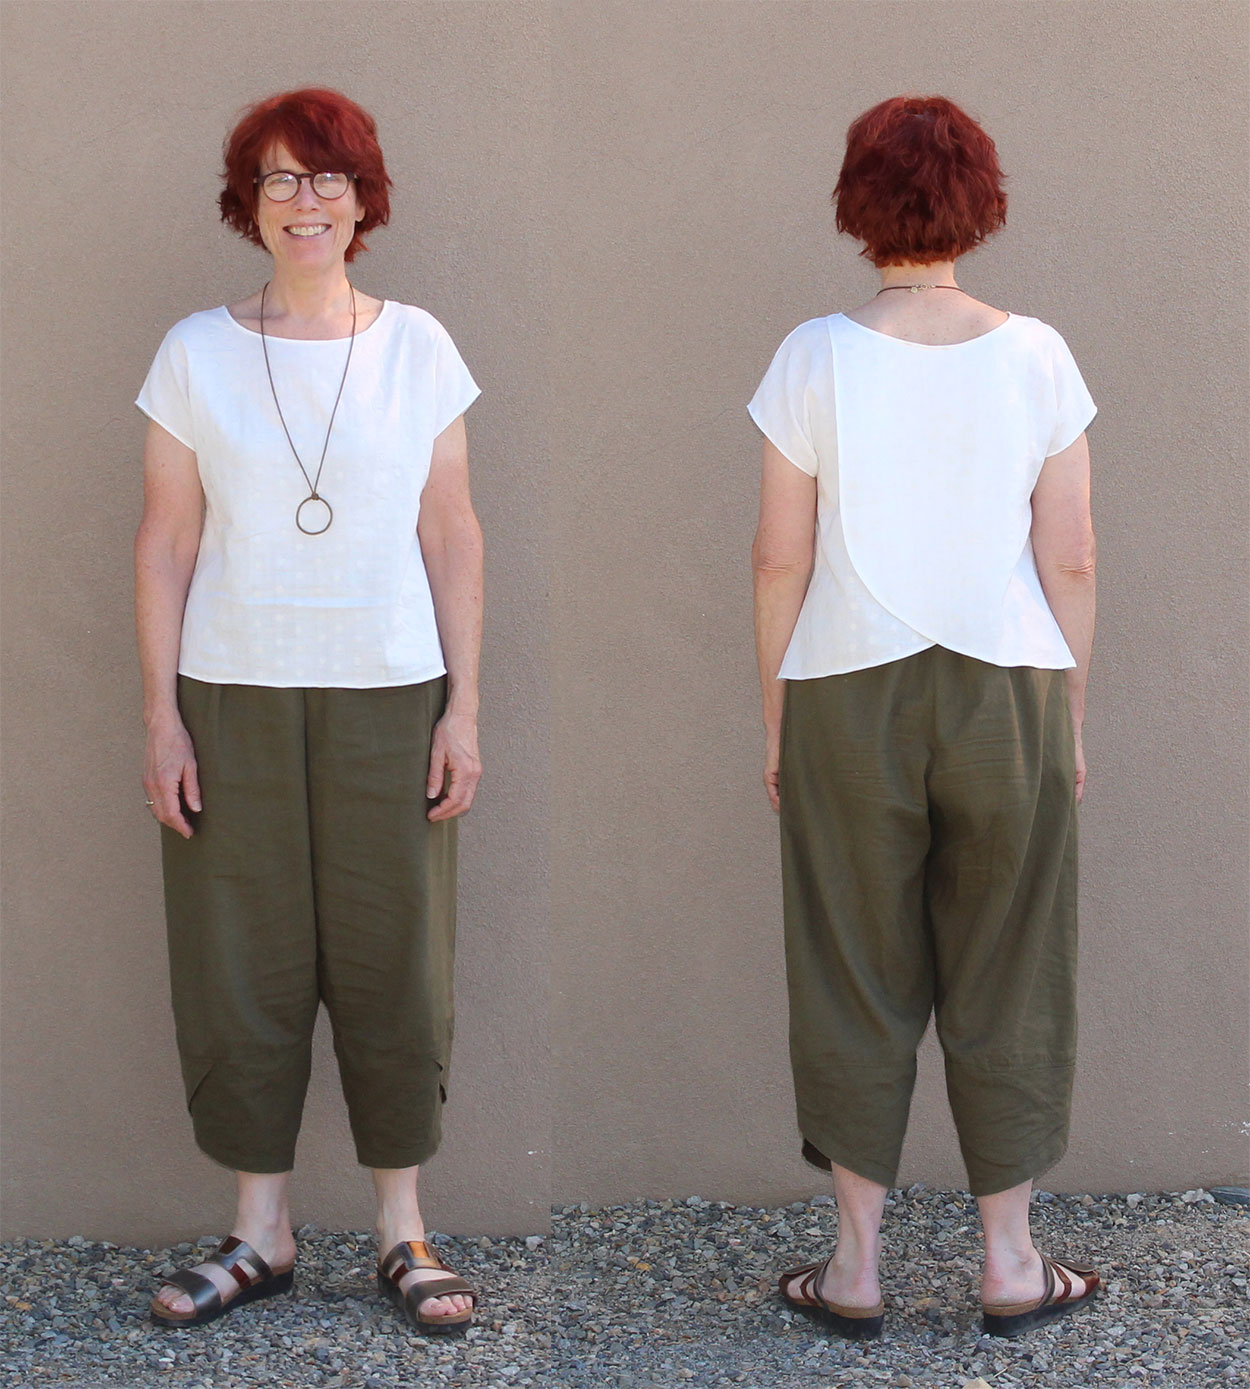
Worn with a RTW linen top.


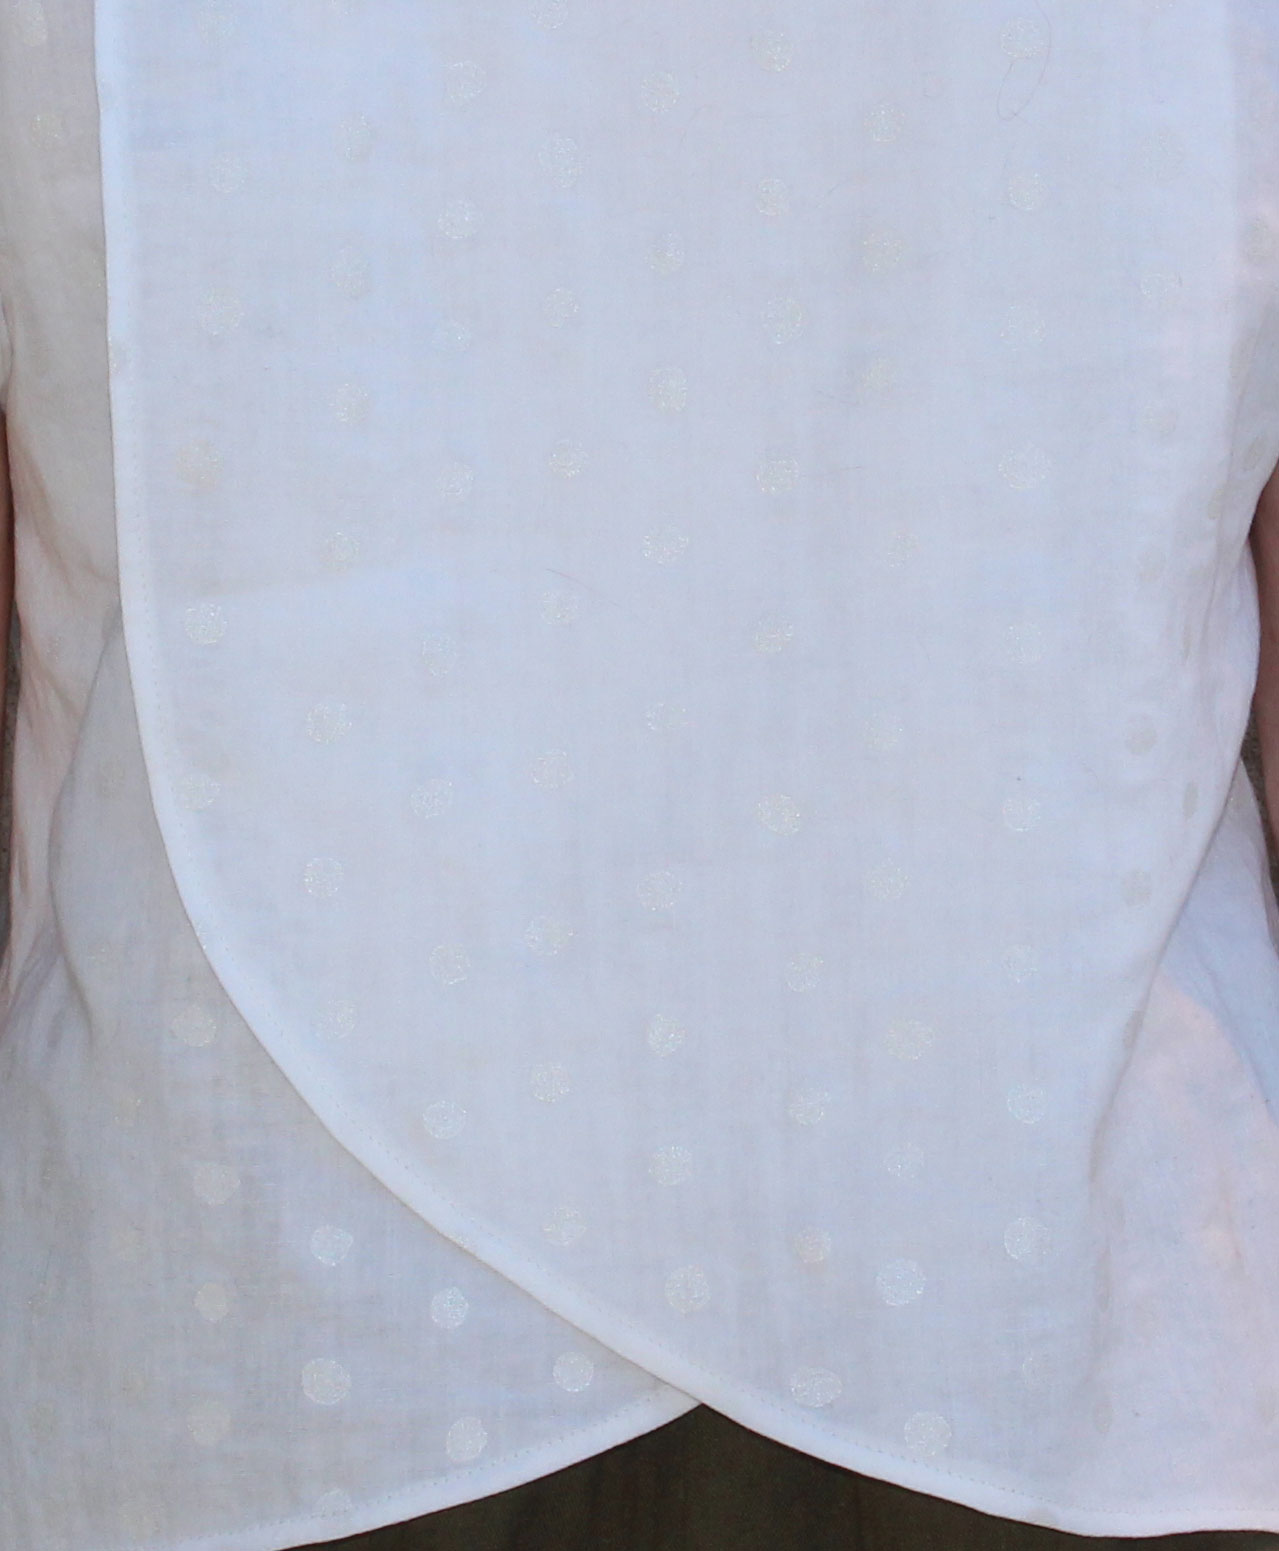
Left: RTW top, Right: Me-made Maya Top from a second-hand dress

Seamless Wrap Skirt from Shape Shape 2

Wednesday June 27, 2018

During #MeMadeMay, Rebecca posted a lovely wrap skirt she’d made from a Japanese sewing book called Shape Shape 2. And Masha (@maze.handmade) posted a skirt that turns into harem pants from the same book. Inspired, I bought a copy of the book and, for the wrap skirt, this Japanese linen blend from Style Maker Fabric.

When the fabric and book arrived, I was quite excited. The idea of a “seamless” skirt where I didn’t have to ponder over how to finish the insides was quite appealing. Until I realized that my vision was a midi-length skirt and the pattern was for a knee-length one. And the fabric was the narrow 44″ variety and I didn’t have enough to lengthen the skirt at all. After some head scratching, I realized I could go up rather than down, by adding a waist band to the top of the skirt.

I made the widest band I could fit on the fabric after I’d cut out the skirt. I used some twill left over from another project to line the band, thinking that it needed some structure. I’m not sure this was the best idea, as the twill is a lot heavier than the skirt fabric and didn’t behave very well when I tried to hand-sew it down to the bottom of the waistband. So the skirt insides aren’t very pretty. Maybe I should have interfaced the band and used a lighter fabric for the lining?

But I’m really pleased with the result and have worn it a bunch since finishing it. Especially since I have several tops that work with the fabric pattern, so I can dress it up or down. And maybe best of all — I used up all the fabric, so I don’t have to think about what to do with the leftovers!


The top is McCall’s 6750 from this Craftsy class on tissue-fitting tops.


On the left is a Maya top in the same sandwashed rayon as the shirt above, and on the right is a RTW blouse.

Scout Tee & Maya Top with “Madewell” Necklines

Thursday June 14, 2018

In April, I made the Grainline Scout Tee, above left, in Mammoth Flannel in Pumpkin/Grey that I bought from Style Maker Fabric. I used the neckline variation tutorial from the Grainline blog (in 2 parts: here and here) and the added long sleeves with this tutorial. The neckline mod was quite straight-forward, although I made my V shorter than Jen did in the tutorial (by an inch), as it looked like the V showed off a bit more than I wanted. The sleeve tutorial was more confusing, and I was very unsure if I had to move the grainline or where to move it to on the new sleeve piece. I left it where it was and it all turned out okay, but if I make another long sleeve Scout, I’ll probably buy the recently released Scout sleeve variation pack.

I’ve been on a tear making Maya tops for my summer wardrobe, and I really like the Scout neckline variation, so last week I made a Maya with one (above right), from a lovely paprika colored linen from The Fabric Store.

I thought the V on the Scout was a still a bit too low, so I made it less deep on the Maya. Here’s what I did to the pattern pieces, using the Grainline tutorial:

  1. I used a bias binding for the neckline, so for both the front and the back pattern pieces, I lowered the Maya neckline 3/8″ to change the seam allowance to 1/4″.

  2. The Maya neckline is about 1 inch higher than the Scout. I raised the front neckline 2-1/2″

  3. I cut a 3-1/2″ V

To sew the Maya, I don’t use the instructions, as she makes French seams on the sides, and I can’t get a good curve under the arm that way. Here’s what I do:

  1. Sew the shoulder seams and finish the edges.

  2. Sew the side seams on my sewing machine, clip the curve, then use my serger to finish the fabric edge. This is the method Kylie shows here. Before I got my serger, I sewed the side seams on my machine, clipped the curve, and sewed a second line of straight stitches about 1/4″ from the seam line, catching the clips a bit, for reinforcement.

  3. Sew the neckline as explained in the Grainline tutorial

  4. Finish the hems.

Here’s the sleeve curve from the outside and inside.

The linen wrinkles a lot, but it’s really nice to wear for the hot weather we’re having (in the high 90s yesterday!)

A Maya top with a tulip hem

Thursday June 7, 2018

Back in March, Lori posted about the Burda wrap blouse she’d made:

I liked the edge detail and added it to my sewing queue for this summer. But when it got to the top of the list, I decided I didn’t like the angled edge, and wanted something rounder.

Asking Google, I got 2 different designs: The rounded tulip hem starts either under the arm or at the shoulder. And sometimes the tulip is the front and sometimes in the back.

I quickly found a Grainline Scout Tee hack with a tulip hem starting at the shoulder by Laglov. And another by Katie of What Katie Sews with the hem starting at the bottom of the arm hole.

I’ve made several scout tees and have had some fitting problems with them. I’ve had better fitting luck with Marilla Walker’s Maya top pattern, so I decided to use that as my base pattern. And I like the hem coming from the shoulder rather than the arm hole. I also thought it might be interesting to make the top reversible, so I can wear the tulip hem in either the front or the back.

To make the top reversible, I used the front pattern piece for the back of the blouse (the front and the back pattern pieces are the same except for the neckline). For the front, I cut 2 pieces that would overlap when sewn:

Drawing the hem curve was a bit tricky as my french curve ruler isn’t long enough — I did it free-style and smoothed it out with my ruler. My ruler is almost long enough to draw the under-the-arm-hole hem, so that would have been an easier hack.

I made a muslin, because I wasn’t very sure about my curve, especially the start point on the shoulder. I also wanted to see if the top worked if I wore it backwards (it did!). I made some changes to the curve and the start point and then went on to the next issue: how to sew the curved hem. The fabric I choose is a white Nani Iro double gauze with painted-on metallic dots ( from Stone Mountain & Daughter Fabrics.)

I wanted a 1/4″ hem if possible. After failing with several different methods — self-made bias tape (too thick), double fold using the narrow rolled hem attachment on my sewing machine (couldn’t get a smooth edge on the curve), hand-sewn narrow rolled hem (I really wanted machine top stitching along the edge) — I remembered my roll of white Hug Snug. It’s a thin, 5/8″ wide, rayon seam binding and to my delight it’s the same color and sheen as the metallic dots in the fabric. (Well, no one will see it, but I’ll know!)

I attached it like bias tape — sewing to the right side of the fabric with a 3/8″ seam, clipping the curve as close to the stitching as possible with my pinking bladed rotary cutter (much easier on my hands than pinking shears), turning & pressing the hug snug to the wrong side, then stitching down from the right side. The hug snug presses really well!

Now I thought I had all hard bits solved and was ready to sew! I basted the 2 front pieces together at the shoulder and neckline, and then sewed the top up as if the front was one piece. I liked my hug snug hem so much that I did the back hem, sleeves and neckline the same way.

And here it is:

After wearing the top, I see that the weight of the tulip hem side pulls it down a bit, so it’s good I made a deeper neckline for the back (or front if worn reversed). I don’t have a white short sleeve top for summer, so this fills a hole in my closet!

Thanks for reading!

Me Made May 2018

Sunday June 3, 2018

I participated in Me Made May for the first time this year. Zoe, the instigator, calls it a “challenge to improve your relationship with your handmade wardrobe.” Participants make a pledge for the month of May, and mine was to wear one me-made garment every day and document them on my instagram feed. Here’s what I learned, followed by snaps of each day’s outfits.

  1.  I have several ready-to-wear garments I didn’t wear because I have no me-mades to pair with them. During the month I made a tee to go with my favorite skirt, and I’ll be ordering fabric to make another tee for another item I wear often.
  2. I had a big ah-ha moment: I have a pair of cropped pants that I wear a lot in the summer. I’ve looked without success for similar pants in other colors. But, duh, my sewing skills are good enough now that I can make my own! I’ve found a pattern to start with and ordered some fabric.
  3. Taking pictures turned out to be easier and less onerous than I thought. I picked the one bare wall at our house, and used that as a backdrop every day. Probably very boring, but it’s helped me evaluate my outfits and made picture taking time really easy.

Me Made May 2018 week one

  1. Long cardigan made using a  Hey June Tallinn pattern hack
  2. Grainline Scout tee using sleeve and neck mods from the Grainline blog
  3. Seamwork Georgia dress and brown Helen’s Closet Blackwood cardigan
  4. McCall’s 7445 v-neck top/sweater
  5. Scoop neck tee from a Craftsy class and black Blackwood cardigan

  6. Navy Helen’s Closet Blackwood cardigan
  7. Brown Helen’s Closet Blackwood cardigan and Grainline Scout tee
  8. Grainline Hadley top
  9. McCall’s 7445 pants and v-neck sweater/top
  10. Named Clothing Kielo Wrap Dress
  11. me-made bag/pouch and refashioned button-up (altered from dress to blouse)

  12. Michelle Patterns A-line pocket skirt
  13. 100 acts of sewing’s Shirt No 1, cut up and made to approximate a Rachel Comey shirt.
  14. 100 acts of sewing’s Shirt No 1 and a Pamela’s Patterns Pencil Skirt
  15. McCall’s 7445 pants
  16. Navy Helen’s Closet Blackwood cardigan and Grainline Scout tee
  17. self-drafted tank top

  18. Michelle Patterns A-line pocket skirt
  19. Pamela’s Patterns Pencil Skirt
  20. 100 acts of sewing’s Shirt No 1 and holding a black Blackwood cardigan
  21. McCall’s 6750 from Craftsy class
  22. Color-blocked Marilla Walker Maya top and McCall’s 7445 pants
  23. Brown Helen’s Closet Blackwood cardigan and Grainline Scout tee
  24. Black Helen’s Closet Blackwood cardigan and color-blocked Marilla Walker Maya top

  25. Black Helen’s Closet Blackwood cardigan
  26. Navy Helen’s Closet Blackwood cardigan and Grainline Studio hemlock tee
  27. Color-blocked Marilla Walker Maya top
  28. Grainline Studio hemlock tee
  29. 100 acts of sewing’s Shirt No 1
  30. Michelle Patterns A-line pocket skirt
  31. Grainline Studio hemlock tee and McCall’s 7445 pants